
Home » 2022
Yearly Archives: 2022
Letter Opener Quick Gift
Let’s end 2022 with a quick project that you could add as a little gift to a New Year’s card or birthday card or….. I am casing an idea by Jeanie Stark at Juststampin.com but adding Happiness Hues designer series paper and a stamped “mail” image from ‘Stamping Your Way To the Top’ stamp set to make a pocket which holds a letter opener. It could also be a gift card holder.

It is another project using the Pretty Pillowbox dies. This one isn’t as 3D as the last one I made for favors at the Christmas stamp camp but fun to make for a card insert.
 Did you ever use the Pretty Pillowbox die as it was intended to be used?
Well, ummmm…… I guess not! I used the greeting die in the die set for the Post It Note holder greeting. It has a stitched edge so it is perfect for this project and many others.

These are the letter openers I ordered from Amazon:

Recipe
- Base: Bermuda Bay, Melon Mambo or Gorgeous Grape, 4 1/4 X 4 3/8; die cut using both the large base die and the die with the two little holes at the same time. Fold on the middle score line and use tear and tape on the sides. NOTE: For these letter openers the tear and tape can’t go all the way to the top.
- DSP Layer: Hues of Happiness Designer Series Paper, 2 1/4 X 4 1/2, line up with the score line in the middle of the die and die cut just the bottom section. I selectively cut certain sections of the DSP that matched the base.
- Greeting: Basic White, 3 X 1, die cut with the long greeting die AFTER stamping the “Mail” image; you can glue it right on the score line at the top of the die which hides the score line and keeps the greeting straight
- Ribbon: 15″ of matching color
Here are individual close up pictures:
 .
.  .
.
 .
. And a group shot just for fun:
 .
. I hope you have had a successful 2022, however you define success, and that you are ready for a new year, with new challenges and new blessings!
“May the Lord bless you and keep you, may He make His face to shine upon you and be gracious to you, May He lift up His countenance upon you, and give you peace!” Numbers 6: 24-26
Sal and I wish you a very Happy New Year!
Karen

Santa’s Express Christmas Cards
Merry Christmas everyone!
Have you ever started a card design by wanting to match the envelope liner?
That is really backwards! Were you able to do it or did you give up?
I did succeed! I purchased the Santa Express Memories & More Cards & Envelopes from the mini thinking it would be a great way to save time and make 20 Christmas cards. The cards are a bit bigger than our standard A2 size which I also liked. I know this is blurry but the pictures in the mini were so small!

The Poppy Parade (or Sweet Sorbet) card envelope liner is striped but the card is polka dots, whereas the Shaded Spruce card envelope liner is polka dot but the card has a bit of speckle like snow on a solid green front.
I am going to post these cards for ideas to help those of you who might have just a few, hopefully not 20, Christmas cards yet to make.
Two at a time!! I started by working with one red and one green and I cut off one inch on the right front side of each. I used the polka dots cut off from the red card to make the inside right side of a flap card on the green card with the green strip as its flap. For the inside left side of the red card I used a 1″ X 6 1/4″ strip of polka dots from the Santa Express DSP which matches perfectly. There was no red stripe in the Santa Express DSP paper to match the envelope liner but the Sweetest Christmas DSP had a stripe that I used to tie in the envelope liner.
. You lost me. How about a picture?

 .
. . 
 .
.
Do you see how the polka dot strip on the green card right front comes from the red card base? I used the green cut off strip to make the flap for the card by cutting off 2″ and scoring at 1″ so it glues behind the polka dot strip. The 2″ part I cut off I used on the flap of the red card.
The red card uses a 1″ X 6 1/4″ strip of the striped paper in the Sweetest Christmas DSP for the right side and another strip 1″ X 4 1/4″ scored at 1″ for the flap. Stamp and corner round the flap, and glue it halfway down on the inside strip before gluing that strip down. (I loved that the other side had little candy canes!) The flaps are stamped with Versa Mark and embossed with white embossing powder with the greeting ‘Christmas Cheer’ from Sweet Candy Canes. The ‘Candy Cane Wishes and Mistletoe Kisses’ greeting is also in the Sweet Candy Canes stamp set and cut with the Candy Canes die which has those two larger holes at the side which I used for ribbon. The holes are large enough for a real candy cane to fit through with the greeting stamped vertically.

I cut one candy cane from the Sweetest Christmas Designer Series Paper (DSP) for each card and cut two evergreen boughs from Shaded Spruce using the dies from the Christmas Banners Die set. I cut a So Saffron Stem from the Banners die set and also five red berries in Real Red which I sparkled up with Wink of Stella. I stamped two mistletoe boughs from the Sweet Candy Cane stamp set and cut them out with the Candy Canes Dies. I punched three little white berries with a small hole punch and layered them above the mistletoe.
The layer under the candy cane and greenery is 2 3/4″ X 5 3/4″, one in Poppy Parade and one in Sweetest Christmas DSP.
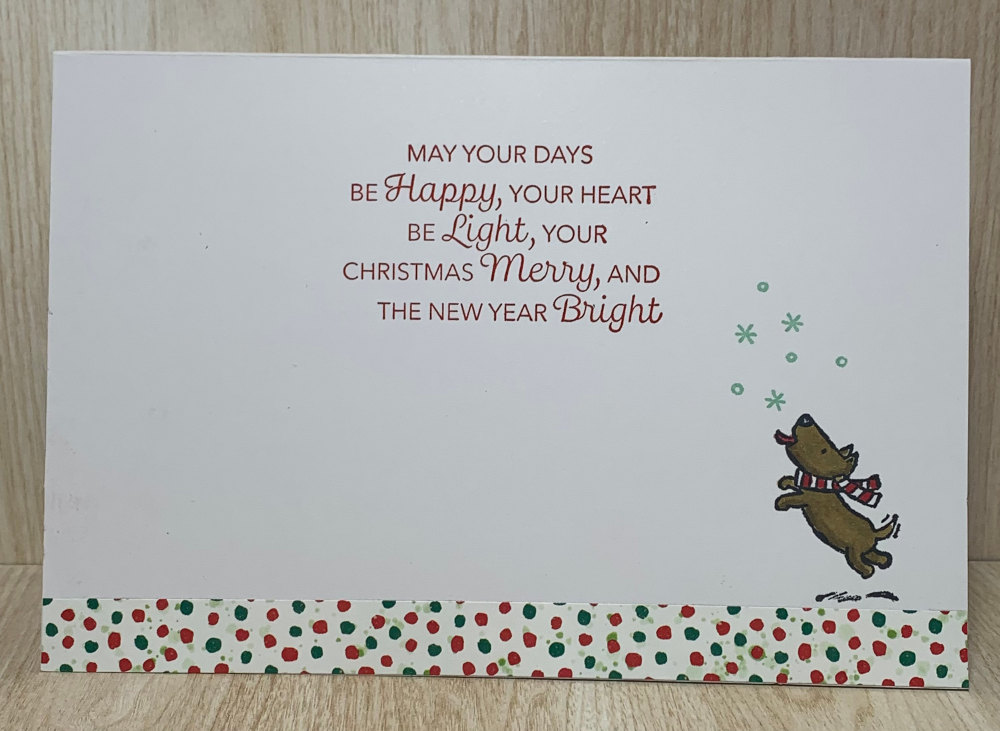
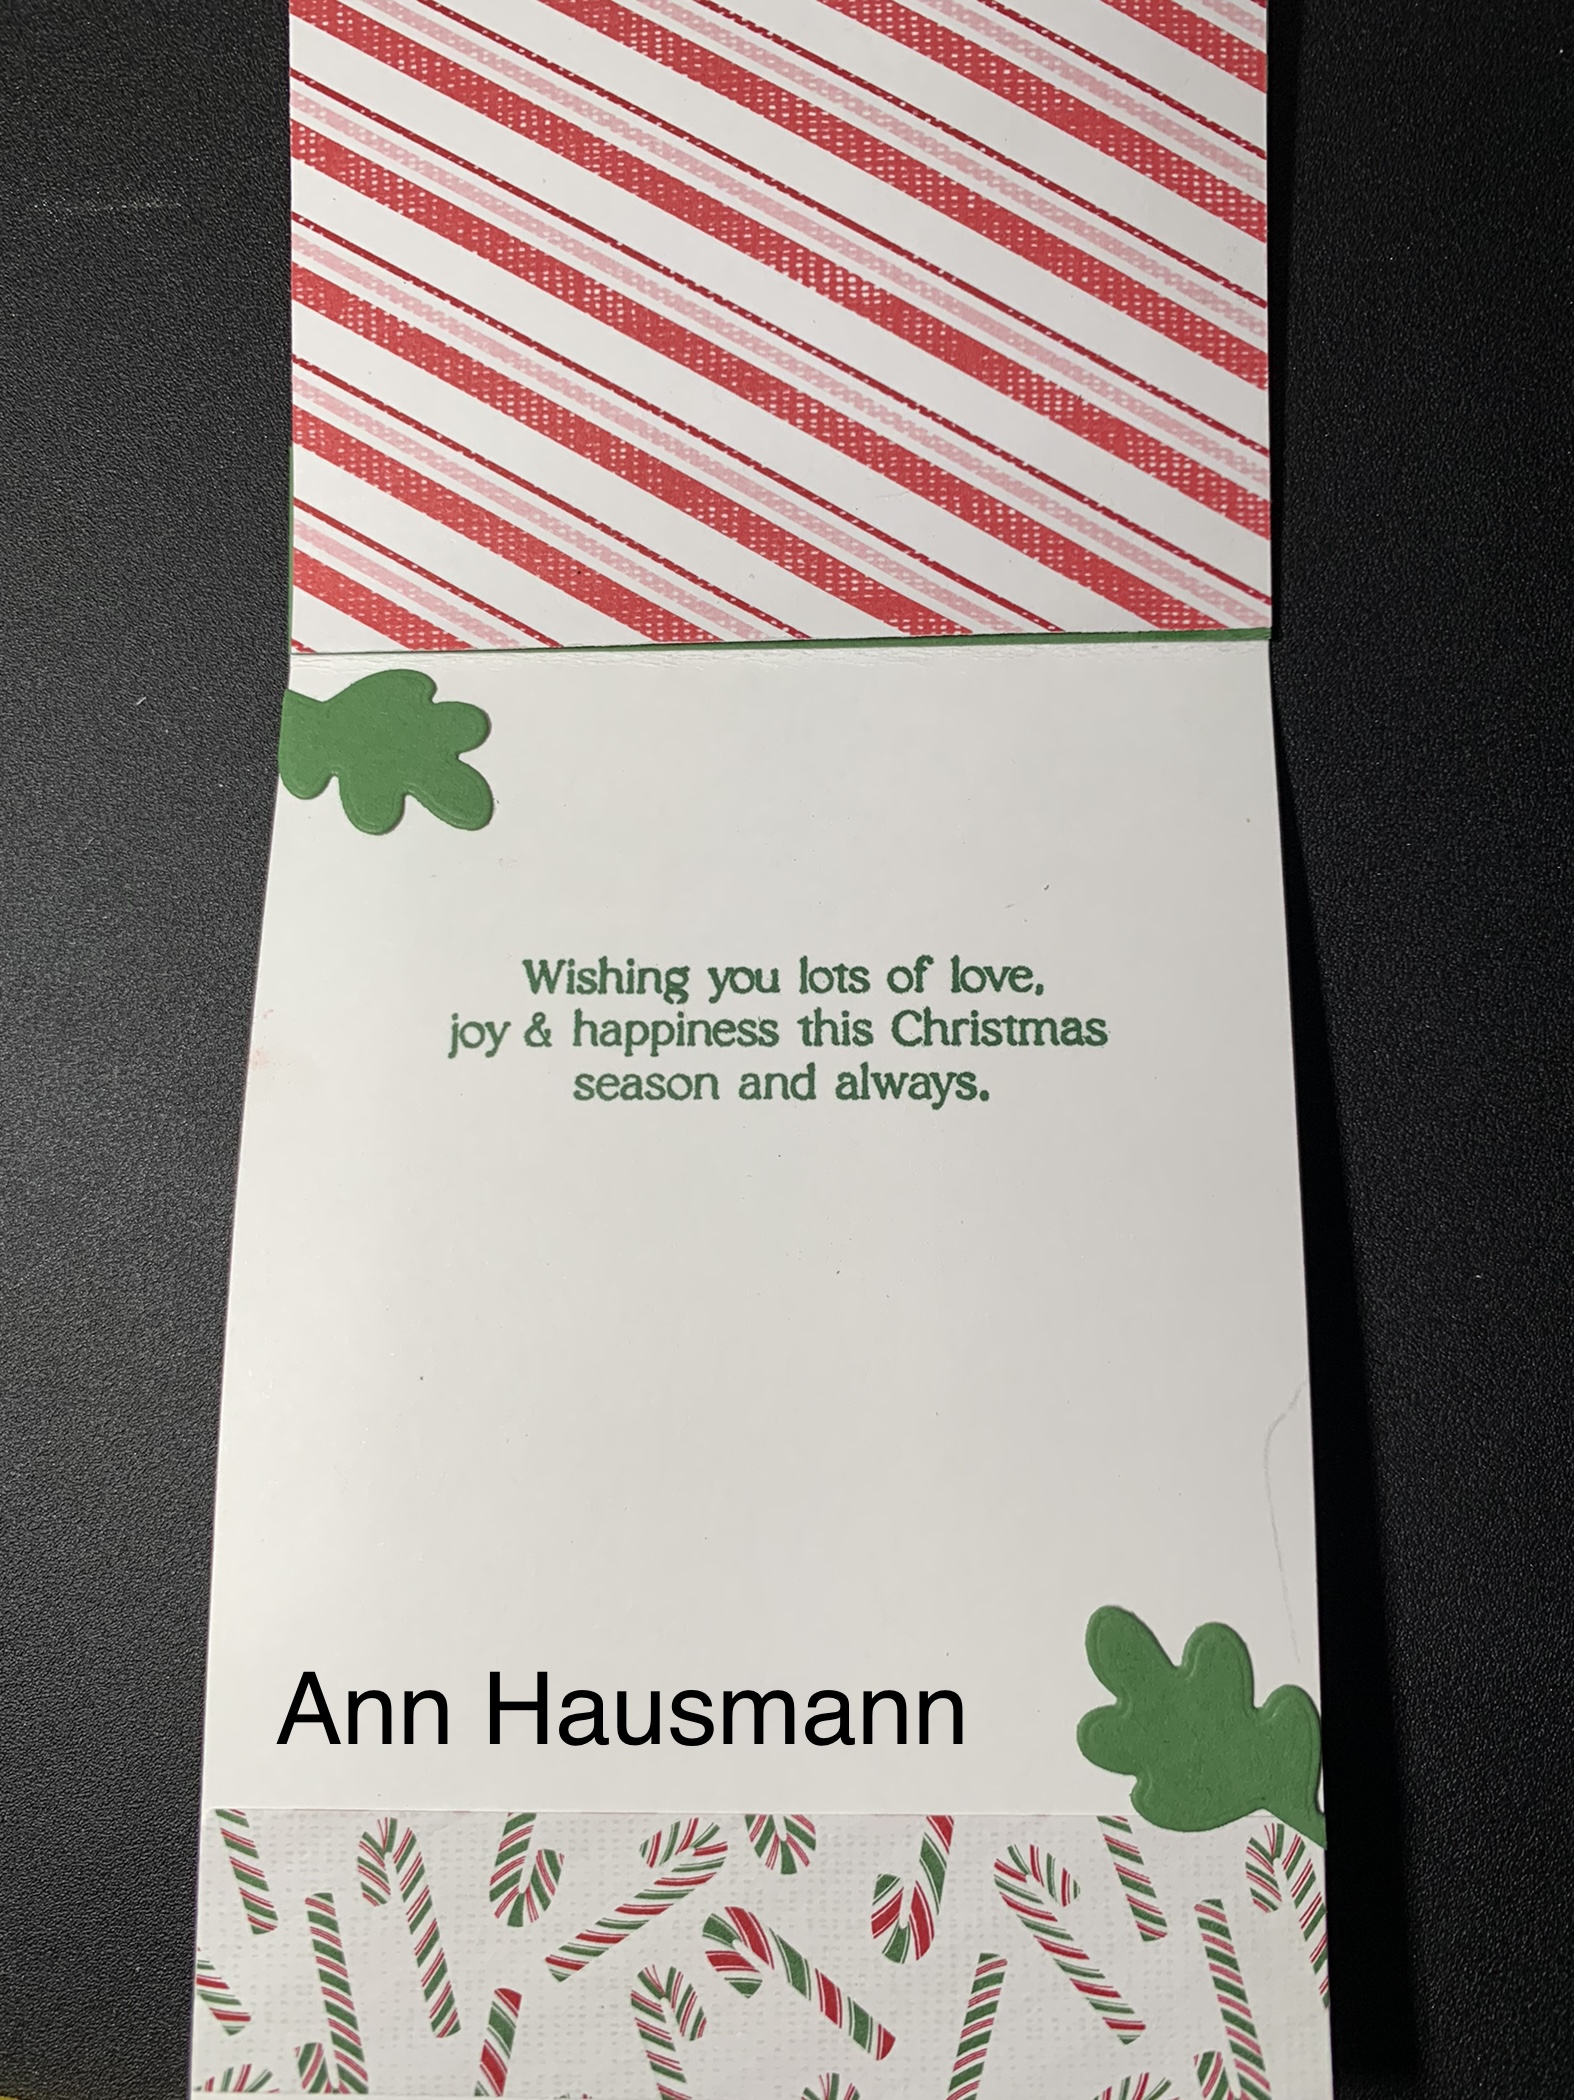
The inside greeting is my favorite for this year-“May your days be happy, your heart be light, your Christmas Merry and the new year bright”- from the Very Best Occasions Stamp Set, a great set for your stamp collection with greetings for birthday, love, gratefulness, thinking of you and Christmas!

These next two cards use the Candy Canes Die that makes stripes!


These card bases are larger than a standard A2 so the cut out wouldn’t cover the full base so start with a piece of DSP for the green card and poppy parade for the red card and cut them at 5 7/8 X 3 7/8 which leaves an uncut left side perfect for wrapping ribbon around. The banner is from the Christmas Banners Die. It is the best banners stamp and die set yet. ( I think I have about three sets from the past.) I did use a Shaded Spruce Stampin’ Blend to color in the green a little darker.
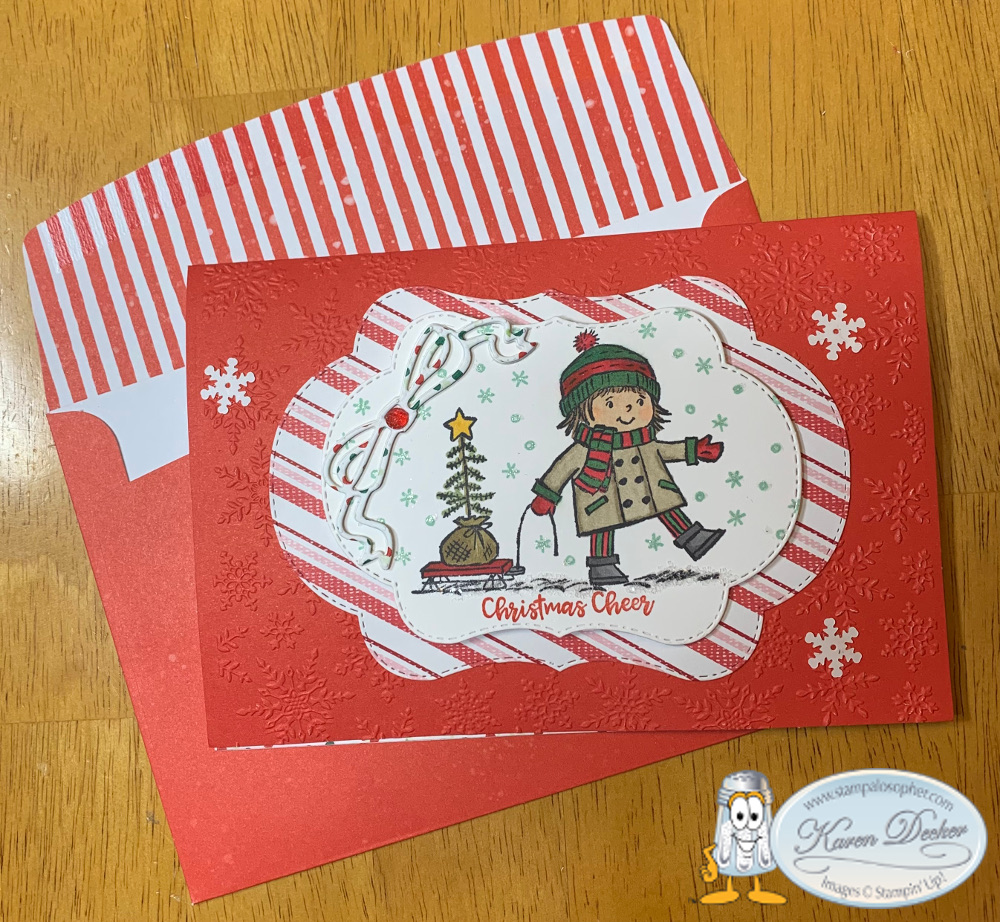
The last cards I want to show you use retired products. The Seasons of Fun set has a little girl pulling a sled and my daughter just sent me a picture of our little granddaughter pulling her baby sister in a sled.

Did you know if you layer Lt Mossy Meadow and Lt Shaded Spruce you get Garden Green?
For the red card, I folded the dotted side to the back and embossed the front with a retired embossing folder. I used the Stitched Seasons Framelits to cut the layers and also to cut the bow in polka dots to match the back. ‘Christmas Cheer’ is in the retired Itty Bitty Christmas stamp set.
And here is the matching green card:

I cut the bow out of the color I wanted and then two other layers of basic white, gluing all three layers together to give the bow a bit more dimension. Be sure and use your double back sticky sheets to do this so you don’t have a mess of glue.
One last example using the same Stitched Seasons Framelits and the matching Blended Seasons stamp set:


And that, my dear stamping friends, is how you start with an envelope and then tie in the card!!
Merry Christmas everyone! Have a wonderful day celebrating the birth of Jesus!
Karen
Christmas Ornament/ Party Favor/Gift Tag

One of the projects we made last December at club was this ornament. It could be used as a party favor or a gift tag or……
It is a case of Sandra Roberts tag on sandrascraftstudio.com.
Recipe
There are six pairs of stars from the Stitched Stars Dies with an Evening Evergreen base and a smaller star die cut layer in the Painted Christmas DSP. The DSP is glued directly to the Evening Evergreen with Tombow adhesive and then the top two pairs are popped up using Stampin’ Dimensionals.
- Largest Star: Evening Evergreen, 5 1/2 X 6, die cut with stitched stars die
- Layer: Painted Christmas DSP, 4 X6, die cut with next smaller stitched stars die
- Note: After gluing on the DSP, punch a small hole for the ornament hanger, down far enough to be covered by the point of next star
- Next Star: Evening Evergreen, die cut with next smaller stitched stars die
- Layer: Painted Christmas DSP, die cut with next smaller stitched stars die
- Top Star: Evening Evergreen, die cut with stitched stars die
- Layer: Painted Christmas DSP, die cut with next smaller stitched stars die
- Gold Stems: Gold Foil, 2 1/2 X 2 1/4, Die Cut with Poinsettia die
- Leaves: Garden Green, 2 1/2 X 2, Merriest Frames Hybrid Embossing Folder and Die
- Poinsettias (X2): Real Red, 1 X 2, die cut with Merriest Frames Die
- Add one large gilded gem to the top
- Greeting: Basic White, 2 1/2 X 1 1/2 stamped with Merry Christmas from Curvy Christmas stamp set in Evening Evergreen. Die cut with Stitched Nested Label die and then sponge the edges with Evening Evergreen.
- Hanger: Red Twine, 12″ for hanger, separate 6″ for bow. Double the 12″ and push the loop through the punched hole from front to back then bring the ends through the loop at the back and tighten pushing the sides down around the point. Tie a double know with the ends. Tie a bow and mount with a glue dot on top of hanger.
That would be a good idea, Sal! I did that one year with a circular ornament that I put in a pocket at the front of the card. I made a longer hanger so it could loop to the inside of the card where I attached it lightly with a note saying the ornament could be removed.
 Are you going to make gift tags this year?
You know, Sal, I have trouble with spending time on gift tags since they are thrown away with the wrapping paper with hardly a second look and they are not recyclable since the name is written on the tag. They are pretty and I love getting them on gifts but I am just not into making them.
So followers, let me know if you make gift tags to dress up your packages each year.
Have a wonderful day and thank you for spending some of it with Sal and I.
Karen
Thanksgiving Scarecrow On A Wobble
 .
.
How was your Thanksgiving? Hopefully all went well and your turkey or other main dish was perfect and the family/friend time was memorable!
I have another Thanksgiving card for you, but unlike the elegance of the previous post with the beautiful Fall Leaves embossing folder of Stampin’ Up!, this one is a ‘smile maker’ using a stamp and die from Divinity Designs called ‘Happy Fall’.
 .
.  .
.
The layers are made using the Stampin’ Up! Deckled Rectangles dies, the corn stalks are from Stampin’ Up!’s retired Chick dies and the fence is from the retired Birthday Chick Dies. The pumpkins, flowers, leaves and spring scrolly are leftovers from a past Paper Pumpkin kit, and the inside greeting is from the retired Stampin’ Up! Basket of Wishes. The scarecrow is mounted on a small craft spring (a wobble) from Michaels. The Happy Thanksgiving is part of the Happy Fall set and is embossed with retired Early Espresso embossing powder. The inside greeting is stamped with Early Espresso.
The Soft Suede card stock and the Crushed Curry cardstock die cut with the Deckled Rectangle dies are all current products. The scarecrow was stamped with Memento Black ink and then colored with Stampin’ Blends:
- Pants – Dk Seaside Spray, Lt Night of Navy
- Shirt – Dk and Lt Granny Apple Green
- Wood Pole – Bronze
- Belts – Dk Crumb Cake the layered with Lt Daffodil Delight
- Patches – Lt Calypso Coral, Lt Real Red, Lt Highland Heather
- Hat – Lt & Dk Daffodil Delight
- Hat Band – Lt Seaside Spray, Dk Night of Navy, Color Lifter
- Bird Beak – Dk Black
- Bird Nose – Dk Pumpkin Pie
- Face – Ivory, 2 layers, extra on cheeks
- Straw – Dk Mango Melody layered with Lt Crumb Cake
Recipe
- Base: Soft Suede, 5 1/2 X 8 1/2, scored at 4 1/4
- Outside Layers: Crushed Curry, 4 X 10 1/2, die cut one #7 and one #8 of Deckled Rectangles
- Inside Layers: Crushed Curry, 2 1/2 X 7 1/2, die cut one #3 and one #4 of Deckled Rectangles
- 3 Corn Stalks: Very Vanilla, 3 3/4 X 3 3/4 die cut 3 stalks with Chick Dies and sponge slightly with Crumb Cake
- Fence: Basic Gray, 1 X 4 1/2, cut 2 fences from the Birthday Chick Dies, cut off two posts, sponge with gray
- Scarecrow: Basic White, 4 X 3
The layers are glued directly down to the base, then the fence is added followed by the cornstalks tied together with a piece of linen thread. A craft spring is adhered to the back of the scarecrow and he is placed a little right of center on the card front. The pumpkins, leaves, flowers and the scrolly like embellishment are all pieces from a Paper pumpkin glued on directly to the top layer.
I guess with a spring loaded scarecrow, you don’t need to pop up anything else.
So true!
SAL, Save A Lot of Leftovers
Karen
Thanksgiving Card with gift card holder
Thank you/ Thanksgiving Card
I used the Handmade Wishes stamp set for the greeting on this card.
I tried several coloring techniques with the Leaf Fall embossing folder but liked the embossed look without coloring the best:
 .
.
 .
.
I used a combination of gold and copper embossing on the greeting. The outside is gold, the inside is copper.
 .
.
. Sorry, I still can’t see the difference.
Sigh…… it’s one of those days! The software I use to add the watermark froze up and the camera isn’t catching the colors. But you need to see the Handmade Wishes stamp set before it goes away and, more importantly, you need to see this die:
 .
.
This Mini Pocket Envelope Die! It is the perfect size for gift cards and look at all the other dies that are included:
 .
.
A miniature oval, branch of leaves die, scalloped rectangle, tags and tiny dies to punch circles or a slot for twine or ribbon! And check out the little bow you can make with two of the dies. You need this die – trust me – no more manually cutting and scoring to make a gift card holder, it is all done with the die.
 .
. Recipe for Thanksgiving Card
- Base: Thick Very Vanilla, 8 1/2 X 5 1/2, scored at 4 1/4
- Layer 1: Thick Very Vanilla, 4 3/4 X 3 1/2, (X2) outside and inside
- Layer 2: Thick Very Vanilla, 4 1/2 X 3 1/4, embossed with Leaf Fall 3D embossing folder
- Inside Gift Card Holder: Designer Series Paper (retired), 4 1/2 X 5, die cut with Mini Pocket Envelope Die; stamp the very top of the gift card holder in Versa Mark with ‘For You’ from Handmade Wishes and emboss with copper embossing powder.
- Greeting: Very Vanilla, Scrap, stamp with border from Handmade Wishes stamp set in Versa Mark and emboss with gold embossing powder. Stamp ‘Endlessly Grateful’ from Very Best Occasions stamp set and the scrolly from the Handmade Wishes stamp set in Versa Mark and emboss with copper embossing powder. Punch with the Handmade Tag Punch
- 7″ of ribbon folded in thirds and attached to the back of the greeting with glue dots
The small leaves I used on the inside are from the retired Square Pilllowbox dies and the front open leaf, die cut in gold, is from the retired Stitched Seasons Framelits dies. The two leaves at the bottom left of the greeting are from the retired Gathered Leaves Dies with the larger leaf die cut in copper foil and the smaller in brushed metallic foil.
SAL, Share A Love
Karen
Case The Creator #9, Recessed Panel Card
It’s time for another Case The Creator card!
This time we are creating a Recessed Panel Card.
 .
.
 .
.
The recessed DSP (designer series paper) on the front is a full size piece so when you open to the inside the back of the DSP is the top of the card and quite nice- just be warned to not use directional papers that might be upside down on the inside!
There are many different versions with different placement of the recessed panel. I chose the dimensions used by France Martin of www.frenchiestamps.com. To access her video click on the pdf file not the screen shot of the dimensions – the video won’t work from the screen shot.
Case The Creator #9 printable pdf file
Screen Shot of Directions
 .
. . That’s really cool and I like the picture of the fall card on the directions but what did you use?
That would be helpful, Sal, wouldn’t it?
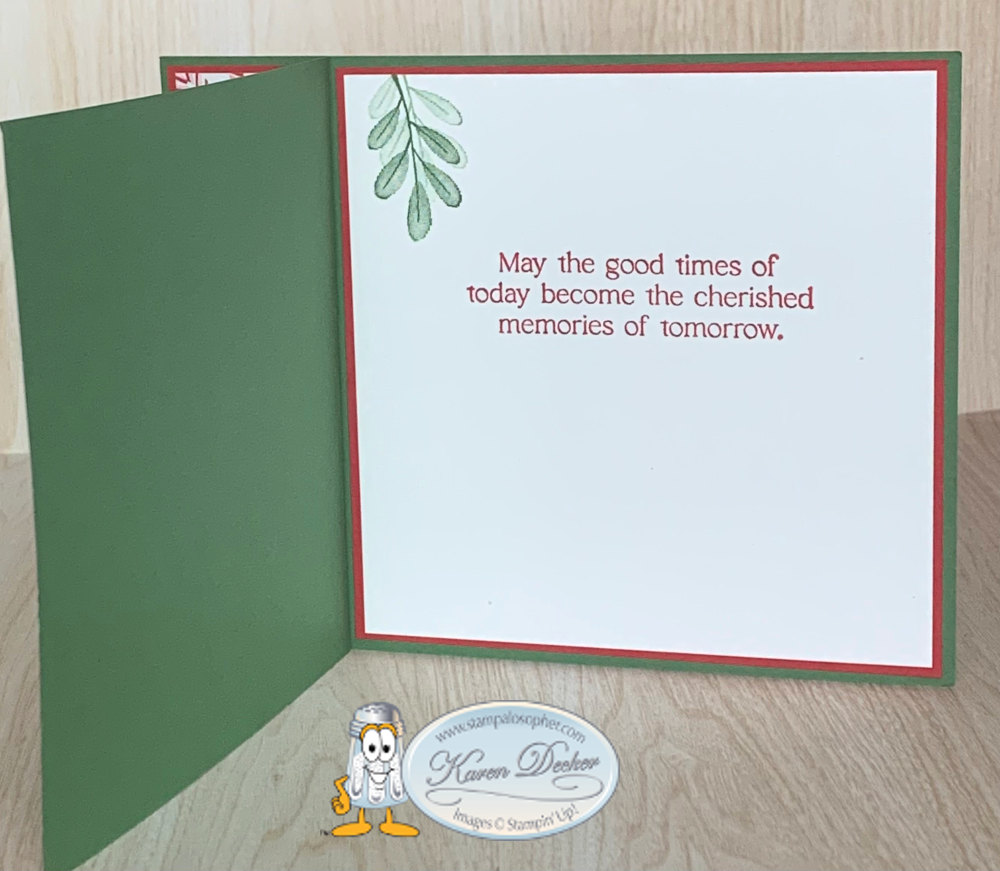
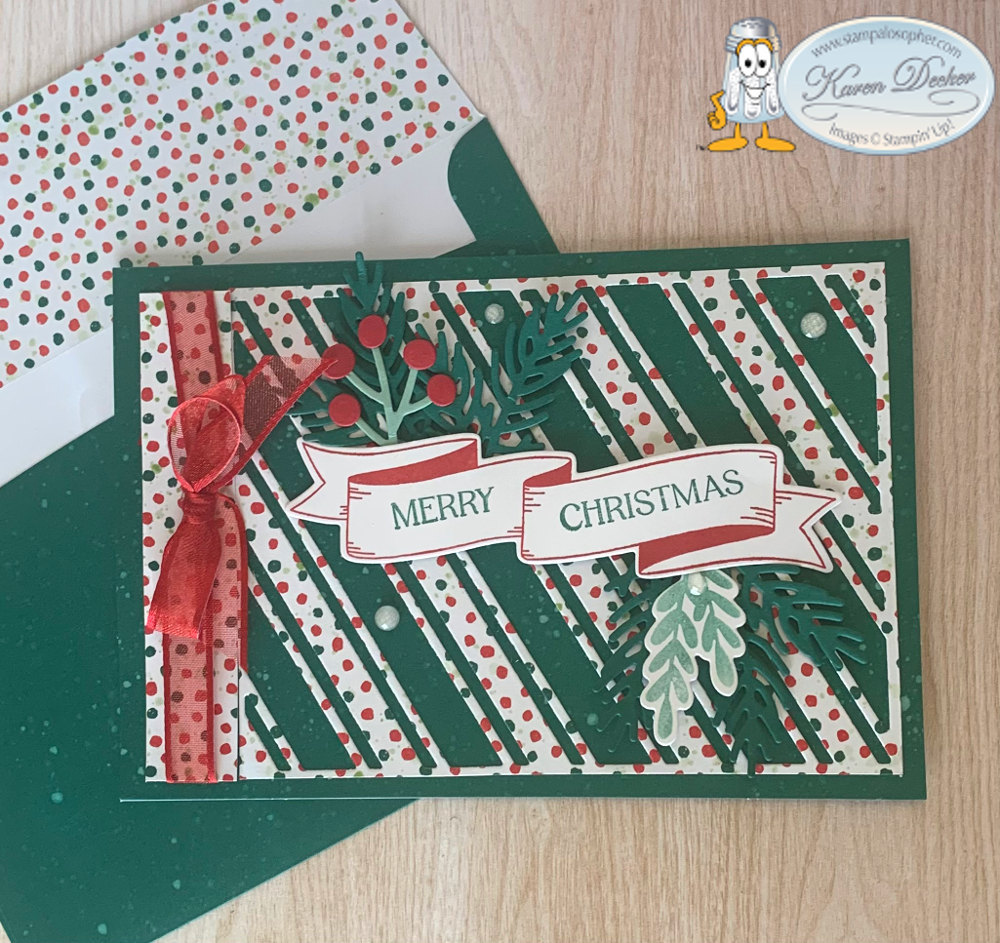
The Christmas card I made uses the Painted Christmas Paper DSP for the recessed panel. This DSP carried over from last year to the new fall mini catalog, so check your stash, you may have it already!
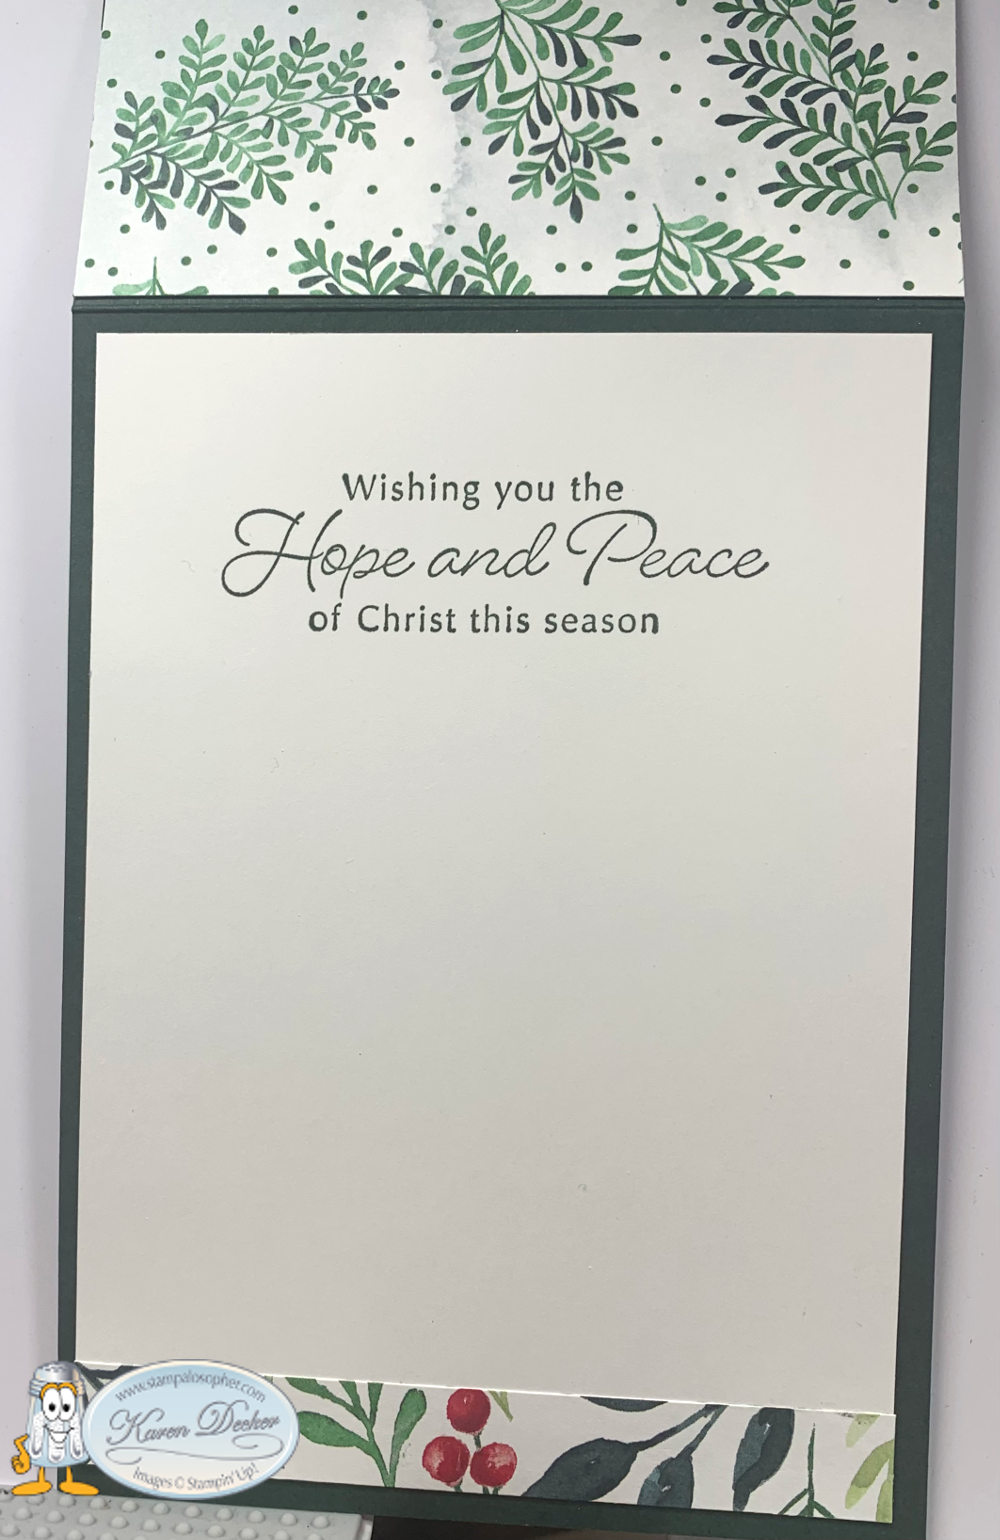
The base is Evening Evergreen and the mat is Basic White. The greetings on the front are from the Hope & Peace stamp set and dry embossed with White Embossing Powder. The inside greeting is from the same set and stamped with Evening Evergreen Ink.
The holly berries, stamped in real red, and leaves, stamped in garden green, are from Merriest Moments stamp set and Merriest Frames Dies, another carryover from last year that is one of my all time favorite sets. The pine boughs are from Christmas Banner Dies cut from Garden Green cardstock.
Very helpful! Did anyone participate in the challenge.
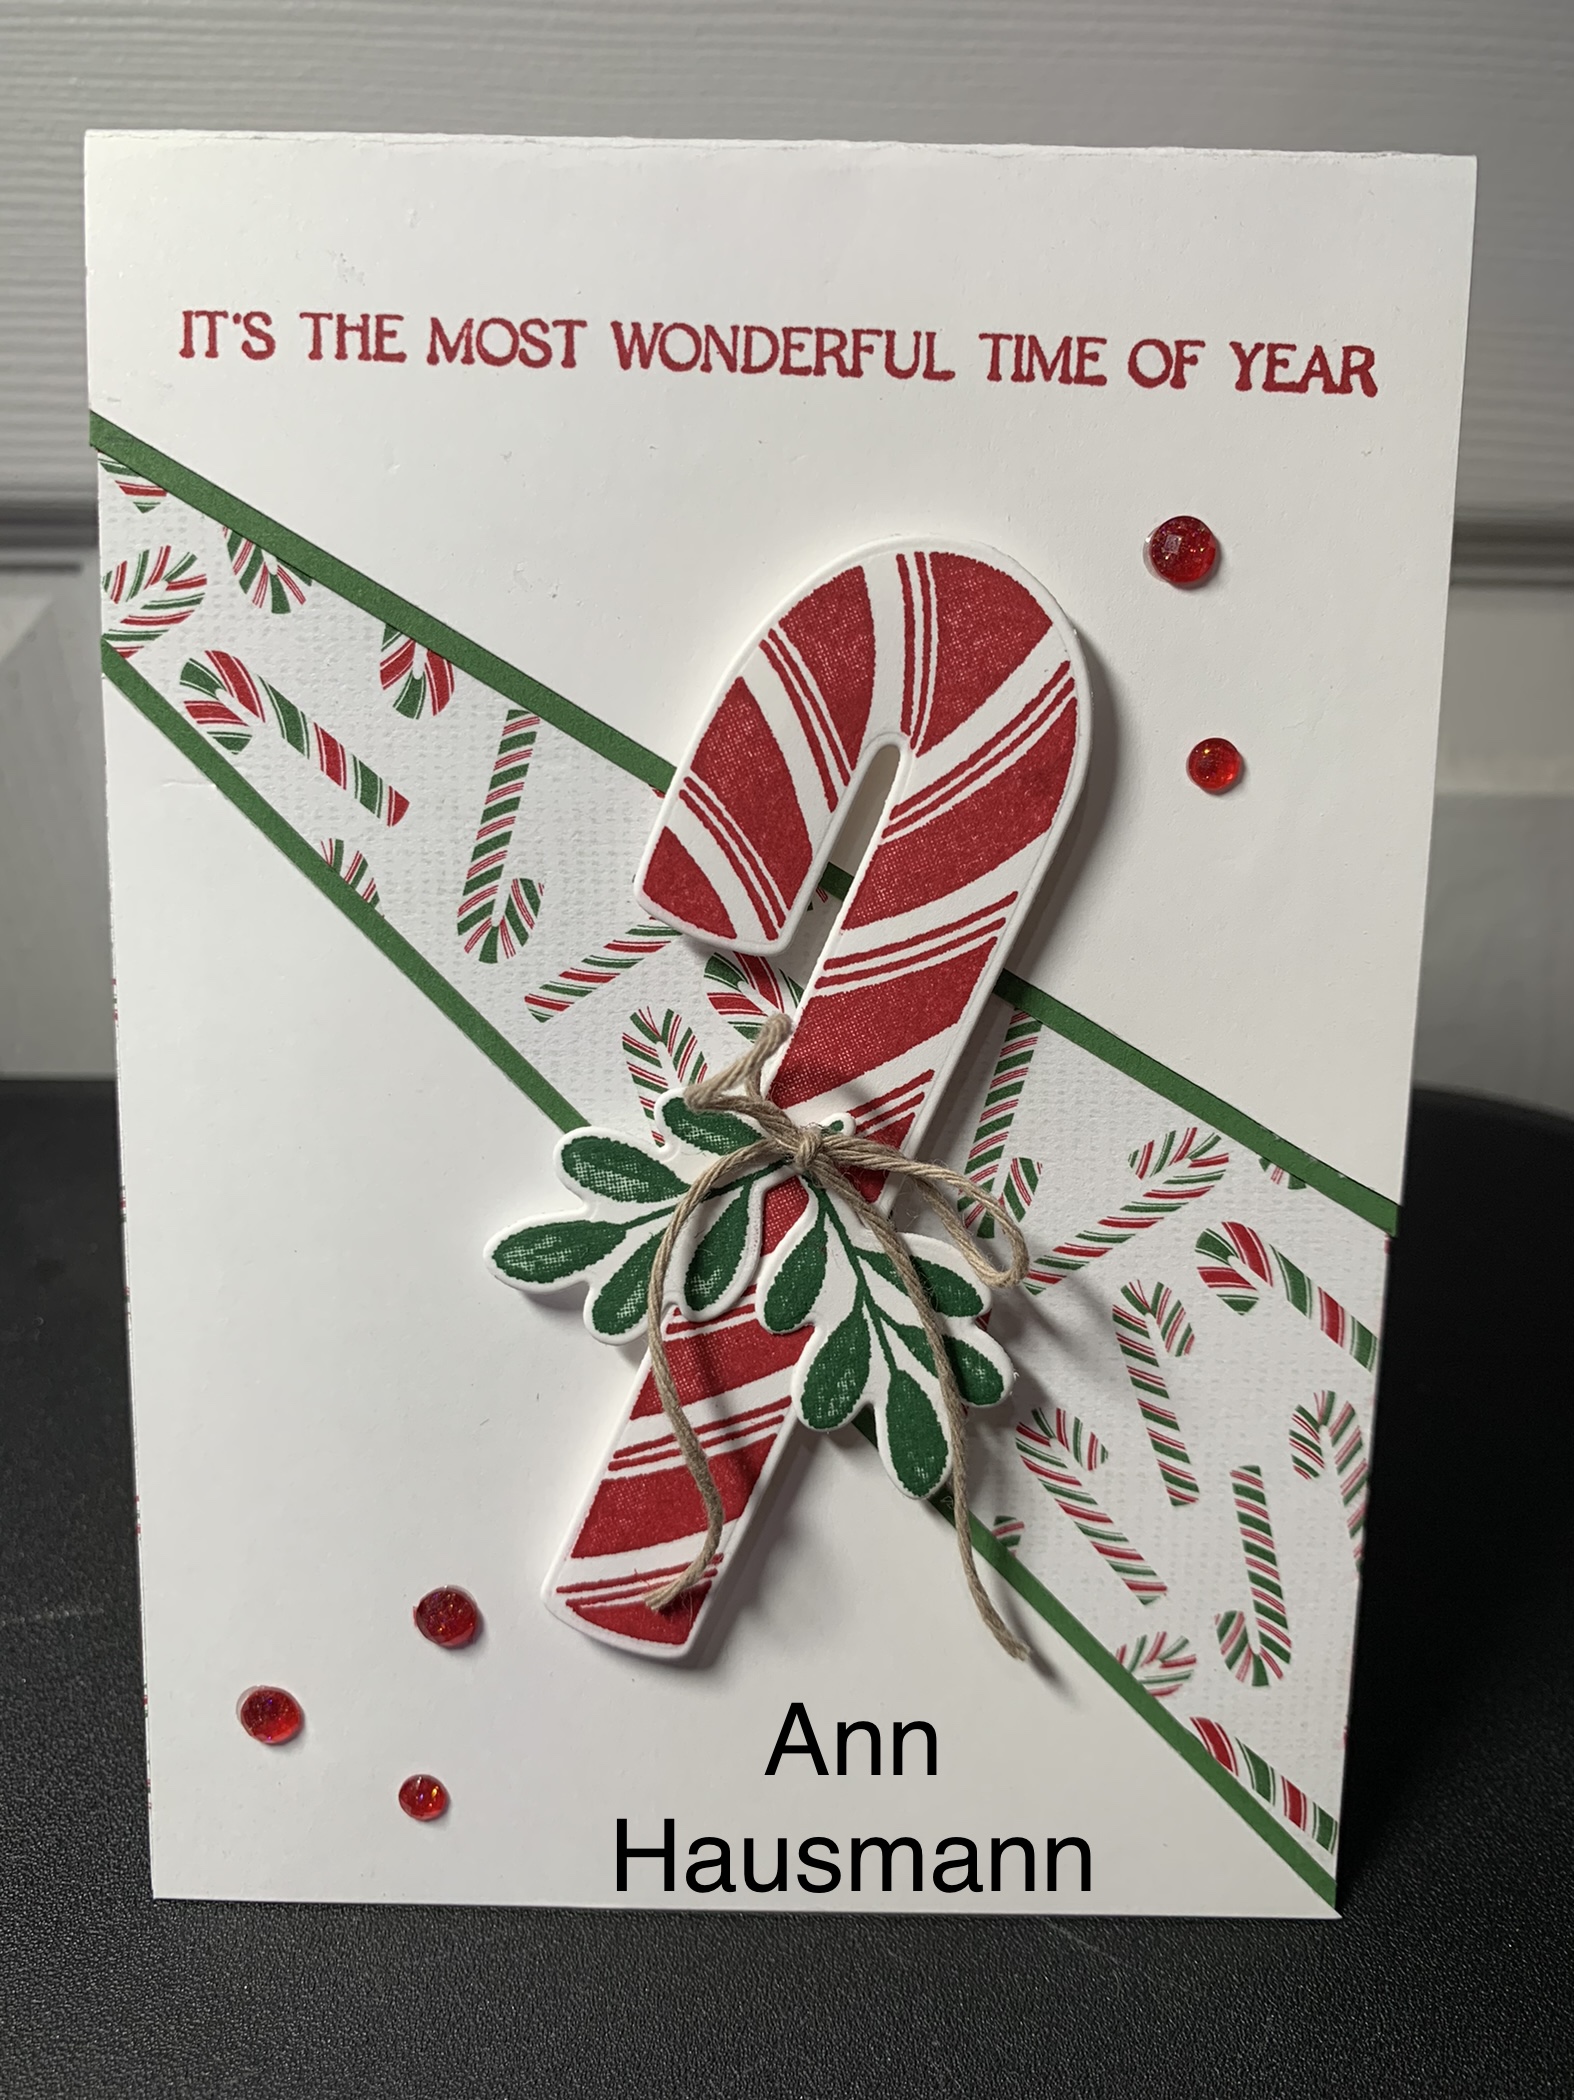
Indeed they did, Sal! Ann used the Sweet Candy Canes stamp set with Candy Canes Dies and the oh- so- cool Sweetest Christmas Designer Series Paper. Her card is just beautiful and the green mat and mistletoe bough are perfect with the candy canes! Such a great job!
 .
. 
Do you see what I mean with the back of the DSP panel? A lovely look!
Jo’s card has a recessed panel of many colored candies! She used a punch to cut out even more candies to embellish her card and added glittery snowflakes! So very fun!


Sharon used the smiley moose from our All Bundled Up stamp set! She turned the panel the other way which looks great. I love how the moose scarf is colored to match the DSP! We don’t have a die to cut out the moose so she fussy cut him and then added an oval of gold behind him. Beautiful work!

. Let’s see…. 50 days left until Christmas and less than that to get those cards mailed.
AAAAHHHHHH……. I better run!
SAL, Stamping A Lot of Christmas cards – (not yet)
Click on little Sal in the computer to go to the online store.
Case The Creator #8, Spanner Card Fancy Fold
Let’s get fancy today and make a Spanner Card!
 .
. The top has a strip of window sheet attached to the two sides which were cut from the main card base. You lift the front to reveal a middle panel:
 .
. Then lift the middle panel to see the greeting:
 .
.
Here is the printable pdf file and if you open it you can click on the Youtube from Sharon Lim to see a video…
Case The Creator #8 printable pdf file with video link
…. and if you would prefer to just look at the directions here, this is a screen print of the pdf (so the link will not work):
 .
.
I used the scrumptious Rustic Harvest DSP (designer series paper) on a Cajun Craze base with a Basic Black mat. The Sending Dies and the Sending Smiles stamp set are a great addition to anyone’s stash. I did cut two additional 1 1/4 X 1 1/4 Basic Black squares to put over top of the back sides of the window sheet so the glue dots wouldn’t show. I die cut a little pumpkin and a branch of leaves from the Seasonal Swirls Dies. The greeting is from Blessings of Home stamp set.
The greeting doesn’t look like what is in the stamp set?!
No, Sal, I masked off the ‘hello’ in ‘A CARD TO SAY HELLO’ and added three little dots with a marker. The greeting dies were longer than I wanted and I didn’t want to cover up the beautiful DSP so I masked, then stamped, then die cut half of the greeting, removed the die and then placed the die on the other end of the greeting to die cut a shorter length. The embossed edges kept the die in place.
Oh, yes! But practice makes perfect so its best to challenge ourselves to step out of our comfort zone so we get comfortable using our dies in various ways. It is nice to know we don’t need dies and punches in every size!
Let’s look at what my crafty friends came up with for challenge #8!
Ann used the Peaceful Deer Stamp Set and Deer Builder Punch:
 .
.
 .
.
Lucille’s card has a fall feel to it with a die cut bouquet from Penned Flowers dies.

Jo used the Delicate Edges Dies! Her flower is from the Color & Contour stamp set with the Scalloped Contours dies.
 .
.

You are so lucky to have such talented crafters playing along with your CTC challenges!
Blessed, Sal, blessed!
Thank you crafty friends for joining the challenge and sending pictures of your creations. Thank you, dear followers, for spending some of your day with me!
SAL, Sending A Lot of samples to spice up your crafting world!
Karen
Book Fold Candy Cane Christmas Card & Circle Tri Fold Card
Let’s look at two Christmas cards we made at the Christmas Stamp Camp.
 .
. 
You know how it is–we say “I don’t need that stamp set…” and then we see a wonderful card and, oh my, we must have the stamp set. That is what happened when I saw this card made by Mary Deatherage. She used The Sweet Candy Canes Bundle, bundle meaning a stamp set and die set sold together for 10% off. The stamp set is Sweet Candy Canes and the dies are Candy Cane Dies. Just as important to the card is the Sweetest Christmas Designer Series Paper. The paper has candy canes that you can cut out with the dies- and the candy cane dies have a die that faces right and one that faces left to create what you see above. The set is in the holiday mini catalog- pages 8-11. I used the label die for threading ribbon but check out how a real candy cane could be used:
.
Don’t miss those little Flat Jingle Bell Trinkets! What fun to add those to your candy cane – or your cards!

Why would I want ‘flat’ bells?
Ahh, good question, Sal. I received several cards in years past with the jingle bells that are 3D and the post office machines completely smashed the bells. You also pay extra if your card doesn’t fit through a 1/4″ slot. They actually test it at the post office and if it doesn’t fit their slot the card becomes a package and you pay a lot more to mail it.
Recipe for Book Fold Candy Cane Christmas card:
- Base: Garden Green, 4 1/4 X 11, scored at 5 1/2 and 6 3/4
- Burnish the 5 1/2 score line in a valley fold and the 6 3/4 score line in a mountain fold
- Adhere the front to back between the 5 1/2 and 6 3/4 score lines
- Mats: Real Red
- 1 1/8 X 4 1/8, left side small mat
- 4 1/8 X 4 1/8, main front mat
- 4 1/8 X 4 1/8, inside mat
- Top Layers: Note: Build your front candy canes, labels and ribbon before adhering to red mat so you can adhere the ribbon under the DSP layer or the real red mat if you prefer the green ribbon matching up to the green base
- Sweet Christmas DSP in candy canes, 1 X 4, left side small top layer
- Sweet Christmas DSP in polka dots, 4 X 4, main front top layer
- Basic White, 4 X 4, inside top layer
- Candy Canes: Sweet Christmas DSP, die cut one going left, one going right
- Adhere directly to the DSP layer with liquid glue
- Label: Basic White stamped with greeting from Sweet Candy Cane in Real Red Ink
- Die cut with label die in Candy Canes Dies
- Mistletoe: Stamp two mistletoe sprigs in garden green and die cut with Candy Cane Die, adhere to right side of label
- Ribbon: Garden Green 3/8″
- 5″ to wrap through the holes in the label adhering ends behind the DSP with glue dots
- 8″ to tie a bow to attach to right side of label
- Embellishments: one red heart (retired) and three small pearls for the mistletoe berries
- Inside is stamped in real red with a sentiment from the Sweet Candy Canes Stamp set and the mistletoe is stamped in garden green, once full strength and once stamped off
How many candy canes can you cut from the DSP?
Good question, Sal. There are various colors of candy canes and two pieces of 12X12, so 32 from each sheet, 64 in total, if you don’t care which direction they are going or which color they are. For my stamp camp I used the red and green candy canes but here is what the DSP looks like – minus the red and green I used for my class:

Oooh, I like the pastel colored one!
Yes, and the Christmas Whimsey paper with its beautiful pastels just got added to the Clearance Rack.
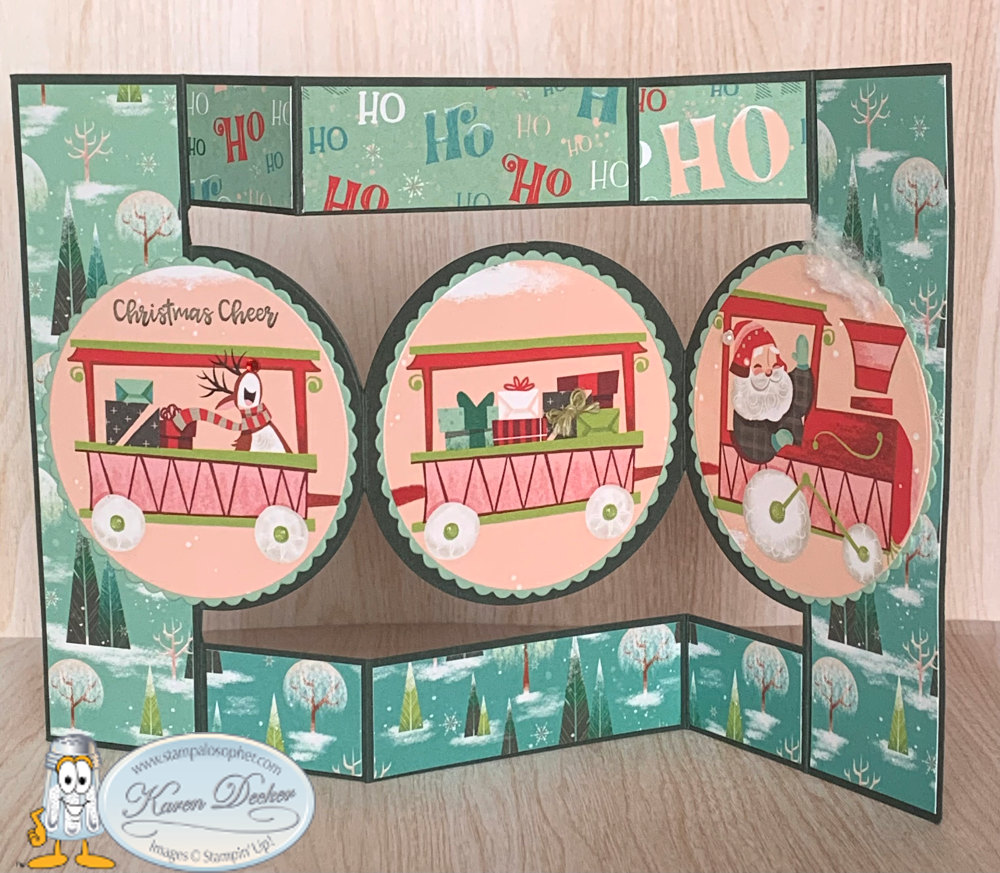
The second card we did is a case of Lavonne Schwendeman’s Santa train card design and Crystal Best’s Circle Tri Fold instructions adjusted by me to fit our standard A2 envelopes.
https://www.youtube.com/watch?v=ZJ0hUkZX_v0
Recipe for Circle Tri Fold Card
- Base: Evening Evergreen, 9 1/2 X 5 1/2
- Score at 1 1/2, 3, 6 and 7 1/2, on the 9″ side, fold and burnish this side only
- Score at 1 and 4 1/2, on the 5 1/2 side- do NOT fold and burnish
- Partial Die cut with 3″ Layering Circle Die
- Fold on 2nd score line
- Center the circle die between the horizontal score lines with the edge hanging over so it won’t cut on the folded side
- Place the cutting plate on the fold/die so the beveled edge is just barely beyond the score line and die cut
- Repeat on the other side
- Cut out the 1/8″ on the top and bottom of the circles from the circle to the horizontal score lines; look at the second picture and you will be able to see the 1/8 cut between the circle and the top score line
- Cut the top horizontal score line from the 1/8″ cut out on the right side to the 1/8″ cut on the left side
- Repeat on the bottom horizontal score line
I think I would tell them to ‘just watch the video’ for all that partial die cutting.
It certainly helps. From here I changed up a bit from what Lavonne did for decorating. I did use the Santa Express DSP (that means designer series paper) for the train images but I just cut them out with the Layering Circle Dies even though the Santa Train Die set has dies that could cut out the images.
- Top: Santa Express DSP
- DSP with trees
- 1 3/8 X 5 3/8 (X2), right and left sides,
- 1 3/8 X 7/8 (X2), bottom pieces to right and left of middle piece
- 2 7/8 X 7/8, bottom middle piece
- DSP with HO HO HO, Note- I purposely cut the right top little piece with the largest ‘Ho’
- 1 3/8 X 7/8 (X2), top pieces to right and left of middle piece
- 2 7/8 X 7/8, top middle piece
- DSP with trees
- Circle Layers (X4): Mint Macaron, die cut with Scalloped 3″ Layering Circle Die; 3 for front, 1 for back
- Santa Train: Santa Express DSP
- use the 2 3/4 Layering Circle Die and cut one santa, one car with gifts, one car with reindeer
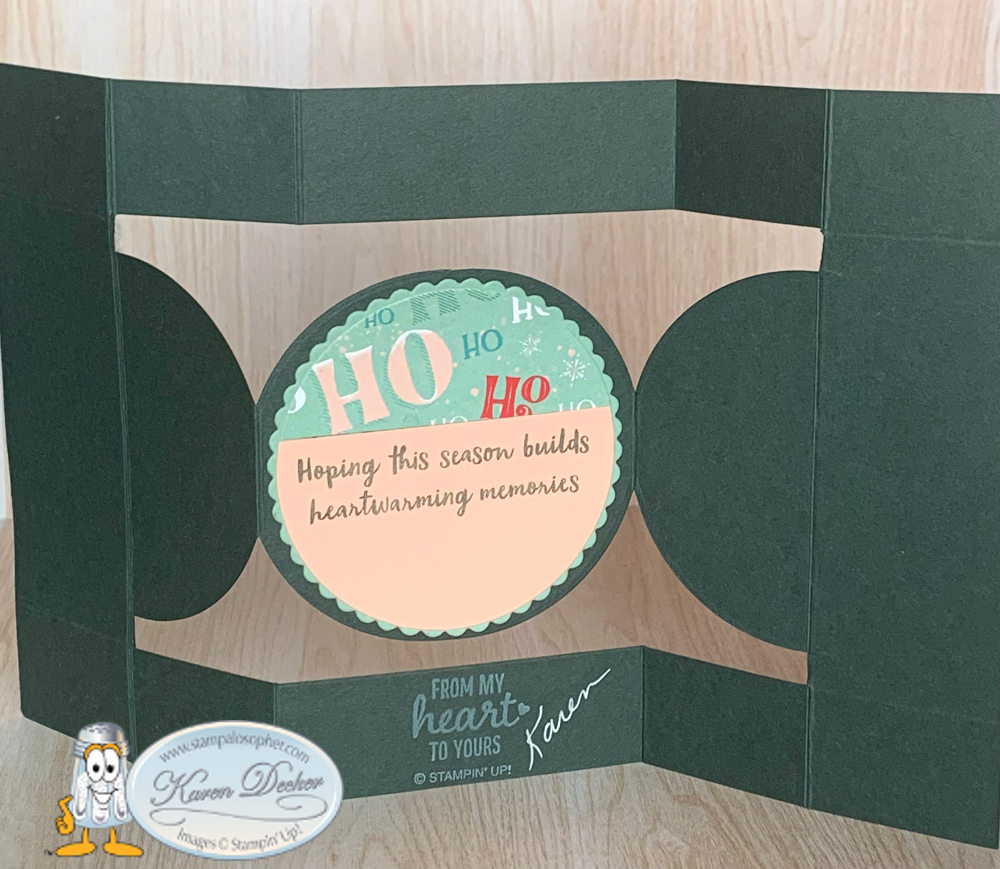
- cut one 2 3/4 circle of the HO HO HO for back
- cut one 2 3/4 circle in Blushing Bride cardstock, lay the two together and cut less than half way down on DSP to make the two layer nicely for the back
- The greeting “Hoping the season….” comes from the Snowman Season retired stamp set. To emphasize how it ties to the Ho, Ho, Ho, I wish I had used a red marker and colored the ‘h’ and the ‘o’ on the greeting. Next time….
- Embellishments: I embellished differently than Lavonne, though she used current products
- by stamping ‘Christmas Cheer’ from the Itty Bitty Christmas retired set over the train car with the reindeer
- by adding a red jewel to the reindeer’s nose
- by adding a little tiny bakers twine bow on one of the packages
- by adding a whisp of smoke made with a bit of cotton ball
- by adding a white pearl to santa’s hat
- by adding clear jewels to the wheels which showed the green perfectly
For my party favor I used another sheet of the Santa Express DSP which has four 3″ strips of scenes on one 12 X 12 that worked perfectly with the Pretty Pillowbox Die set. I printed the attendee’s names on a Basic White cardstock and then used the Pillowbox Label Die to partial die cut one end, then lay the die on the partial cut label and cut the other end. With the stitched label, the partially die cut portion sits nicely in the stitches so you have perfect alignment as you run the label through a second time. Check out this cool die set!
Julie Gilson, of Stampingala.com, designed this box last year using the Frosted Gingerbread DSP.
Scroll to the 39 minute point where the pillowbox starts:


Recipe for Pretty Pillowbox Party Favor
- Box for inside: Granny Apple Green, 7 1/4 X 5 1/2
- score 2″ on each side and burnish (that means rub real well) the scores
- Cut the score lines on long side to the short side score lines, then cut out a diagonal piece from the end squares which makes a triangular tab on each corner

- Add liquid glue to the end triangles and adhere to long side to create a box; Julie used tombow glue and little clothespins to hold the tabs in place while the glue dried
- Base of the outside: Real Red cardstock (X2), 4 1/2 X 6
- cut two pillowbox dies
- cut off the tabs on the base of both
- cut off the circular edge of the tab part of the die cut; here is what the original die cut looks like and what it looks like after you cut off the tabs and the circle edge. I used the Stampin’ Trimmer originally so I got nice straight lines instead of just fussy cutting like I did on these.

- Punch a 3/4″ hole in the tops of each base


- Overlap the square part of each piece and glue together to make a nice sturdy bottom base
- Glue the granny apple green box you made above to the base, centering on the bottom and glue, then glue both sides to the base
- Layers on the box
- Santa Express DSP, 4 3/8 X 2 1/8 cut two pillowbox die portions (see picture) for the front and back
- Santa Express DSP (X2), 1 1/2 X 2 for the sides of the box
- One of your 3″ X 12″ strips of DSP will make the front, back and two sides
- The die is upside down on the picture but I wanted to show you how it would lay on the 3″ strip of DSP where the top edge is right at the top of the scene. You will cut on the score lines top and bottom of that section.

- The die is upside down on the picture but I wanted to show you how it would lay on the 3″ strip of DSP where the top edge is right at the top of the scene. You will cut on the score lines top and bottom of that section.
- Embellish! I added the name plates, snowflakes from our retired gems, and an Evening Evergreen bow -8″
- Red striped tissue paper and red striped mints make a perfect addition to the box

. Why do you write out all the directions and have a youtube video? Isn’t the youtube enough?
Good question, Sal! First off, what if the youtube links don’t work in a year or a few years and one of my followers wants to make the box. Secondly, it can be very time consuming to watch a youtube over and over, stopping and starting as you complete each step. Thirdly, if you are hearing disabled, the written directions are important.
If any of you find corrections, please let me know in the comments. I would appreciate being able to correct these directions so they are accurate for the reasons stated above.
Have a wonderful fall season!
SAL, Sharing A Love of stamping
Karen
Click on little Sal in the computer to go to the Stampin’ Up! website.
Case The Creator #7, Twisted Ribbon Card & Joy Meadows September 2022 Shoebox Cards
Hello Stamping Friends,
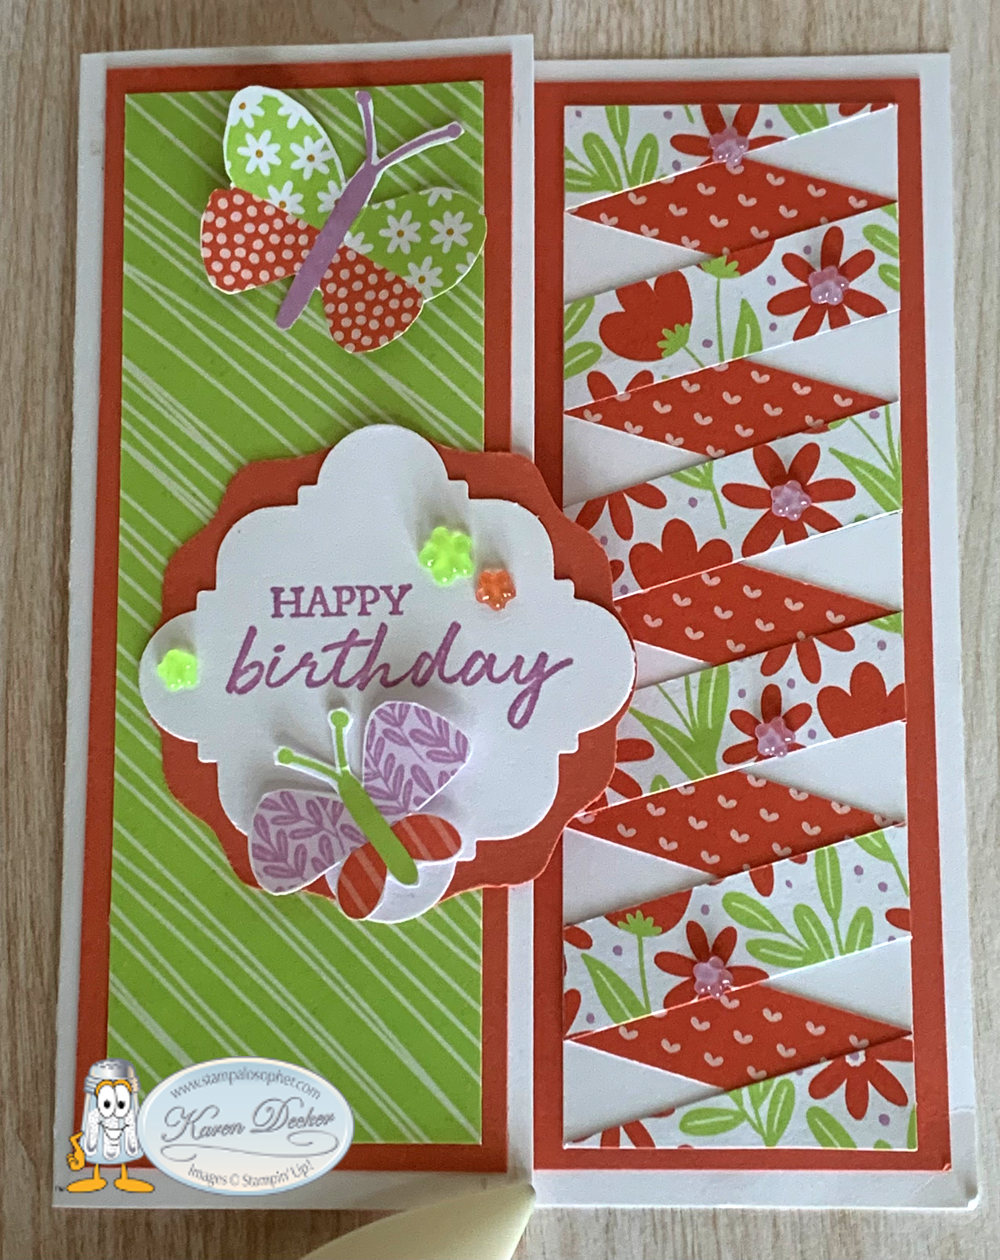
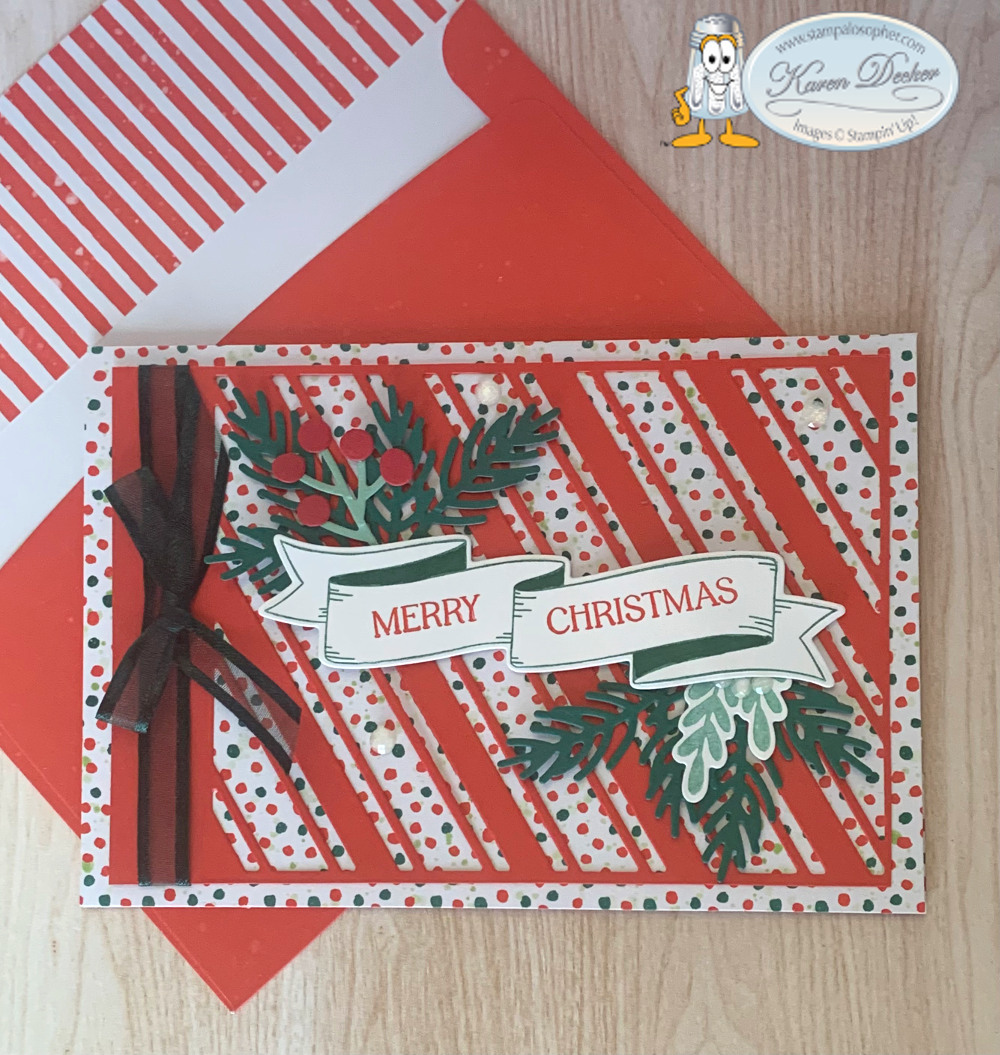
Let’s look at a technique called the ‘Twisted Ribbon Card Technique’! By cutting strips of designer series paper and laying them at diagonals it really looks like twisted ribbon.
 .
.
Our creator is Karen Bouchikas of Karen’s Stamping Place. Here is a pdf of the card cuts with a link to the you tube by Karen.
Case The Creator #7 printable pdf file
Here is a screen print of the pdf file. Because the following is a screen print the you tube link will not work directly from the blog post. You need to click on the pdf file and then click on the youtube link — the link works from the pdf file. Thank you to the dear follower who left a comment to point that out! I do apologize for the confusion.
 .
. For my card I used the Butterfly Kisses Designer Series Paper for the ribbon strips and the left side panel on a mat of Calypso Coral and a base of Thick Whisper White. The two little butterflies on the front are cut from one of the 6 x 6 pieces of designer series paper. The butterfly on the inside of the card is stamped with the Best Butterflies stamp set using Calypso Coral, Granny Apple Green and Fresh Freesia. The little flowers are from the Fun Flowers Resin Shapes.
I don’t recognize the labels you used for the Happy Birthday?!
They are punches, Sal. The Calypso Coral background is the Decorative Circle punch from the Annual Catalog and the top white shape is the Handmade Tag Punch. The ‘happy birthday’ greeting is from the Shaded Summer stamp set. The inside greeting is from Pansy Patch.
Check out another way I used the Handmade Tag Punch with the Handmade Wishes stamp set.
 .
. No, Sal, that is part of the stamp set! Everything you see is part of the stamp set; let me show you:

That set is a must have set!
Let’s see what the rest of my amazing stamping group did for the Case The Creator card. For those of you who are new to following Stampalosopher, the fourth Tuesday of the month I hold a Zoom meeting at 11:30AM and we share our swap cards and what we made for that month’s Case The Creator card. I send out the instructions with the video link about two weeks in advance. Send me your email and you are welcome to join us!
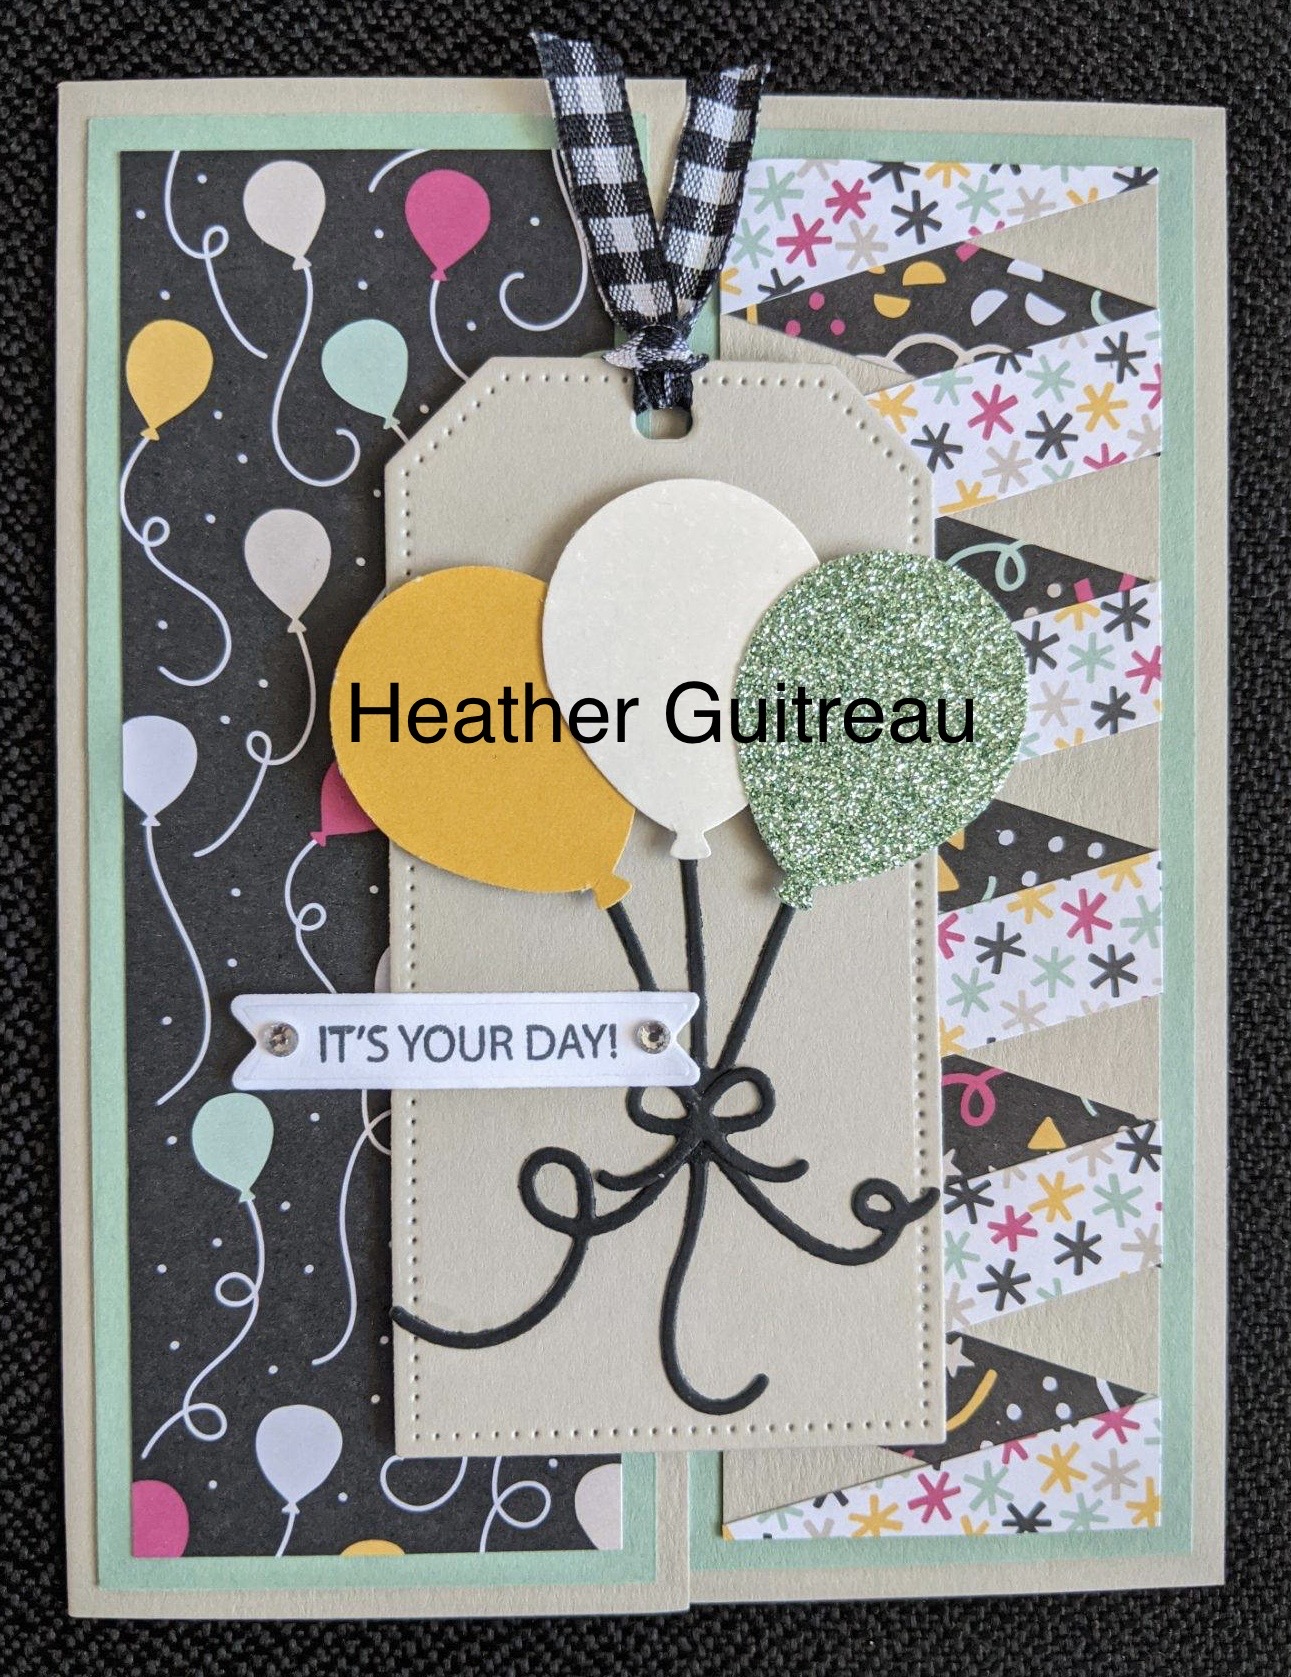
Heather’s birthday card with balloons is just awesome! With light strips on dark strips the ribbon really looks like one piece folded all the way down.

 .
. Jo’s card with the gold vellum and gold sequin trim was a card fit for a king!
 .
.  .
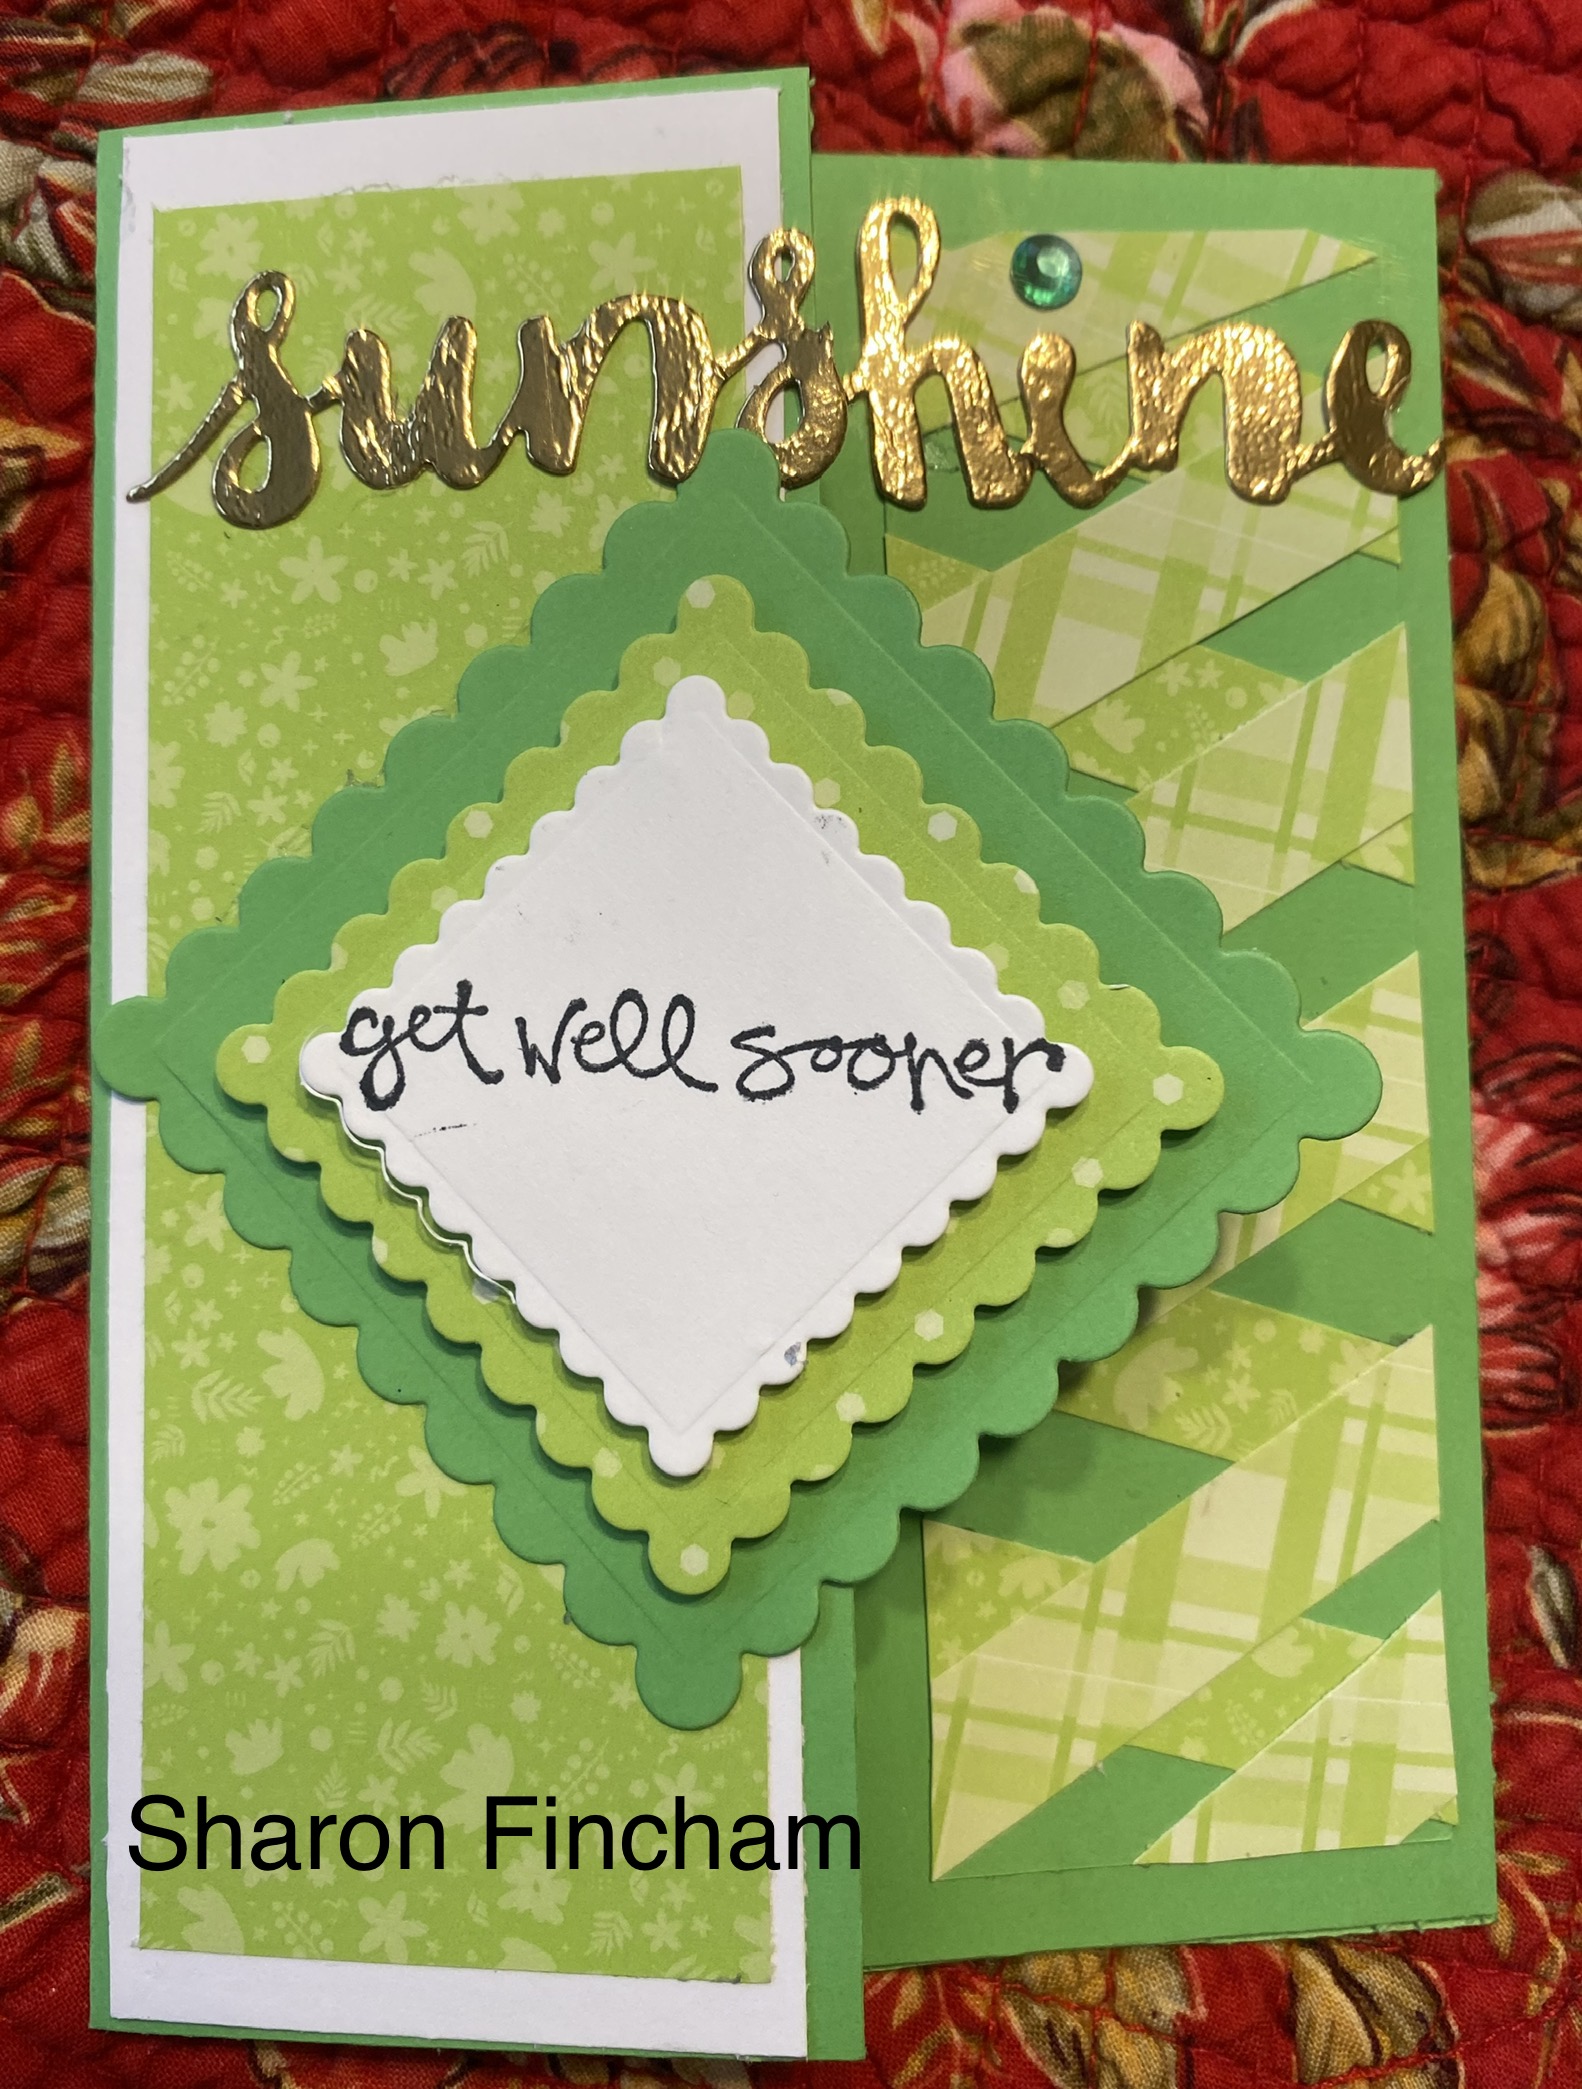
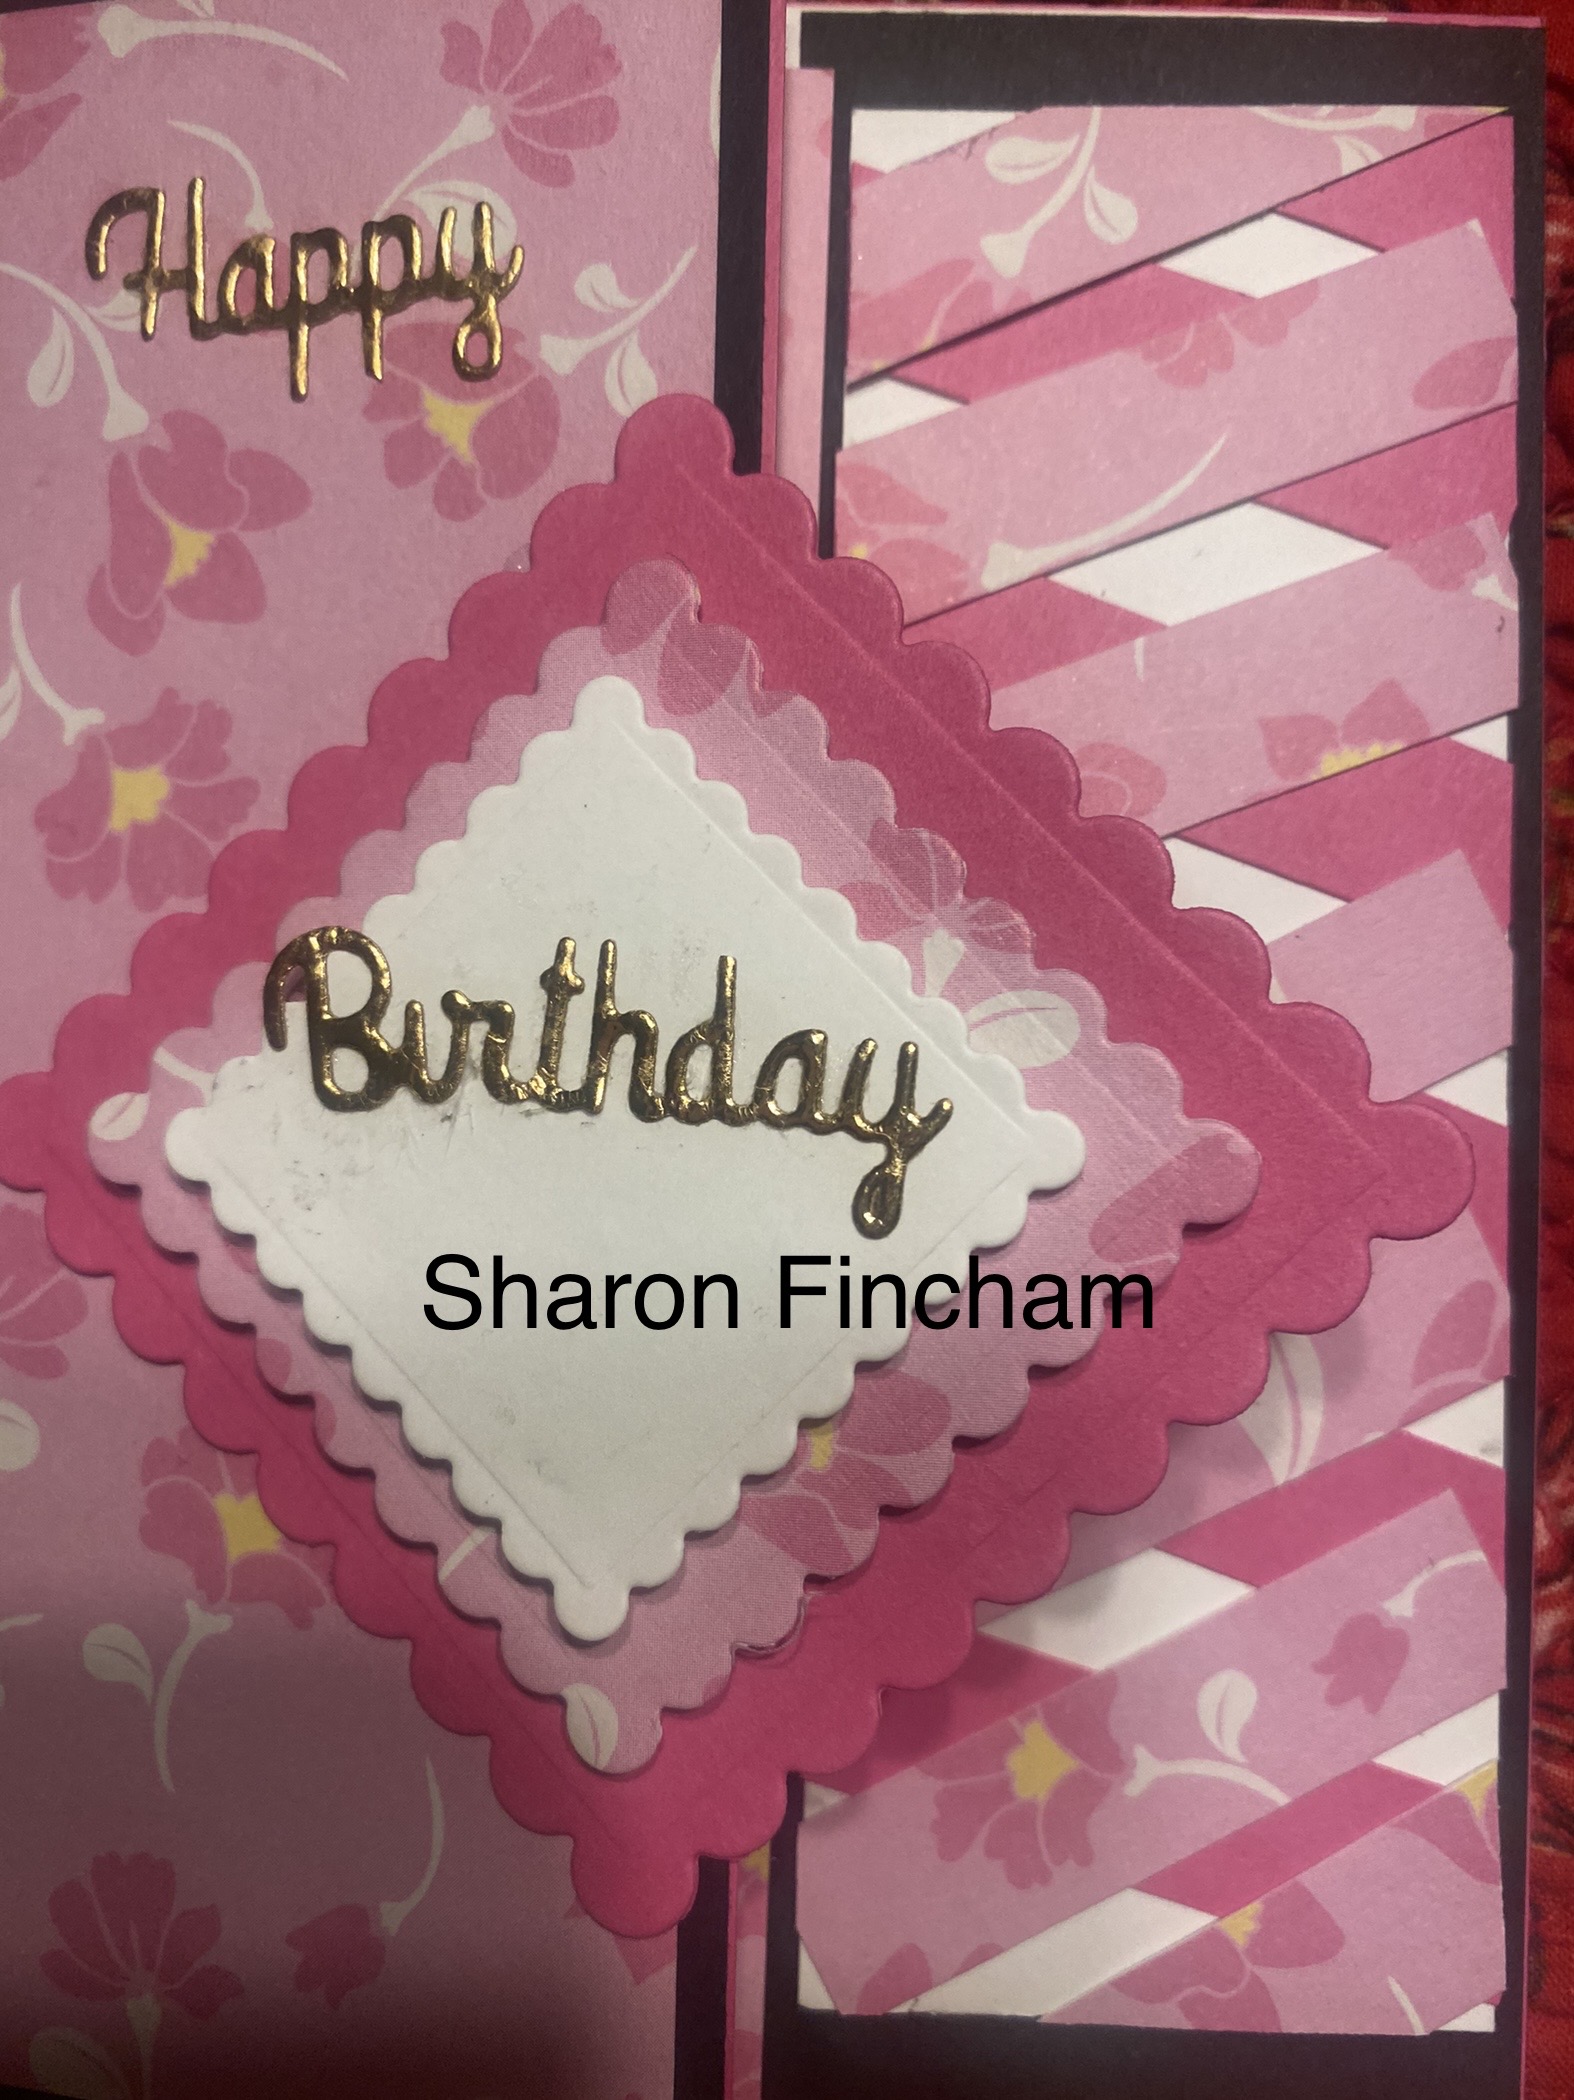
. Joy did a criss cross with her strips and put them on the left side – so unique!
 .
. Sharon also crisscrossed her strips and had such fun she made three cards:
 .
.  .
. 
Send me a picture if you make a twisted ribbon card and I can add it to this post! That is the nice thing about blogs! I want to make a twisted ribbon Christmas card so check back next month to see if it is posted. I kept waiting to post hoping I would get it done but finally decided I had better just add it at a later date.
Joy Meadows hosted our shoebox swap and taught us how to fold paper to make a kimono! Aren’t her creations beautiful?!

For my swap card I used the Wonderful World designer series paper from the Sale A Bration free offering:

Except for the greeting and the inside, it is an exact case of Linda Bedinger’s card on Ink and Ingenuity. The flowers are fussy cut from the Designer Series Paper. I loved the little bitty flowers on the side matching the great big flowers on the main front. I would do this again if I had a large image and small images on designer series paper! I did several different inside greetings:
 .
.  .
. 
The front ‘A little hello…’, the ‘Happy Birthday’ and the ‘Thank You’ are all from Pansy Patch. The ‘Congratulations’ is from Happiness Abounds.
Recipe for Wonderful World swap card:
- Base: Thick Basic White, 8 1/2 X 5 1/2 scored at 4 1/4
- Front Mat: Pear Pizzaz, 4 across X 4 1/4 down
- Front strips and Inside Mat: Mossy Meadow
- 1/4 X 4 1/4, vertical strip on front
- 1/4 X 4, horizontal strip on front
- 4 X 5 1/4, Inside Mat
- Inside Layer: Basic White, 3 1/2 X 4 3/4
- Side Strips: Wonderful World Designer Series Paper
- 3/4 X 4 1/4 for the front
- 3/4 X 4 3/4 for the inside
- Flowers: Wonderful World Designer Series Paper, fussy cut each
- Ink: Mossy Meadow
- Stamp Sets: Pansy Petal and Happiness Abounds
- Embellishments: Various to go with the flowers
By using a generic greeting on the front, I could include both the Happy Birthday and Thank You in my swap so folks had a choice for their greeting.
That’s all for today! Come on back when I post the projects we did the next month.
SAL, Stamp A Lot , Smile A Little and always be Salt And Light to those you meet.
Karen. Click on little Sal in the computer to go to the online store
Triple Time Stamping
Have you ever tried ‘Triple Time Stamping’? It gives a fun look and is not hard to accomplish. You have three sizes of Basic White temporarily adhered together on which you stamp your images and then you pull them apart and add the borders. Easy peasy!
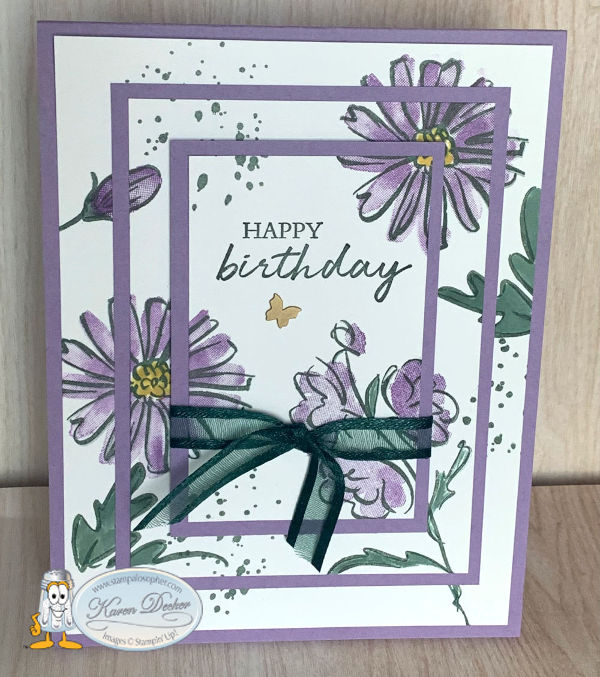
Color and Contour Triple Time Stamping Card (A)
 .
.
If you love a water color look, you will love this stamp set. You actually have one stamp for the outline and one stamp for the coloring. The stamps for coloring do not color in the flowers perfectly, use a Blender Pen or Water Painter if you prefer a perfectly colored flower with a water color look or use a marker in the same color.
I love those little dots you added!
They are part of the set, Sal, take a look-see:

The Scalloped Contour Dies go with the set. Where you see the stamps with a pinkish color, that is showing a die that cuts that stamp. This die set is a must for your stash!

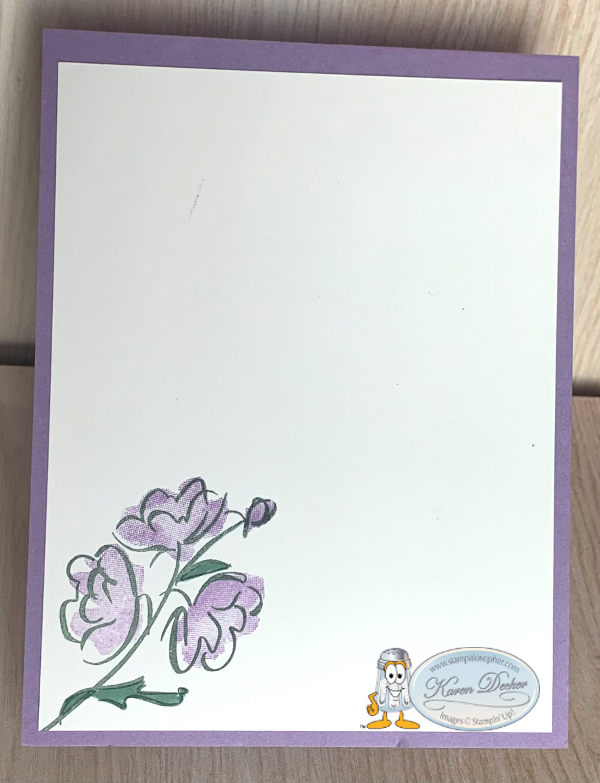
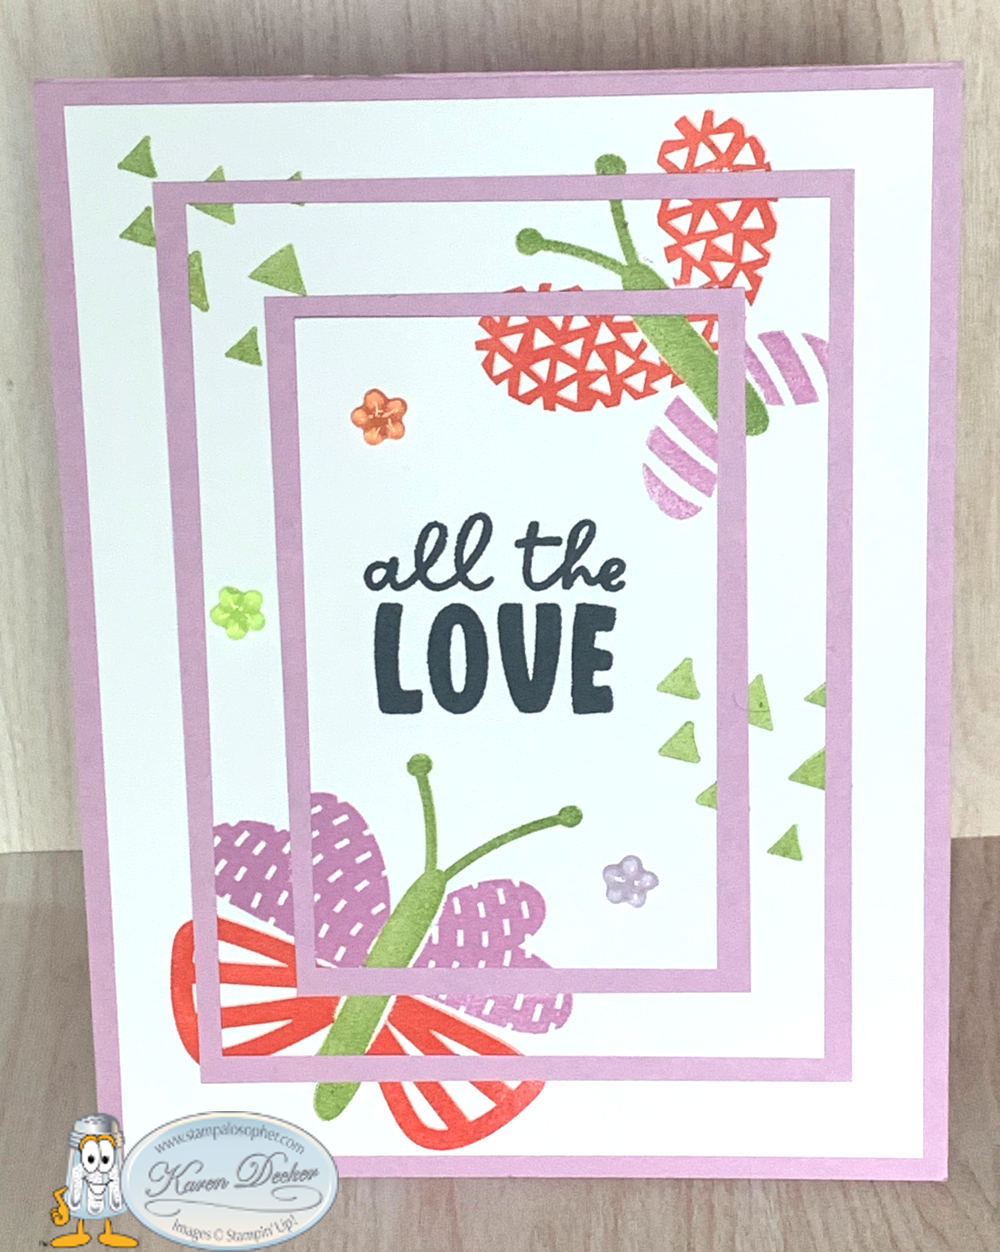
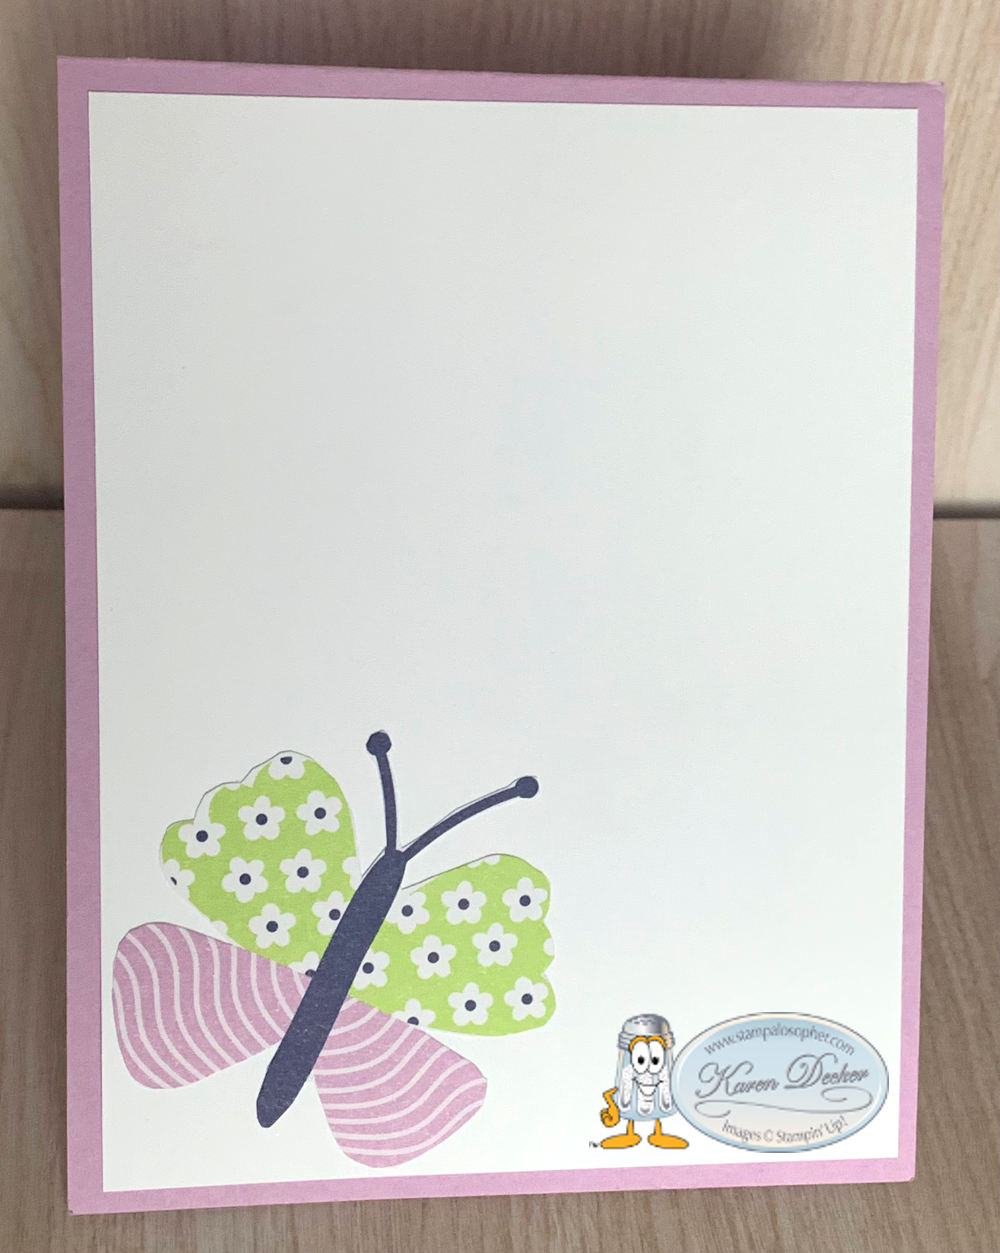
Best Butterflies Triple Time Stamping Card (B)
Design your own whimsical butterfly with the Best Butterflies stamp set! There’s big wings, small wings, big bodies, small bodies, big words, small words and triangles or dots for added interest! I used Fresh Freesia and Calypso Coral with Granny Apple Green on this card with a Fresh Freesia base. Those little flowers are Fun Flowers Resin Shapes.
 .
.  .
. For the butterfly card I found it best to use the Stamparatus to stamp the images; with the added layers it is a bit hard to get the images to stamp completely so you need to stamp a second or third time. However, remember there is a border that will cover 1/8 inch of the image so don’t fret too much about those incomplete edges right next to a layer where the mat will be.
For the Best Butterflies card, use one plate for the butterfly bodies- stamp this first then mask, a second plate for the calypso coral wings and a third plate (or the back of your plate) for the fresh freesia wings. It makes a workshop go quickly to have them all aligned on different plates for perfect stamping. I had several butterfly body masks already fussy cut with our new Masking Paper to lay over the bodies before stamping the wings. Post it notes work pretty well if you don’t have the masking paper, just stamp the image on the post it note and fussy cut.
For the Color and Contour card, I mounted the stamps on acrylic blocks to give the stampers opportunity to stamp and color only what they wanted. I had an Evening Evergreen marker available so if the image wasn’t stamped clear to the edge we could use the marker to complete it, if we saw it was necessary after adding the border mats. I also had a Highland Heather marker so those who didn’t like the watercolor look could color in their flowers.
Secondly, start with stamping your greeting on the center layer, then stamp the images around the greeting.
Recipe for Triple Time Stamping Layers
- Base: A – Highland Heather; B- Fresh Freesia; 11 X 4 1/4, scored at 5 1/2
- Mats: same cardstock as bases
- 3 1/4 X 4 1/2
- 2 1/4 X 3 1/2
- Artwork Layers: Basic White, Temporarily adhere together with temp glue or use just a bit of snail and then use your fingers to rub the snail so the oil in your fingers makes the glue less sticky
- 2 X 3 1/4
- 3 X 4 1/4
- 4 X 5 1/4
- Inside Layer: Basic White, 4 X 5 1/4
- Ink: A- Evening Evergreen, Highland Heather, Crushed Curry; B- Fresh Freesia, Calypso Coral and Granny Apple Green with the greeting in Tuxedo Black.
- Embellishments: A- Evening Evergreen Open Weave Ribbon, Brass Butterfly; B- Fun Flowers Resin Shapes
The recipe sounds pretty easy!
The beauty, Sal, is all in the stamping and adding the borders!
For the Color and Contour card I used a Happy Birthday greeting from the Shaded Summer Stamp Set.
For the inside of the Best Butterflies card, I used a fussy cut butterfly from the Butterfly Kisses Designer Series Paper.
Click on little Sal in the computer to go to the online store.
SAL, Sharing A Love of stamping
Karen
Welcome to my blog!

Sal Window to Products


