
Valentines 2025
(If you are opening this post in a mobile device, be sure and click a second time on the header to go to the blog where the pictures are shown correctly.)
It was so fun to make cards for Valentine’s Day! I had purchased dies last year but didn’t use them. I can’t decide which I like the best, so leave a comment telling us of your favorite. This first one was for my grandchildren showing a little teddy bear stacking balloons on top of each other to say ‘I LOVE YOU’. The balloons are die cut from a glossy card stock but the picture didn’t pick up the shine. The die cut out all the hearts in one cut, so I used different colored papers and then glued them individually on the white layer that I embossed with a fun heart embossing folder. With 4 cards to make it was great to have different colors to mix and match.


For the inside I used our spiral die and glued one end on each side so it opened up with a flash of hearts. The children love an interactive card!
- Kokorosa Die for teddy bear and balloons
- Sunshine Wishes Dies for the layered heart on the left of the inside
- Lots of Heart Stampin’ Up! set for the “my heart smiles just thinking about you”
- Think Happy Stampin’ Up! for the little smiles inside the heart
- Spiral BigZ die
- The embossing folder is one of the mini folders from Stampin’ Up! so you run it through twice
Next, I used the same embossing folder for a layer and then die cut interconnected hearts and layered them on a piece of designer series paper.


- Kokorosa Die for interconnected hearts connected to side strips
- Stampin’ Up! Love & Happiness stamp set for the tiny Happy Valentine’s Day
- Stampin’ Up! Heartfelt Stamp Set for the “Roses Are Red…..So Lucky” and the heart in bottom corner
 As many as you made, I’ll bet you had Paul’s help.
I did, Sal, which made it more efficient and certainly more fun!
Third for the day is a card with a blue background for a friend (you know who you are) who loves blue!


- Kokorosa Die for the flurry of hearts coming out of the envelope
- Stampin’ Up! envelope maker using 1/2 of smallest measurements
- Stampin’ Up! Heartfelt Stamp Set for the “Roses Are Red…..So Lucky” and the heart in bottom corner
The inside bottom heart is stamped but it looks so clear in the picture that it looks like an additional die cut. Paul used the Stampin’ Up! envelope maker to make the little white envelope.
Last but not least is another set of interconnected hearts on a sponged background for a rainbow look. For this construction, there are the hearts die cut in purple, then a layer of white die cut for placement of the purple and then a smaller layer of white card stock sponged to go behind those two layers.


- Kokorosa Die with the interconnected hearts
- Stampin’ Up! Heartfelt Stamp Set for the “Roses Are Red…..So Lucky” and the heart in bottom corner
That is a nice variety of purple, blue, pink and white bases.
Purposeful! Doing a whole set of cards just alike can be very productive, but it can get boring if you don’t have an assembly line for each step of the card.
And when have you had an assembly line? I don’t think two people count as a “line”.
Hmmmm…… maybe that is something I should do in classes. NOT!
Thank you for giving me some time today. Hopefully you have been inspired, even to just see some nice wording you can stamp on anniversary cards or birthday cards or ……
SAL, Such A Lot of Valentines
Karen

Quotation of the day:
“Sometimes the greatest gift you can give someone is simply to include them.”
Wintertime Greetings
(If you are opening this post in a mobile device, be sure and click a second time on the header to go to the blog where the pictures are shown correctly.)
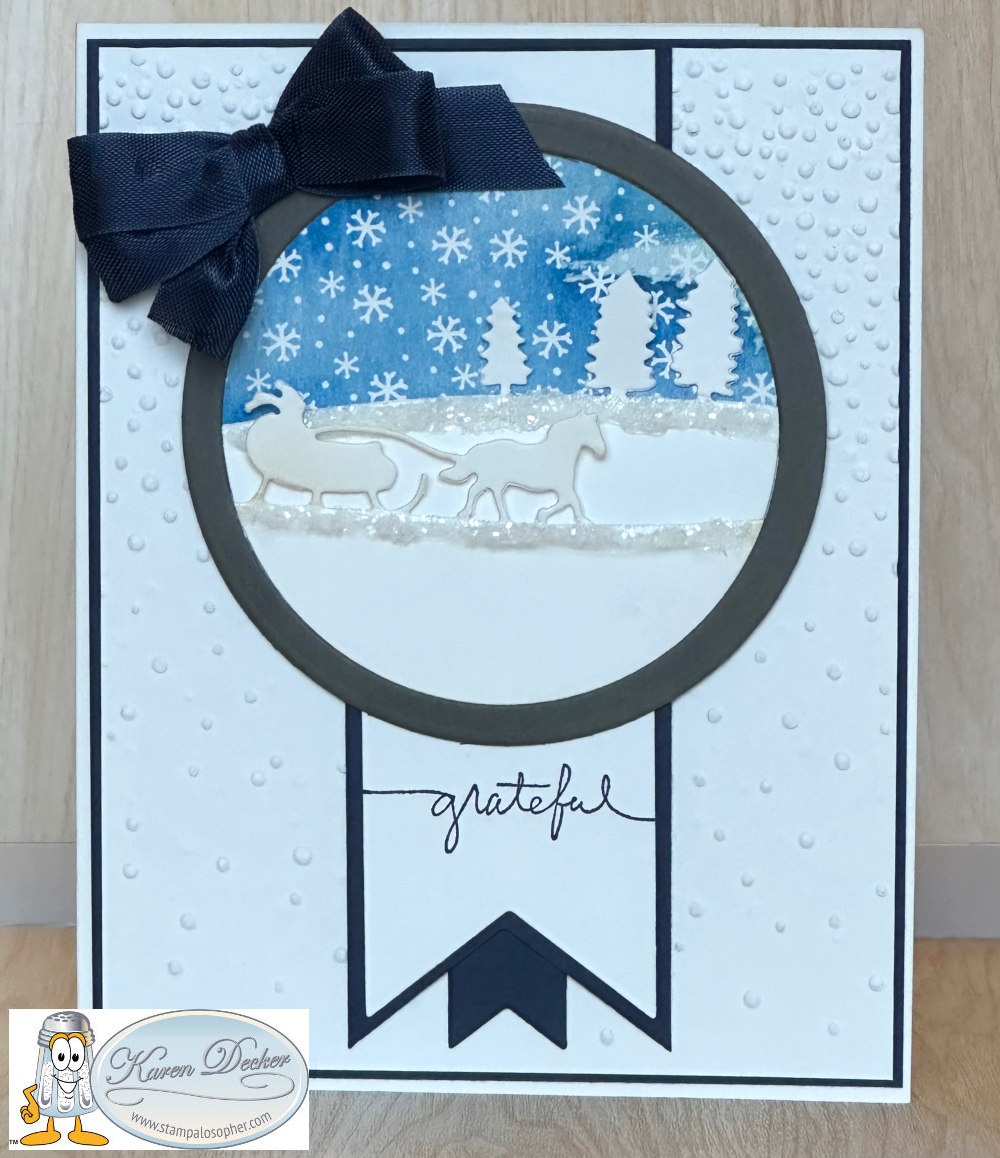
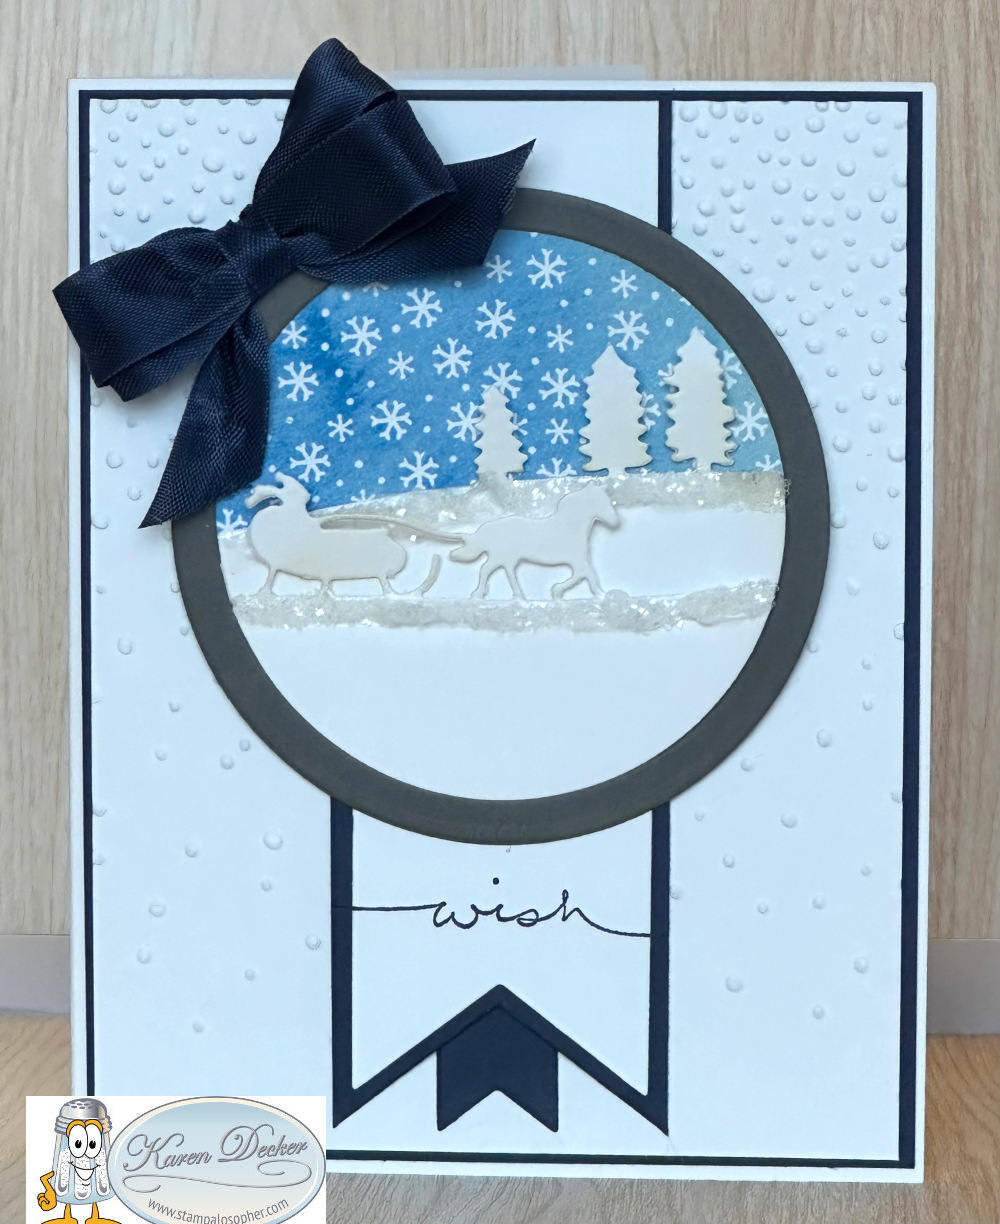
Are you staying warm? It has been cold here in Castle Rock, Colorado so it is fitting that when I needed a thank you card and a birthday card I made them with a winter scene.
 .
.
 .
.
Cherie Davies made a card like this back in December of 2015 and I saved it to Pinterest since I had purchased the Sleigh Ride Edgelits from Stampin’ Up! and knew ‘someday’ I would use them. That someday finally came, though I tweeked a few details as usual and changed the greetings. I did make a Christmas card with the framelits – HERE.
- Base: Basic White, 5 1/2 X 8 1/2 scored at 4 1/4
- Layer 1 (X2): Night of Navy, 5 3/8 X 4 1/8 (1/16th reveal)
- Layer 2 (X2): Basic White, 5 1/4 X 4 (1/16th reveal); Emboss with Snowfall Embossing Folder
- Banner:
- #3 framelit, Basic White
- #4 framelit, Night of Navy, cut the sides of the banner to be 1/16″
- #1 framelit, Night of Navy, tail between the large framelits
- Circle:
- Use Circle framelits #6 and #7 to make a frame in Grey Granite
- Die cut a #7 circle framelit from snowy DSP and sponge the edges with blue
- Die cut two #6 circle framelits from Basic White
- Die cut one about 1/2 way with trees from Sleigh Ride Edgelits
- Die cut one about 1/3 of the circle with the sleigh and horse from the Sleigh Ride Edgelits
- Use Snow puff paint sprinkled with glitter on the top edges of both
- Bow: Blue Seam Binding Ribbon made into a double bow
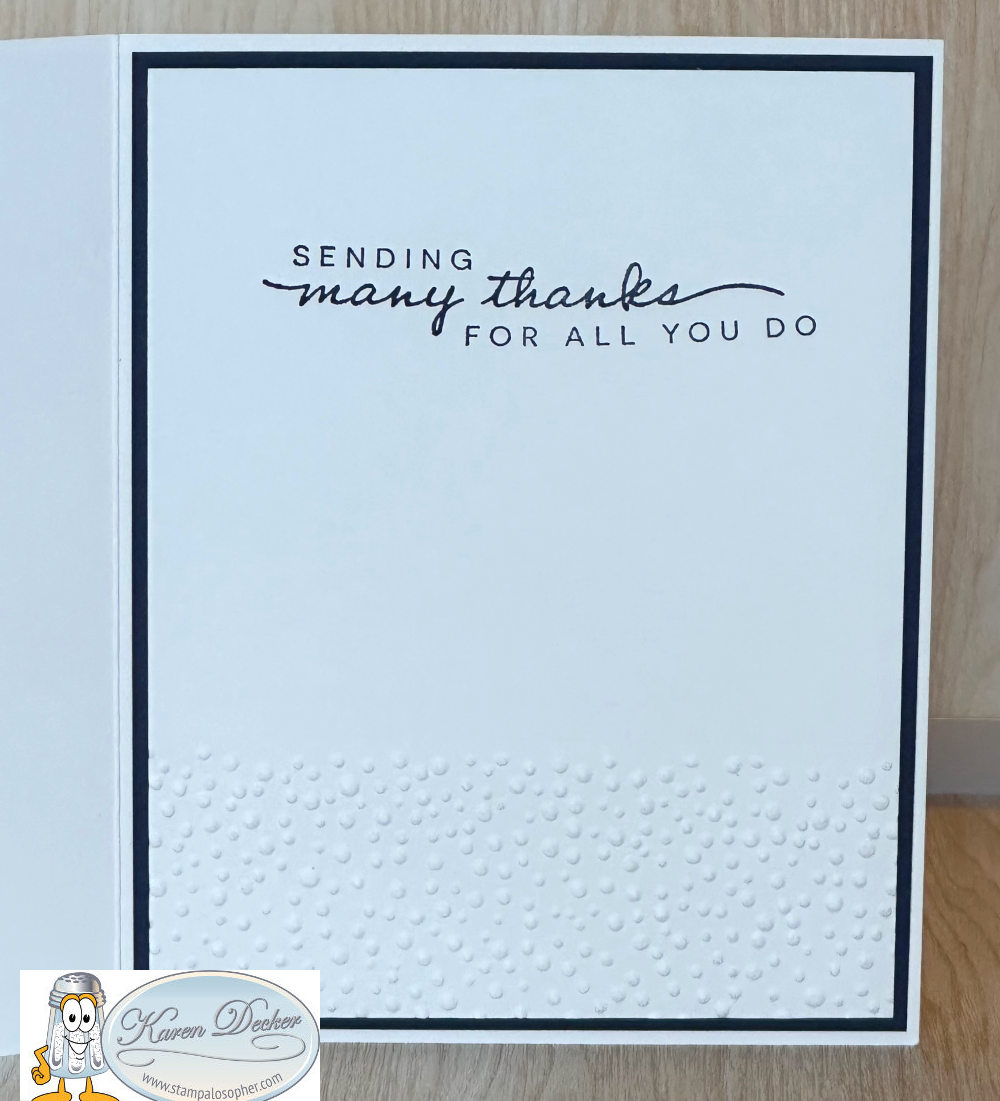
- Greetings: Stamp in Night of Navy
I think you were still dreaming about the sleigh ride you went on in Steamboat before Christmas.
You are probably right. It was such a special time to go to Steamboat and have a sleigh ride with the family on our 49th wedding anniversary.
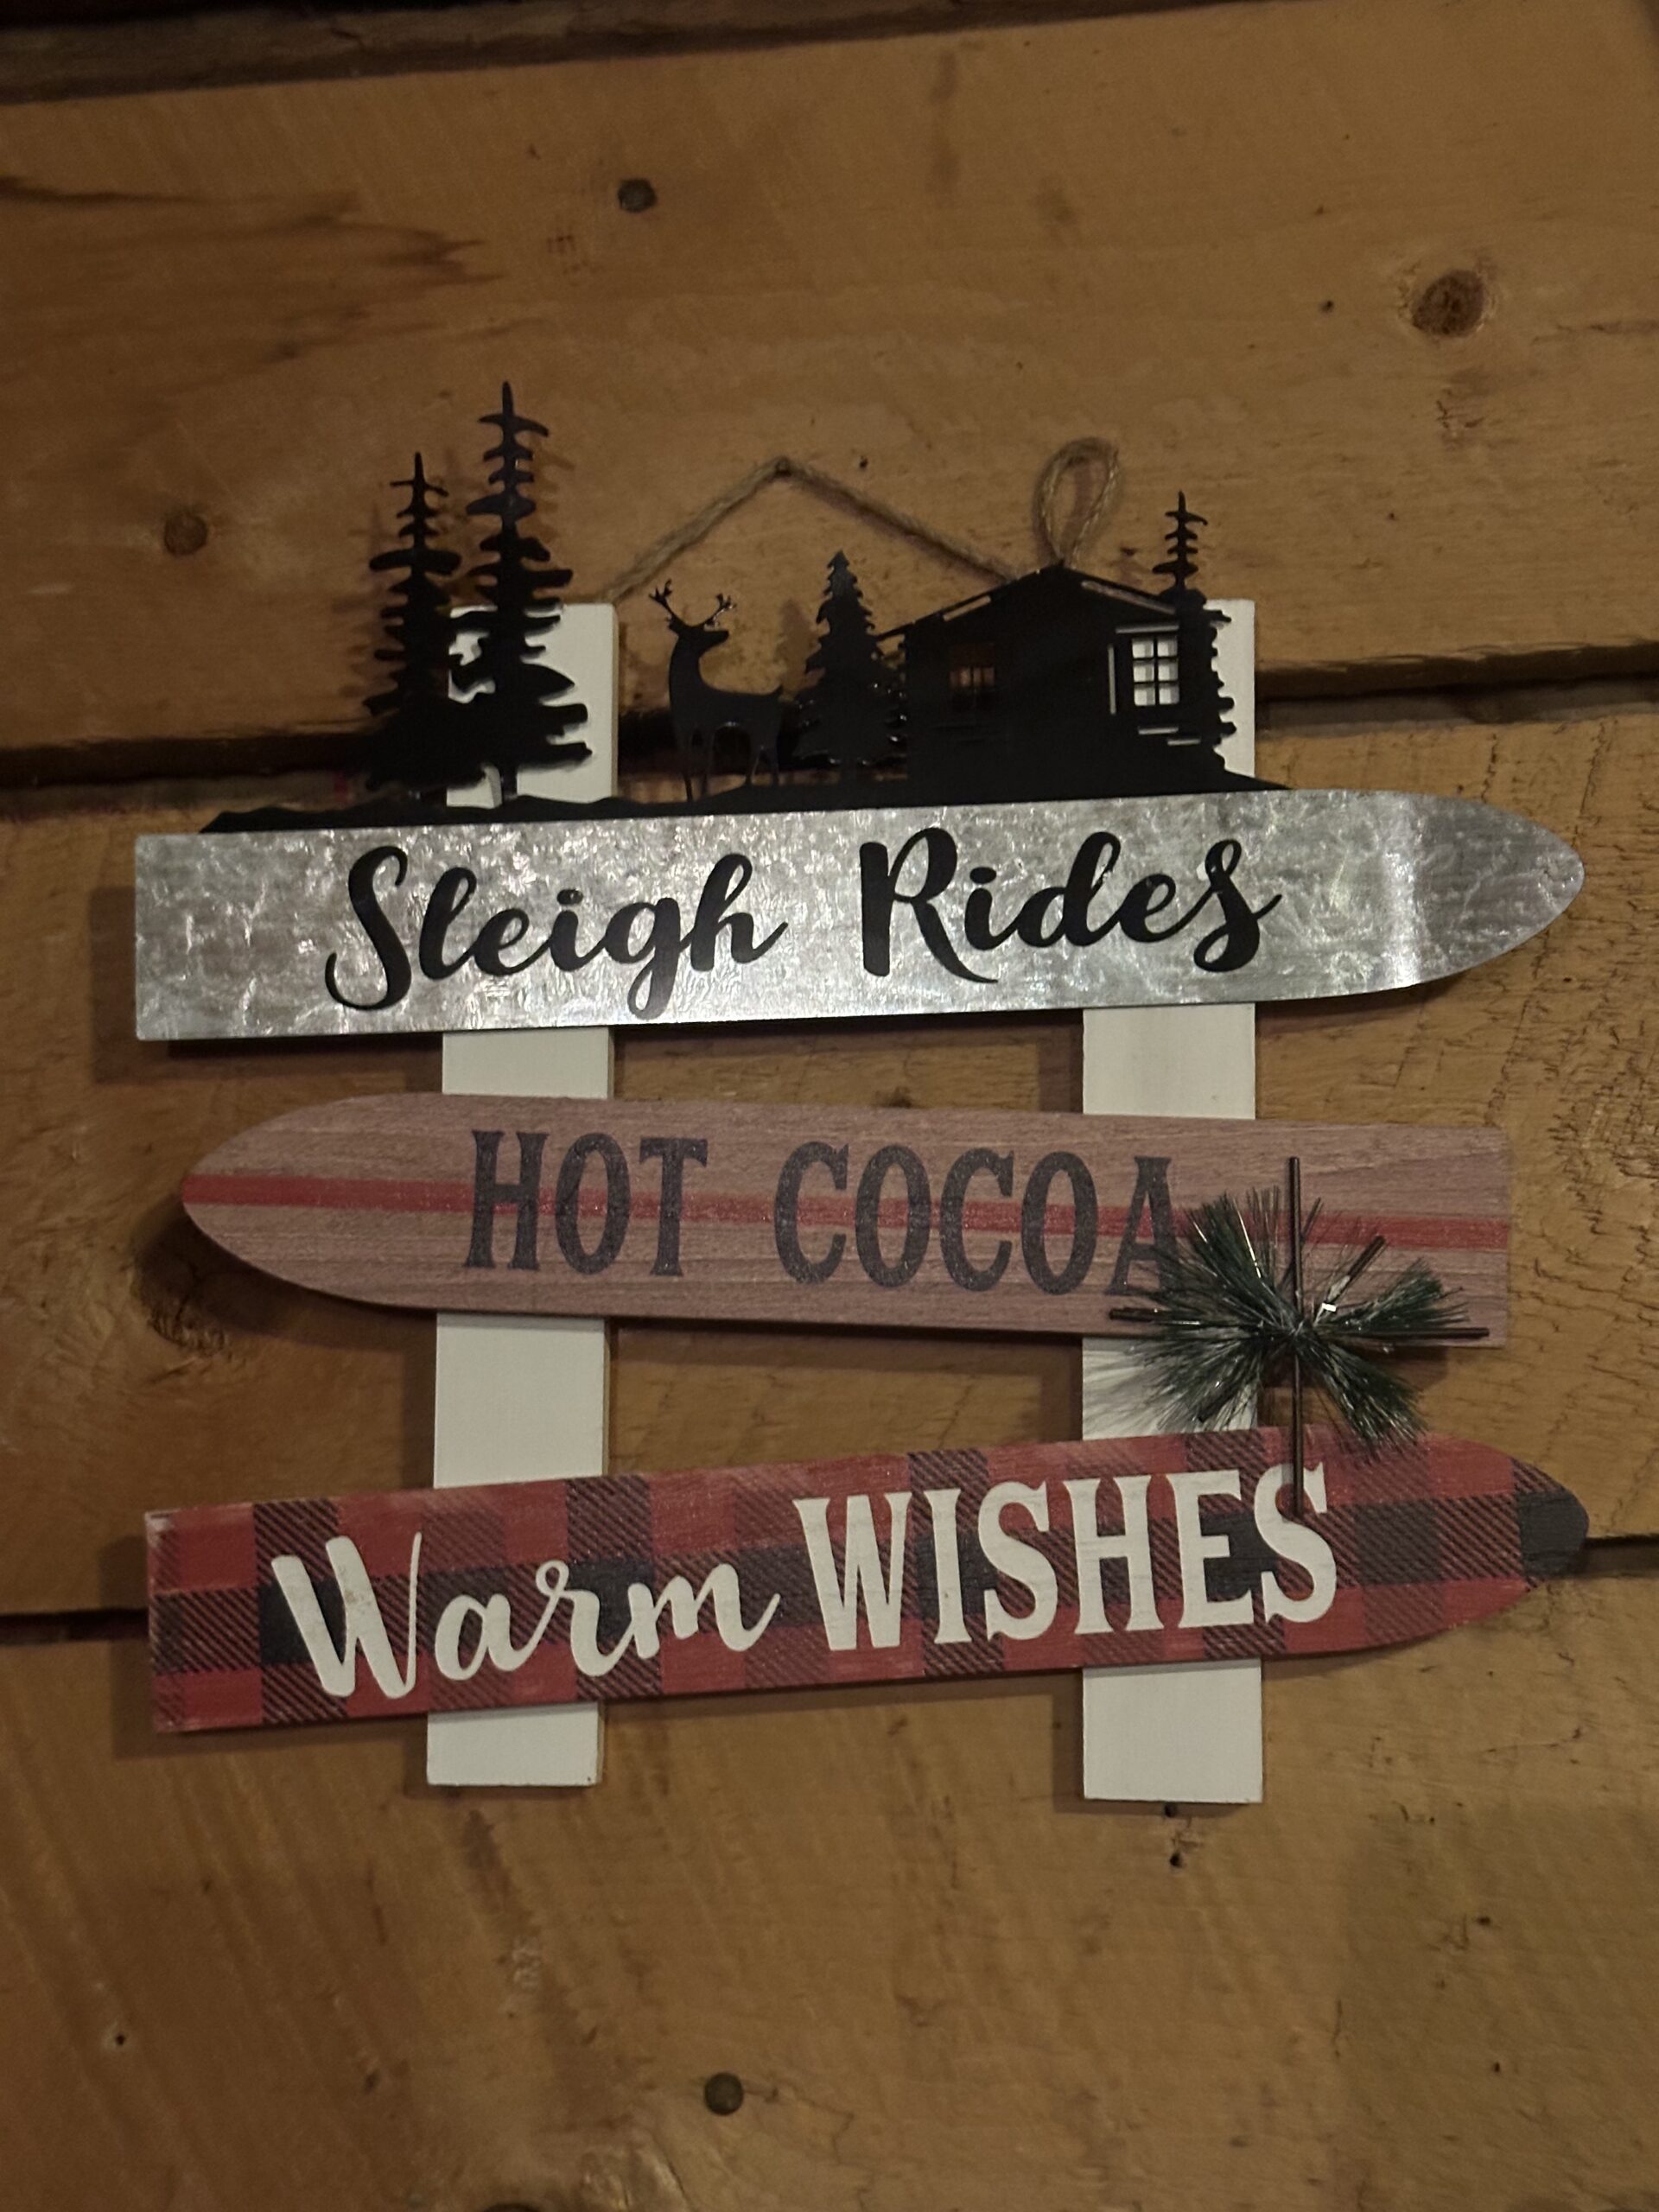


We did the hot cocoa ride. They also do dinner rides. It was an unforgettable afternoon with a glorious sunset to finish the day. So when you are in Steamboat Springs you can ride a hot air balloon -that’s the pilot in the picture- and then go for a sleigh ride.
I think they would rather know the name of this place than the name of the stamps you used.
Nah, once a stamper, always a stamper but it was the Bar Lazy L ranch. I will link it in the computer below.
Thanks for stopping by.
SAL, Snowing A Lot
Karen
Quotation of the day:
“TRUTH does not mind being questioned.
A LIE does not like being challenged.”
Karen Decker’s December 2024 Shoebox Event
(If you are opening this post in a mobile device, be sure and click a second time on the header to go to the blog where the pictures are shown correctly.)
My prayers go out to all those suffering from the LA wildfires and a special prayer for the firefighters and first responders who brave it all to protect others from losing it all.
Our last and final Shoebox Event was hosted by me with a Christmas luncheon, snowman gift exchange game, and a couple rounds of bunco for laughs! Card making of course started the day and I used the unique Krazy Kreations stickers to create one Christmas card and one friend card.
 .
.
 .
.
I created a way to bring the celebration of the birth of Jesus with the music notes and Stampin’ Up! stamps.
The dancing deer do look like they are celebrating.
That, Sal, is Designer Series Paper from Stampin’ Up! as is the red and black plaid I used for accents.
So the outline of the deer is actually a sticker?

Yes, Sal. So are the music notes on the outside, the little bird and the greeting, bell and holly up top. The little bird is from the ‘Hello Winter’ sticker bundle, and the green boughs and greeting are also stickers. Here are steps for creating with a Krazy Kreation’s sticker when adding to glitter paper:
- Burnish a piece of KrazyKreations fine glitter paper.
- Carefully peal off the stickers that you want to be glittery, place on the glitter paper.
- Burnish the sticker. I used our ink roller.
- Color the image using ALCOHOL markers.
- Fussy cut the image.
- Use the edge of a black marker to have a definitive black edge on the cut out sticker.
- Apply to your project.
Woah – that is not as easy as stamping!
Just different, Sal. It is always fun to learn new things at any age.
Recipe
- Base: Sahara Sand, 5 1/2 X 8 1/2, scored at 4 1/4
- Layer 1 (X2): Basic Black, 5 3/8 X4 1/8
- Layer 2: Red & Black plaid DSP, 5 1/4 X 4
- Layer 3: Basic Black, 4 X 3 1/2
- Layer 4: Sahara Sand DSP with deer, 3 3/4 X 3 1/4
- Inside: Sahara Sand DSP with deer, 5 1/4 X 4
- Inside Strip: Red & Black plaid DSP, 3/4 X 4
Inside Music Notes: Stampin’ Up! ‘Music From The Heart’
Heaven & Nature Sing: Stampin’ Up! ‘Nature Sings’
For Unto You… and Wishing You Every Blessing…: Stampin’ Up! ‘Every Blessing’
Alcohol Markers Used:
- Bronze with the Color Lifter for the deer; Add color to the edge then pull it in with the Color Lifter
- Lt Granny Apple Green for the holly leaves
- Dk Real Red for the bow on bell, the holly berries and the belt circles and the bird’s hat
- Basic Black for the belt the hooves, the nose and the edging
- Lt Smoky Slate for the bell
- Dk Smoky Slate for the bird with the Color Lifter to blend color
The downside of using Krazy Kreations stickers is using them up and not having any more for future cards. However, they are still available in the store so I could purchase more. I will link the Krazy Kreations store in the computer below.
How often do you go back and make the same card?
Good point, Sal! I always want to try something new.
For the Snow Friend card I went through my stash of DSP-designer series paper, and found two sheets with a watercolor look that worked well together:
 .
.

I am using the Krazy Kreations Snow Friends Sticker Bundle. Everything you see is from that bundle, even the stars on the dividing strip in the middle. I made some kits with a strip of 11 stars and some kits with 10 stars and two red jewels.
Recipe
- Base: Coastal Cabana, 5 1/2 X 8 1/2, score at 4 1/4
- Layer 1 (X2): Basic Black, 5 1/4 X 4
- Layer 2 at the top: DSP with snowflakes, 2 1/8 X 3 7/8
- Layer 2 at the bottom: DSP watercolor look, 3 X 3 7/8
- Inside top layer: 5 1/8 X 3 7/8
- Fine Glitter Paper: 3 X 3 for stickers, 3 7/8 X 3/8 for the strip separating the two DSPs on front
Alcohol Markers Used:
- Dk Real Red for the bird, the hat and the inside of the heart star
- Lt Balmy Blue for the outline on the bear with the color lifter for blending
- Dk Basic Black for the edging
Thank you for stopping by today to see a new way of creating greeting cards!
SAL, Sharing A Love of Learning
Karen
Riddle of the day:
Question: “What four-letter word can be written forward, backward, or upside down and can still be read from left to right?”
Answer: “NOON”
Jo Brooks November 2024 Shoebox Event
(If you are opening this post in a mobile device, be sure and click a second time on the header to go to the blog where the pictures are shown correctly.)
Happy New Year everyone!! May the Lord bless you and keep you this 2025 year and may He make His face to shine upon you … and give you peace! Let’s pray the same for our country as the election results are certified this January 6, 2025. May the Lord bless and keep our country and its leaders and may He make His face shine upon the USA ….. and give us peace. That is a rephrasing and shortening of the benediction in Numbers 6:24-26.
Jo Brooks was our Shoebox Event Hostess in November and had delightful Thanksgiving cards for us to make. Remember- with a shoebox, Jo is the designer and makes card kits for each of us to recreate the cards she designed. The cards you see here were put together by me but designed by Jo so mine may not look quite as good as the originals that Jo created.
This first card uses the silhouette technique and her embellishments were feathers! So creative!


The second card Jo had for us uses buttons! That was inspiring since I have a huge collection of buttons and haven’t used them very often. With metallic leaves and pumpkin vines it is quite striking; and who doesn’t love a bundle of wheat, a fence and a wheelbarrow! Truly “Autumn beauty everywhere” as the inside greeting states.


The embossed sky looks like wind blowing the clouds around.
It does, Sal, and added another creative touch to the card.
Thank you, Jo!
SAL, Shoebox A Lot of ideas
Karen
Riddle of the day:
Question: I have branches, but no fruit, trunk, or leaves. What am I?
Answer: A Bank.
Sympathy Cards
(If you are opening this post in a mobile device, be sure and click a second time on the header to go to the blog where the pictures are shown correctly.)
The last quarter of 2024 was harsh for many of us. There were four of us stampers who lost our mothers and one of my Bible study friends lost his father. The old saying that deaths come in threes didn’t prove true this year.


Stamps: Stampin’ Up! ‘Love & Sympathy’, and Acushla Stamp by Petticoat Parlor- I will link Petticoat Parlor in the computer below.
That second one is the stamp you won at the Scrapbook Fair!
Yes, Sal, and I stored it in the ‘Love & Sympathy’ stamp case to remember that I have it.
Dies: The BigZ Lattice Die, the Window Frames Framelits Dies, Cherry Blossom Dies, Cross of Hope Die, Forever Flourishing greenery die
Recipe
- Base: Basic Gray, 5 1/2 X 8 1/2, scored @ 4 1/4
- Layer 1: Basic White, 5 1/4 X 4, die cut with Window Frames Framelits Dies
- stamp Love & Sympathy in lower right corner
- use the cut out for the greeting on the inside
- Lattice under the Layer: Basic White, 4 X 4 1/4, die cut with BigZ lattice Die
- Bouquet: Flowers from the Cherry Blossom Dies
- Flirty Flamingo cut outs with Petal Pink centers; 2 large & two small flowers, (one for the inside), glue the flower on top of the Petal Pink for centers
- Mint Macaron stems using Forever Flourishing dies, 5 outside and 1 inside die cut
- Cross: Silver Foil cut with Cross of Hope Framelits
- Embellishments: Pearls on the lattice
While I had all the dies out I made a Thank You card with the same design and a butterfly in the middle.


I used the Love and Sympathy stamp set a little differently for this sympathy card:


Thanks for stopping by!
SAL, Sailing ALong into the new year
Karen
Riddle of the day:
Question: Kids can make it, but never hold it or see it. What is it?
Answer: Noise.
Birthday Pop Up Card
(If you are opening this post in a mobile device, be sure and click a second time on the header to go to the blog where the pictures are shown correctly.)
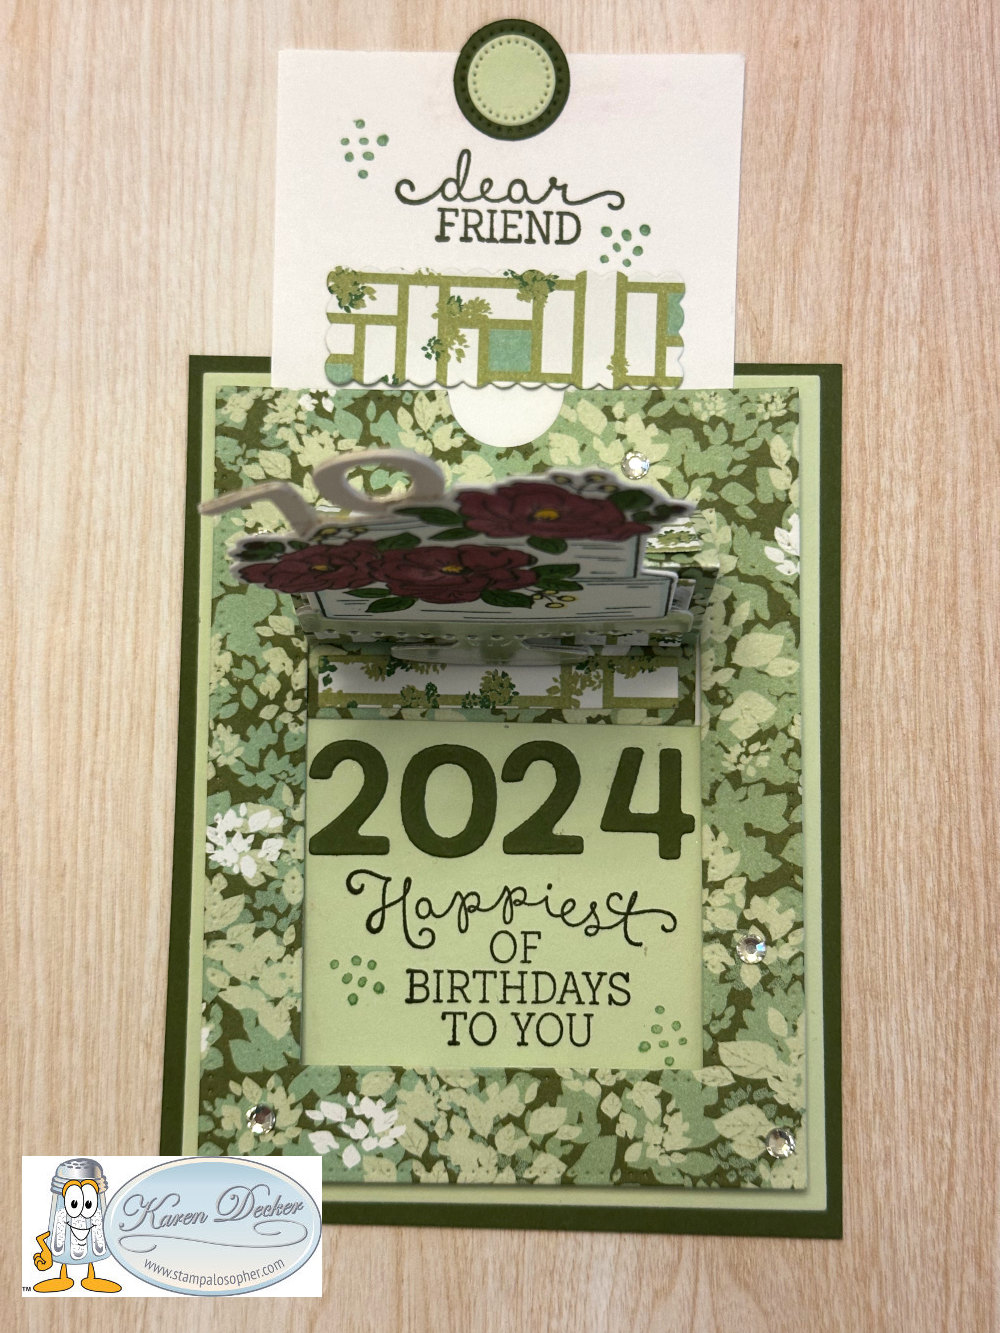
A milestone birthday needs a special birthday card!

You are back! I thought maybe your computer had crashed- which means I crash, too!
No, Sal, the last quarter of 2024 was tough and I can’t seem to manage my time very well with all that has happened. I will do better in 2025! Starting today I will begin catching up my journaling of cards and shoebox events, one at a time, and even make a thank you card.
To create this card, I pulled out the Pop-Up dies from Dare 2B ArtZy, which I purchased from Teaspoon of Fun,
Click HERE to see the pop-up cards I made for Valentines Day with these dies and with examples of ones that we made in previous classes manually without dies. There is also a video on that blog post showing the construction by Deb Valder with the die set.
It would be pretty time consuming to make all those cuts and scores manually.
We love a challenge, Sal, but if you can purchase a die set you certainly get a card done more efficiently with less mistakes winding up in the trash. Divinity Designs even has dies for purchase that will perfectly cut out bases and layers if you have trouble measuring and cutting just right. https://divinitydesignsllc.com/a2-landscape-card-base-with-layer-die/
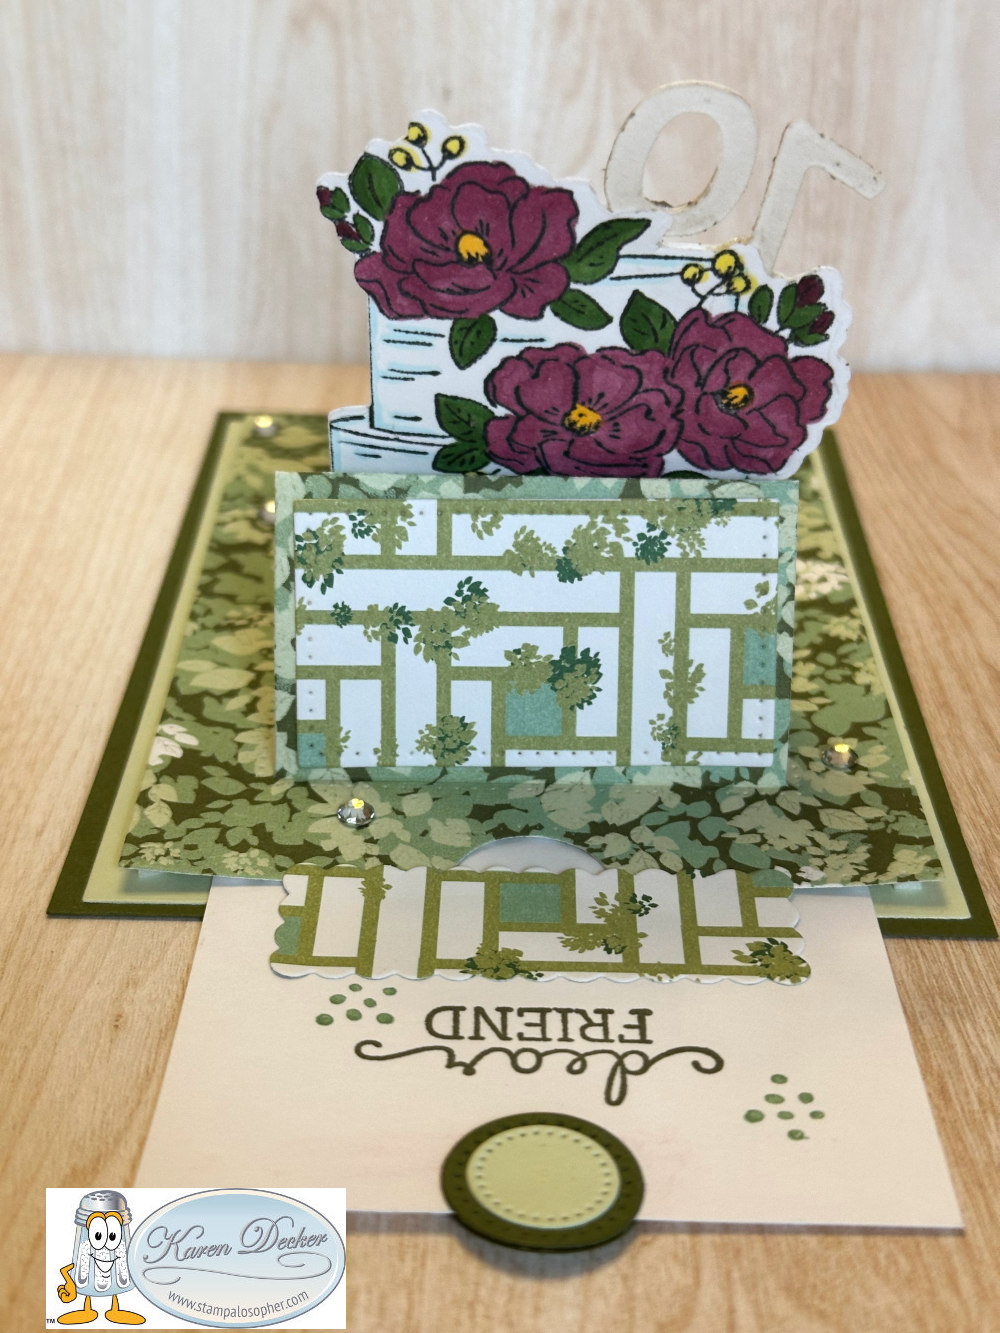
I used the ‘Happy Birthday To You’ Stampin’ Up retired stamp set and ‘Birthday’ dies for the cake. I made a mirror image of the cake, die cut them, and glued them back to back so the back would look nice when popped up. To create a mirror image you stamp your image 2 or 3 times on a Silicone Craft Sheet using the Stamparatus. You then place your white cardstock on the silicone sheet and rub-rub-rub. You place your die under the image and face up to die cut it correctly.
The greetings are in the ‘Birthday Blooms’ Stampin’ Up! stamp set.
I used Evening Evergreen cardstock for the base with a Soft Succulent layer and DSP- designer series paper- with floral images which incorporate both those colors. I wanted the cake to ‘pop’ so I used Rich Razzleberry for the main color.
With the dies, I found the pop up didn’t stay up very well so I added a rectangle of DSP, using another of the dies in the set, and mounted it on the pull out layer under the greeting so it hooks on the edge of the layers and stays up. That worked well.
For the numbers I used the ‘Playful Alphabet’ dies.
I linked the Teaspoon Of Fun dies in the computer with little Sal.
SAL, Share A Love
Karen
Riddle of the day:
Question: A cowboy rode into town on Friday. He stayed for three nights and rode out on Friday. How is this possible?
Answer: His horse’s name is Friday.
Sharon Fincham’s October Shoebox Event
(If you are opening this post in a mobile device, be sure and click a second time on the header to go to the blog where the pictures are shown correctly.)
Our October Shoebox Event was hosted by Sharon Fincham and she had such fun Halloween goodies and cards.

Of course, these were filled with goodies that disappeared quickly.
This first card uses a die and stamp set from Stampin’ Up! Sharon’s use of the glimmer paper and silver embossing made the card very special.
 .
.

 .
.

SAL, Share A Love of handmade cards
Karen
Riddle of the day:
Question: I’m a ball, but I can’t be kicked, thrown or tossed. What am I?
Answer: Eyeball.
Lisa Christensen September Shoebox Event
(If you are opening this post in a mobile device, be sure and click a second time on the header to go to the blog where the pictures are shown correctly.)
It is almost time for the November Shoebox Event so I had better get the September and October events journaled. Lisa Christensen was our hostess and we made two cards. She had numerous stamp sets from which we could choose our greetings, so I made one card a wedding card and one card a birthday card. Take a look:
 .
.
 .
.
Isn’t that a beautiful card?! The colors Lisa chose and the variety of dies she used to make a bouquet are just wonderful! I think it is the Big Blossoms Dies from Scrapbook.com.
. You should take a notebook to the scrapbook events so you can write down the products they use.
Should a – would a – could -a!
Lisa’s second card used Designer Series Paper to make a beautiful statement with strips on a panel to bring in the base color.


I can’t even guess the products used on this card but the idea is awesome!
Thank you for stopping by.
SAL, Send A Lot of handmade greetings
Karen
Riddle of the day:
Question: Forward I am heavy, but backward I am not. What am I?
Answer: Ton.
Retirement Wishes and Sympathy Wishes
(If you are opening this post in a mobile device, be sure and click a second time on the header to go to the blog where the pictures are shown correctly.)
Paul received many cards for his retirement and we also received so many cards expressing sympathy for the passing of my mom. Thank you everyone! This post will display the many cards that were handmade though all the other cards were just as wonderful and touched our hearts. This post is for crafters – and myself- when we are struggling to find a retirement or sympathy idea in a handmade card. We can pull up the blog and type ‘retirement’ or ‘sympathy’ in the search bar and get ideas.
RETIREMENT CARDS


 .
.
 .
.
 .
.

Thank you, dear friends.
SYMPATHY CARDS
My Mom passed away September 2, 2024. She had a fall August 30 and broke bones in both her lower legs. She was 91 years old and had lived a blessed life.


SAL, Soaking In A Lot of Love
Karen
Riddle of the day:
Question: What is always by your side, yet never stands in your way?
Answer: A true friend.
Retirement Party Card
(If you are opening this post in a mobile device, be sure and click a second time on the header to go to the blog where the pictures are shown correctly.)
Paul,my DH (darling husband), retired after 18 years of working at the same facility. He climbed the ladder and went out on top so that was a success deserving of a very special party and a very special card – of course!


In retrospect, I wish I had made it as a bridge fold card so the scenes would be side by side and the mushy words on the back!
.
You could use AI and link them for the blog.
No way, Sal. I prefer reality instead of artificial intelligence. My previous post uses the Lovely Layered Eagle from Honeybee Stamps and I wanted to use it for this card with the eagle holding the fish instead of the branch.
Recipe
- Base: Sahara Sand, 7 X 10, scored at 5
- Layer 1 (X3): Evening Evergreen, 6 1/2 X 4 1/2
- Layer 2 (X3): Pool Party, 6 1/4 X 4 1/4
- Top (X2): Basic White, 6 X 4
- Stampin’ Up! Wild About Flowers – Retirement Greetings stamped on scrap white and cut to look like cloud
- Stampin’ Up! High Tide – Water and Grass
- Stampin’ Up! By The Dock – Frog, Fish, Dock
- Stampin’ Up! In The Meadow – Deer & Fawn, Mountains
- Stampin’ Up! Swan Lake – Little Swans
- Stampin’ Up! Special Celebrations – Inside left greetings – both
- Divinity Designs Silhouette Couple Die
- Stampin’ Up! Be Mine Stitched Framelits – Hearts
- Eagle –
- Soft Suede, large wing feathers
- Early Espresso, body and top of wings; talons
- Shimmery White, head and tail
- Crushed Curry, beak and feet
- Dk Grey and Lt Grey for the fish
Stamp the mountains, the dock, the grass, the deer and the frog. Mask them and stamp the water. Sponge the sky and add white to the mountain tops with a white gel pen. I stamped the swans and fish after the water was stamped and then used the white gel pen to color the swans and grey for the fish.
It was fun to use all the stamps I have collected over the years to make this scene.
I had a party for Paul at the Rhyolite park where I could rent the pavilion; Flying Horse catered a great BBQ meal. Paul invited all his coworkers (telling me only a couple would show up) and almost all of them showed up, even some who came and then went back to the site to work and let someone else come. His hunting buddy and his wife came and my stampers came (thank you) and the church small group came as well as our daughter’s and their families and several of our neighbors. Paul got a bit emotional at one point saying “I had no idea I had this many friends.” It was a wonderful party.

 .
.  .
.
 .
.  .
.
 .
.  .
.
 .
. 
SAL, Such A Lot of loving people
Karen
Riddle of the day: What can be stolen, mistaken, or altered, yet never leaves you your entire life?
Answer: Your Identity.
Welcome to my blog!

Sal Window to Products


