
I have one more valentine entry before we start thinking about Easter cards! This time I am using a Kokorosa Custom cutting die called a ‘Big Love Heart Background Die. I am calling it a heart collage die! I purchased a similar collage die a while back and I cut it apart to die cut the pieces. See that card HERE. This time I left all the die pieces connected and just ran it through that way. It worked much better and I had main pieces for two cards.
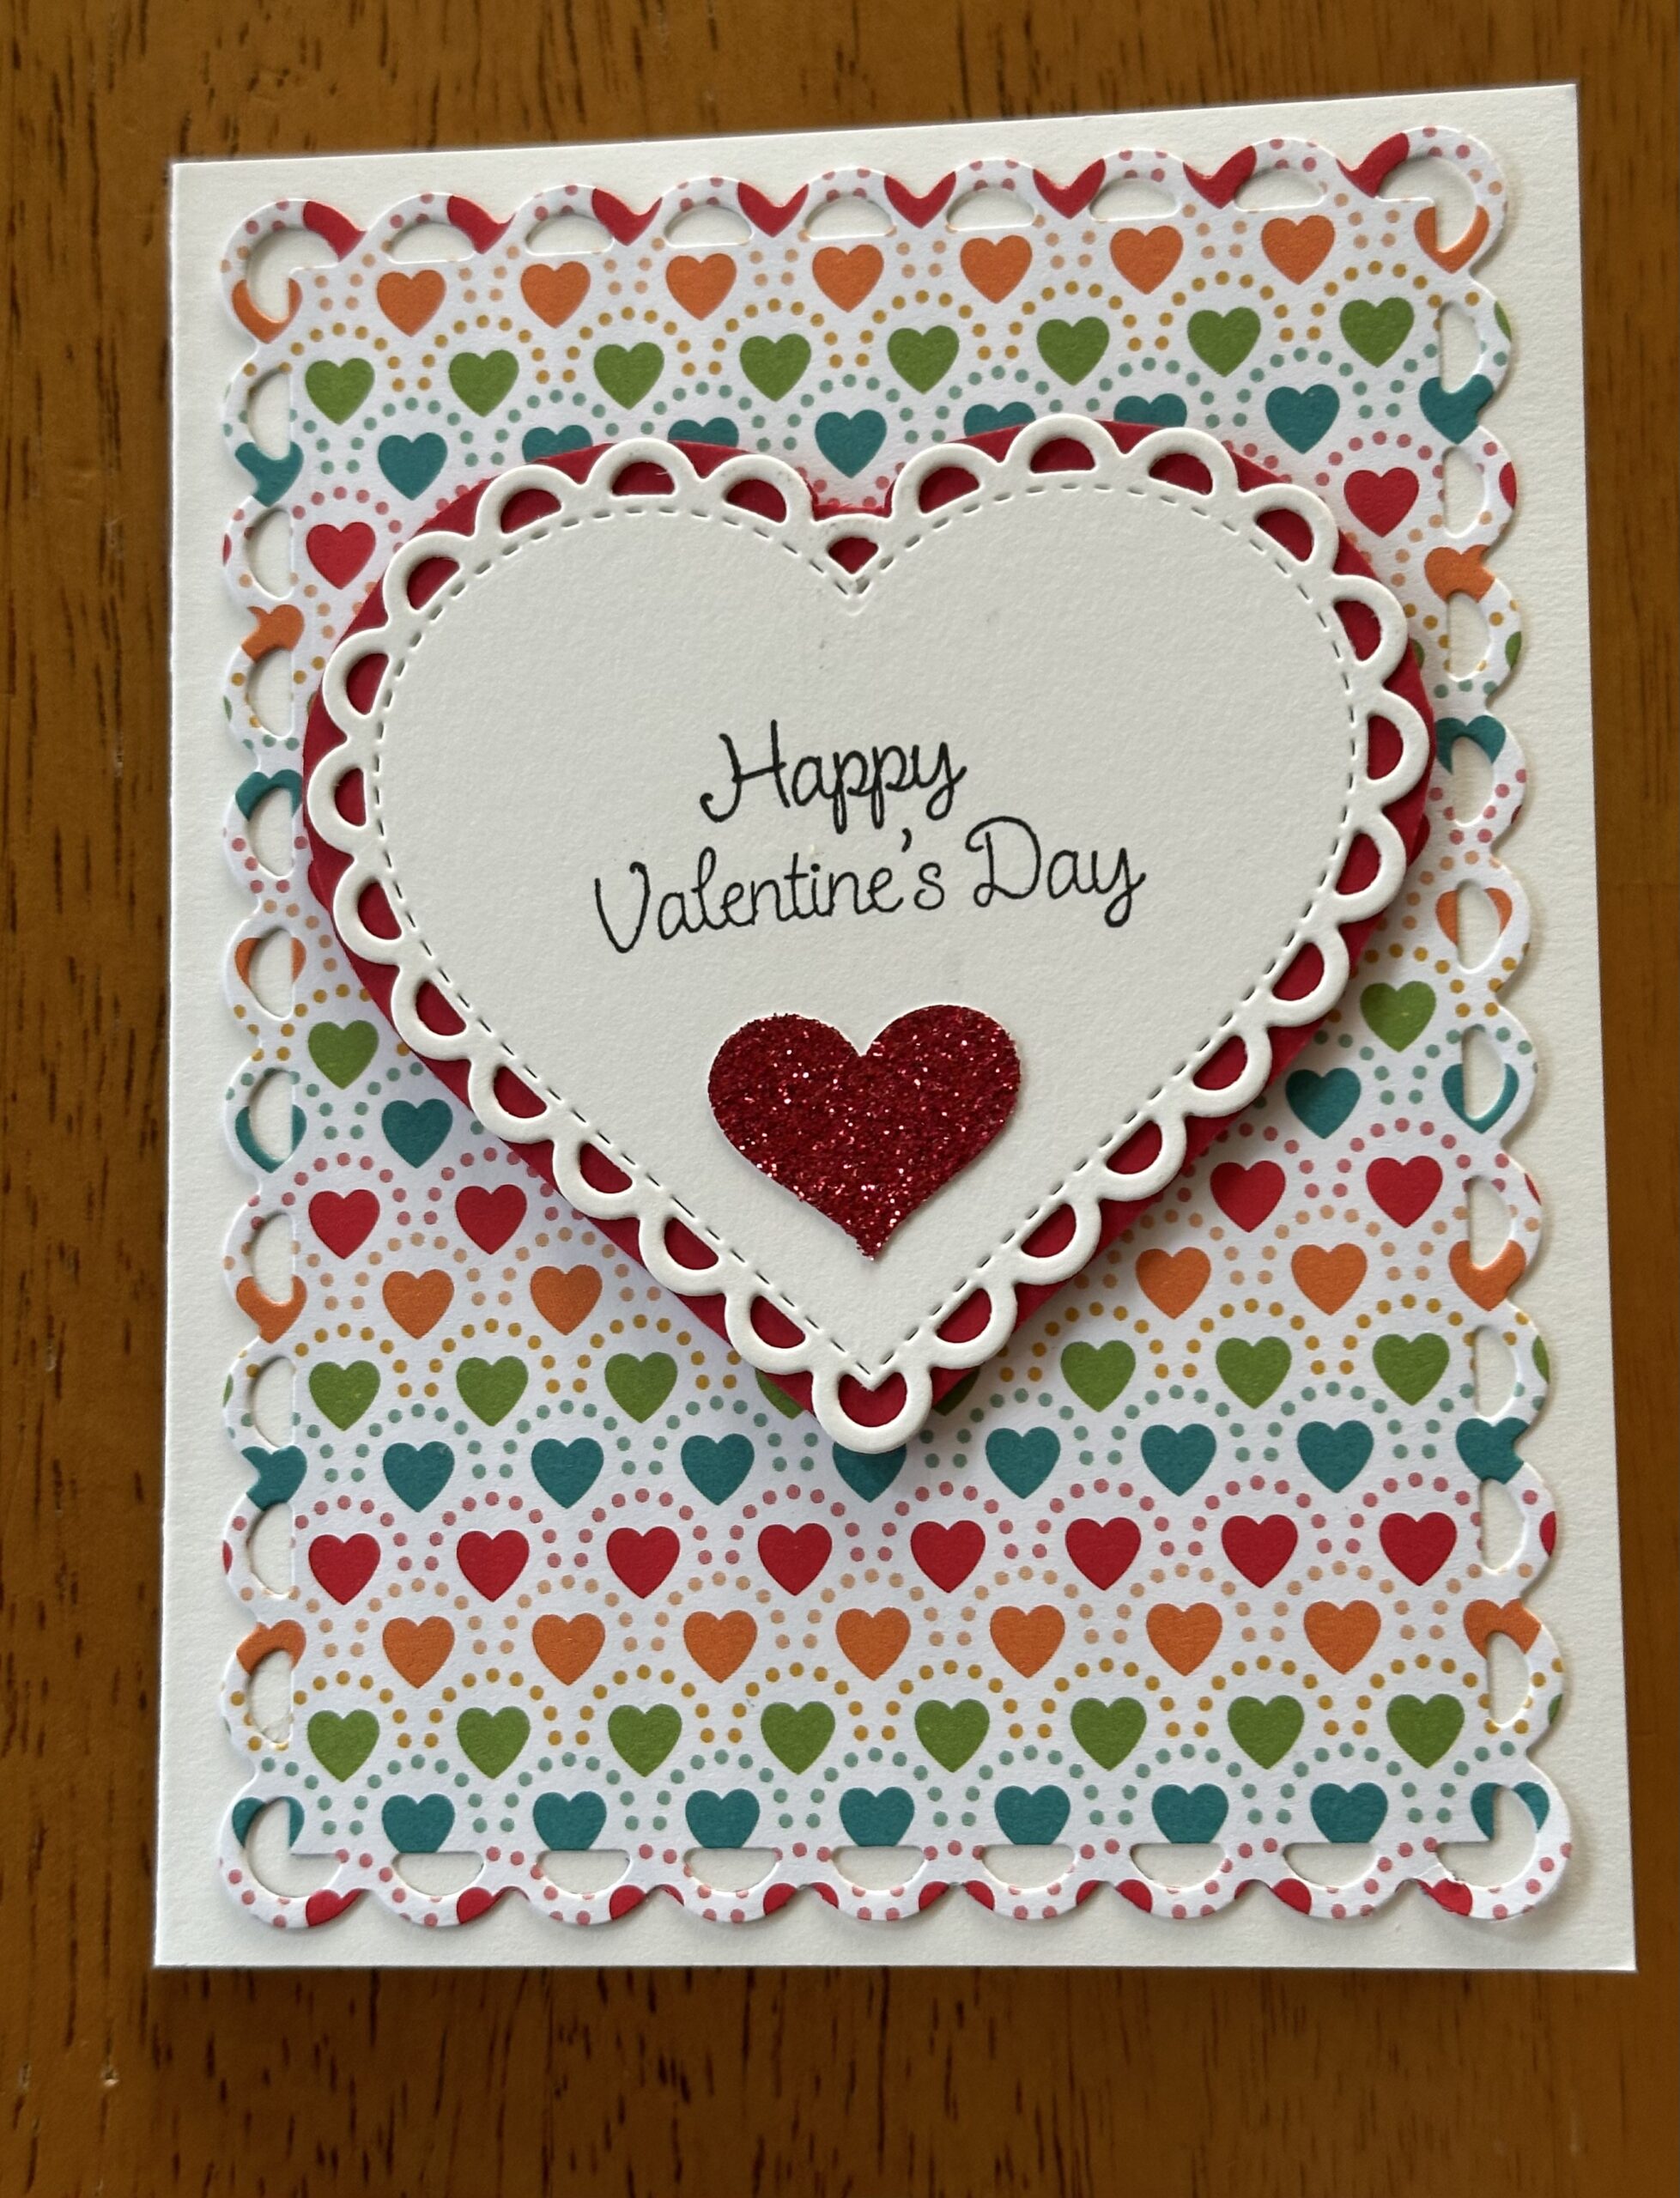
 If you look closely, you can see that the left one has the dotted designer series paper (DSP) on the outside border with the real red on the inside which frames the pieces. The card on the right has the real red on the outside with the dotted designer series paper on the inside.
To keep the card from being too busy, I used only three different DSP designs. I could run the diagonal paper all at once but I selectively added the three hearts and the three ‘love’ letters. The DSP is from……
 Let me guess…… Teaspoon of Fun?!
Right O’! And made by Pixie Dust Designs.

It is a 6 X 6 Pad with 24 double sided sheets in 12 designs. I wish it said what card weight it is because it is much thicker than my other DSP sheets. It made the mini mailbox project shown below much easier since I didn’t need to add layers for sturdiness. Can you pick out which sheets I used on the cards? Here they are again:
 .
. 
For the inside of the valentines, I used the Lovely Words Thinlits Dies from Stampin’ Up! The die cuts out the circle leaving the word ‘hugs’.
 .
. 
I used the ‘Embrace Each Moment’ Stampin’ Up! set for the greetings on both cards. The Stampin’ Up! ‘Lakeside Framelits Die cut out the ‘wishing you joy & blessings’ and I stamped the holding hands in grey, stamping off and then stamping on white so it was very light and I could stamp the ‘you will always be my forever’ in red on top of the grey. I cut out the three circles with the Layering Circles Dies rather than try to write over the DSP.
 .
.  .
.  .
.
For my other valentine project, I made a mini mailbox! They are all over pinterest and I wanted to try my hand at creating one. I wrote down directions for three different ones and then took ideas from each and made my own design with a few extras- I called it ‘Paul’s Mailbox’!
 .
.
 .
.

It holds two Hershey Nuggets. I didn’t glue the nuggets to the little box so you could eat your chocolates and not ruin the little box. The two sided DSP was great for having a fun inside and for creating a flag by centering a heart from the pink background side to punch with the Mini Banner Punch. The other side then matches the box. You do need to be careful because the DSP is so thick. I am used to breaking the fibers to get a curve with the bone folder but that ruined the paper, so just carefully fold your base with your fingers if you have stiff DSP.
How true – and several others that I really should keep since I do use them. I just hoped to make room by selling all the wooden ones but it would be better to make room by taking them off the blocks and putting them in CD cases.
Recipe
- Base: DSP, 1 1/2″ X 4 1/2″, score at 1″ and 3 7/8″, Burnish the score lines and form a gentle curve, adhere at bottom
- Back and the Door: DSP, 1″ X 3 7/8″, score each end at 1 1/4 before rounding the ends.
- I made a template out of white cardstock to fussy cut a rounded end; you could also use the 2nd smallest circle framelit to get a nice rounded cut but I was making multiples and either cut the end too much or too little with the framelit so I just fussy cut from a template. It took a couple tries to get the size correct on the template because I wanted the back to fit snugly and not need glued. You can make a strip 1 1/2 X 1/4, scored at 3/4, to glue the back in place but if it fits snugly you can actually use it to push the chocolates out the front! Adhere this strip to the bottom of the mailbox coming in 1/16″ from the back. I adhered so the opposite side of the DSP with the pink background was facing up.

 Looks like a large bandaid!
- Flag & Flagpole: DSP strip, 3 1/4 X 3/16, score at 1 5/8. The diagonal striped paper in the DSP was perfect for cutting a dark red strip that would have the same sheen as the mailbox pieces. I used the Mini Banner Punch for the flag centering a heart from the DSP. Manually, you could use a 3/4 long by 5/8 high square and cut one side to be a banner. Fold the flag pole in half and glue the flag between the front and back close to the fold. On the side of the mailbox punch a small hole 5/8″ up from the bottom and 1/2″ over from the front. Punch a hole 1/4″ up on the flagpole ( I used a paper piercer tool for the holes) and use a tiny brad to attach the flagpole to the mailbox. Your flag moves!! When you put in the chocolates, turn the mailbox upside down and put in the top nugget first, then the second nugget to avoid getting stuck on the brad on the inside.
- Handle: DSP with pink background, the handle in the ‘Sliding Door Framelits Dies’ fit perfectly over the heart. It made the handle look like it was a die cut heart but it is really a circle. Fold the handle right at the circle , punch a hole 1/2″ down and 1/2″ over on the front flap of the mailbox, punch a hole in the handle and adhere with a brad. Put a bit of glue on the backside of the handle since you don’t want it to move.
- Heart: Basic White scrap, I found a perfect sized heart in the Circle Card Thinlits die set. Stamp the greeting from ‘Love & Happiness’ stamp set with Real Red ink and then die cut. Sign then mount with glue dots over the brad.
- Envelope: Scrap of white cut 1″ X 5/8″ and scrap of red for a tiny heart. Score the front diagonally corner to corner for an envelope look or use the Kokorosa cutting die which has three sizes of envelopes and three little hearts to die cut. I purchased through InLoveArts but it came in Kokorosa packaging.


I thought you were trying to make more room in your craft closet.
Yes, I am beginning to think it is more about having new things to craft with than creating a stash to use. Wait ’til you see my Easter cards!
Let me show you the valentine gift/cards I received:
Joy Meadows made a beautiful valentine card:
 .
. 
The little red heart was a gift from Sharon Fincham last year!
Lisa Christensen had a cute bag of gummies for me:
 .
.  .
.
I love-love-love the heart on the back with the letters from ‘Valentine’ in red on the scripture John 3:16!
I want to make some Easter gifts like this so I measured out the cuts and score lines:
Lisa’s was 12 3/4 X 3 1/2 scored at 4 7/8, 6 1/4, 11 1/4 with the 1 1/2 edge punched with a scallop punch. The front cutout is a 2 1/8″ square. The heart is 3 3/4″. The greeting is a die cut 2 X 1 3/8 with a to/from tag that is 1 3/4 X 5/8. She stapled a clear bag with goodies to the back of the bag, added tiny velcro under the flap and made a red bow for the top.
That is a problem so I adjusted the measurements for a 12″ piece of paper:
- 12 X 3 1/2, scored at 4 1/2, 5 7/8, 10 1/2 still leaving 1 1/2 for the flap.
But you just purchased 6 X 6 Easter paper pads.
Another problem for sure, so I adjusted again only this time added glue tabs since I need three cuts of paper.
- Front: DSP, 6 X 3 1/2, scored at 4 1/2 leaving 1 1/2 for the base tab. Die cut a square in the front 3/4″ from bottom and sides.
- Back: DSP, 6 X 3 1/2, scored at 4 5/8 leaving a 1 3/8 for the base tab. The extra length in the back makes the front curve out nicely.
- Flap: Matching card stock 2″ X 3 1/2′ scored at 1/2″
I haven’t made them yet but now I have instructions that fit my paper!
And Jaxson made a card for Papa and Grandma and a card for Ruger. Both had treats inside:

 Can you see the wings & arrow on cupid?
 .
. 
Jaxson is in first grade and loves to draw!
Paul took me to Gabriels in Sedalia and we had a table by the fireplace!
 .
.  .
.
Next up is Paul’s birthday in Breckenridge! I had better get busy on his card!
Thanks for stopping by!
for a pinch of creativity to spice up your crafting world!
SAL, Such A Lot of words today
Karen

Riddle for the day:
Q= How are diarrhea and electric cars alike?
A= With both you hope to get home in time!