
Home » Articles posted by Karen Decker (Page 5)
Author Archives: Karen Decker
Karen Decker’s November 2023 Shoebox Event-Foiled Cards
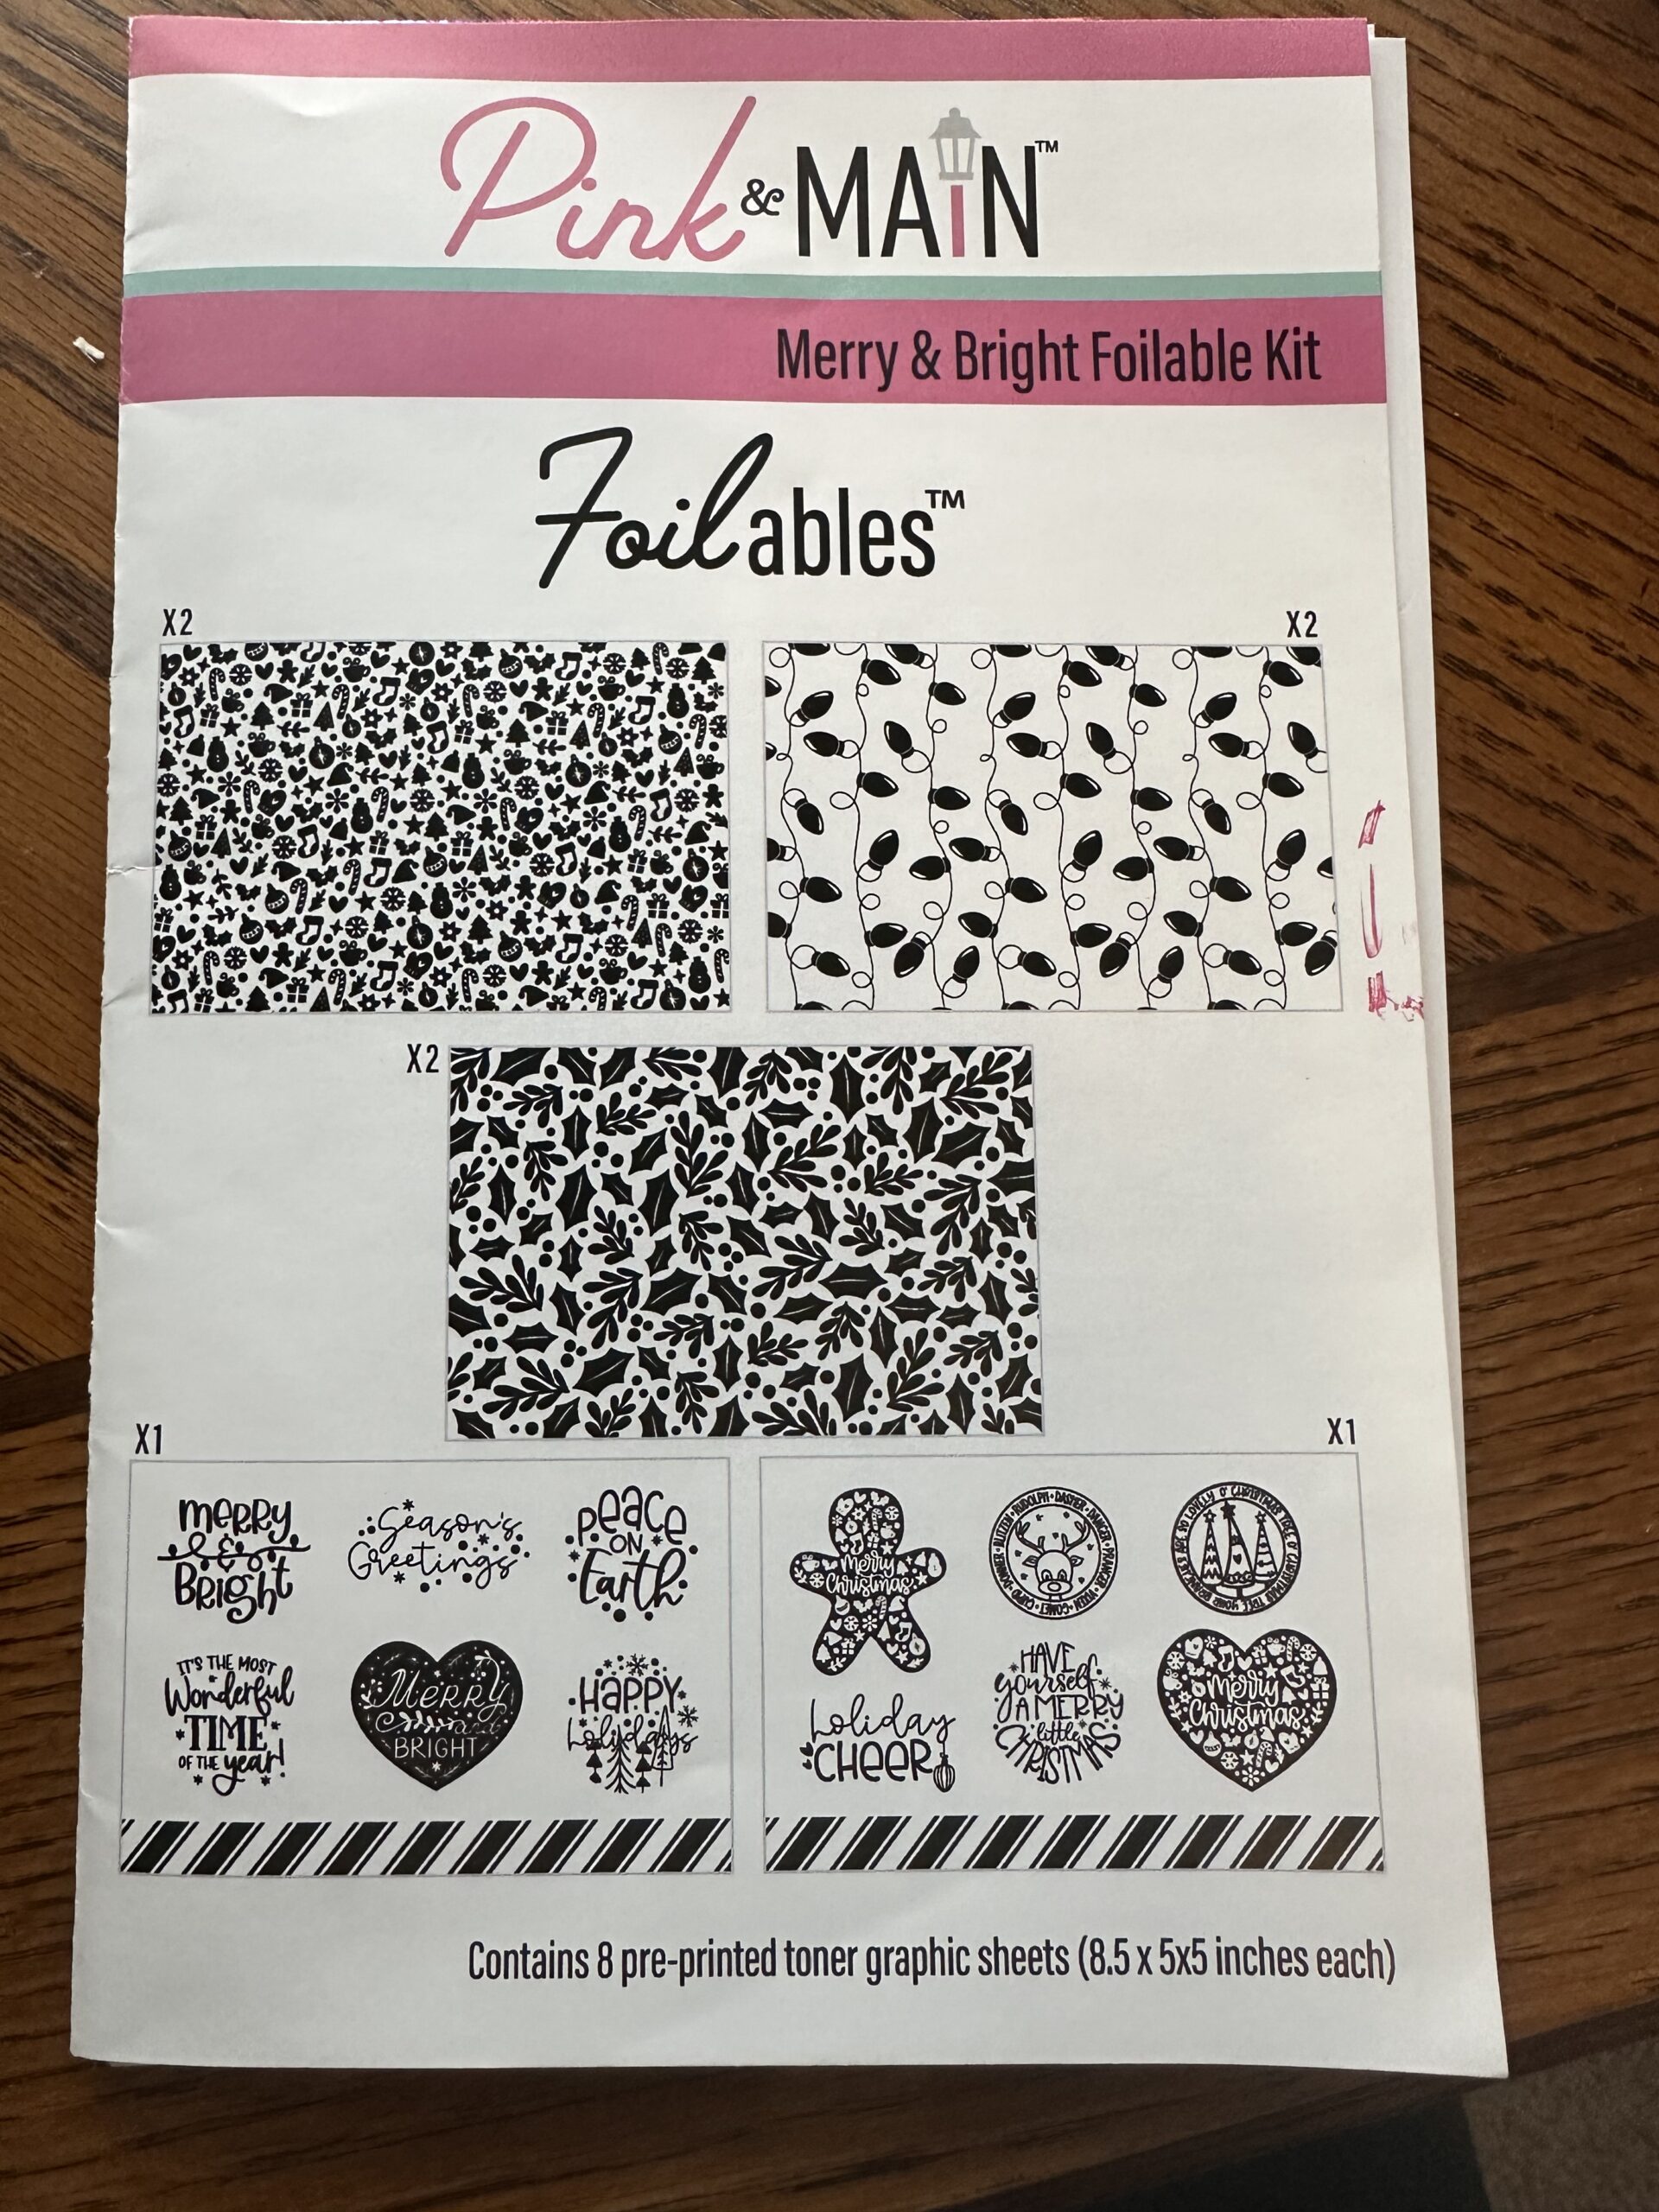
What fun! Using foiling to create Christmas cards! I purchased the ‘Merry & Bright’ foilable kit from Pink & Main which included toner card fronts in three different styles so – of course – I needed to make some of each style! The red foil is Pink & Main’s ‘Shattered Red Cheer Foil’.


When you foil, you have a left over piece of foil where there was no toner image and I used that leftover sheet and an oval die just a little larger than the inside oval to make a lovely border. If you look closely at the inside of this card you can see that the border around the oval is red foil with white images showing through from the cardstock (using the leftover piece of foil), whereas the strip at the bottom is white cardstock with the red foiled images just like the front. I added a little strip of red foil to match the border on the front. The greeting uses Stampin’ Up! red glitter embossing powder for a bit of extra sparkle with Stampin’ Up!’s ‘Very Best Occasions’ stamp set.
For the Merry Christmas I used a ‘poppy’ die. I cut it out of the red layer that I used on the front under the decorative toner sheet. I cut out two additional Merry Christmas Flourishes to layer with the red, which is so much easier than trying to pop up such tiny little areas.
 .
.One of the toner card fronts was holly leaves so I used some green foil from Heidi Swapp which I ordered when I ordered the Minc machine before I learned about Pink & Main. The green foil is 12 1/4″ wide and more suited to scrapbook pages than small card fronts. The Pink & Main Cheer Foil is 6 1/4″ wide and much easier to use.


I purchased full black toner sheet card fronts to foil a layer to go under the foiled designer toner card front but found out it really wasn’t necessary. If you cut the foil exactly the size of the layer you want and center the toner card front carefully, you have a perfect border for your foiled front. I did that with the following card’s red foil strip at the bottom of the inside.
You can really see the ‘shattered red cheer foil’ in this picture.

 and you missed a picture of the front?
Yes, Sal, and that card was mailed before Christmas. Can you imagine calling someone and asking them to take a picture of the front of the Christmas card you mailed them so you could post it on your blog.
This third card really surprised me with how effective the foil turned out. I used Pink & Main ‘Rainbow Cheer Foil’ which has little stars in the foil! It looks so much better than this picture but you get the idea.


In addition to the toner card fronts, the ‘Merry & Bright’ kit comes with several toner greetings and sheets of small greetings in black on white or white on black. The black is the toner so you can choose where you want the foil- a foiled greeting or a white greeting with foil around it. I cut the foil large enough to give a border around the greeting, foiled the greeting, using the black on white,and then glued the left over foil piece behind the foiled greeting for a nice border.


This last foiled card was an experiment. I had purchased Pink & Main colored toner sheets and used the left over foil sheet from foiling the card front with red holly leaves and then ran the left over sheet through the minc machine on top of a green colored toner sheet! It worked! I used regular red foil cardstock for the layer and a green card base. Gold foil card stock was used for the greeting and several gold jewels were used to embellish the front.


The inside greeting is from Stampin’ Up!’s ‘#Elfie’ stamp set. I used circle dies and gold foil cardstock to tie in the gold from the front.
Gotta make that inside match the front somehow!
That’s my stye, Sal!
Recipe Basics
Card 1 & 2-Vertical
- Base: Thick Basic White, 5 1/2 X 8 1/2, scored at 4 1/4
- Black Transfer Sheet: 5 1/4 X 4, Foil in desired color with foil of same size and then die cut Merry Christmas Flourish; to pop up the flourish die cut two additional flourishes in Basic White. You’ll need 4 1/4 X 3 3/4 for die cut.
- Decorative Toner Sheet: 5 1/4 X 4, Foil 5 1/2 X 4 1/4
- Oval Outside: Basic White, 3 1/2 X 4 1/4, Sixth in Stampin’ Up! oval set
- Oval Inside: Basic White, 2 1/4 X 3, Third in Stampin’ Up! set
- Inside Strip: Use what you can form leftover foil
Card 3- Horizontal
- Base: Thick Basic White, 5 1/2 X 8 1/2, scored at 4 1/4
- Decorative Toner Sheet: 5 X 3 3/4, Cut foil at 5 1/2 X 4 1/4, line up carefully to have a perfect border of foil
- Merry & Bright Greeting (3rd card): 2 X 2 cut of the greeting from kit, 2 1/4 X 2 1/4 Starry Rainbow Cheer Foil
- Inside Square: Basic White, 2 1/4 X 2 1/4 , Foil backing 2 1/2 X 2 1/2
- Inside Strip: Toner Sheet, 5 X 1 with foil of 5 1/4 X 1 1/4
Pink & Main has a subscription service for their foilable kits which I signed up for, so you will be seeing more foiled cards in the future! I am impressed with the quality of their products. Click on little Sal in the computer to go to their site.
Thanks for joining me for a foiling adventure!
SAL, Share A Love
Karen

Quilling Birthday Card
I pulled out all my quilling tools and found a youtube video to guide me in the making of a quilled birthday card. I found out that quilling (for me) is more like knitting. You do a little each day, you don’t sit down and complete it in the same time that you would complete a stamped card. I could never say, “You go ahead and watch that game, Paul, while I knit a pair of socks.” That just wouldn’t happen, and I found out it was the same with quilling. The youtube video was short but the production of the card was not! Was it fun? Yes. Was it rewarding? Yes. What do you think?
 .
.  .
.
Here are a few things I can point out to my dear stamping friends:
- Base: Thick Very Vanilla, 5 1/2 X 8 1/4, scored at 4 1/4
- Layer (2): Wood Tone DSP, 5 1/4 X 4; use Medallion Die to cut out the opening for the greeting on the inside; it was too big for my inside layer so I added a strip at the side.
- Happy Birthday on front: Blushing Bride cardstock with 3 die cuts layered together for dimension; die is a Kokorosa die
- Greetings on Inside:
- Birthday Wishes – Watercolor Trio Stampin’ Up!
- Happy Day…. – Basket of Wishes Stampin’ Up!
- So Glad – Gather Together Stampin’ Up!
- Embellishmensts: 3 clear jewels and 1 brass butterfly
For future reference in quilling:
- Large Flower (3): peach strip 12″ in length, marquee domed outward
- Center of Large Flower (3): yellow strip 4″ domed
- Small Flower (3): red strip 6″ teardrop domed inward
- Goldenrod (28): yellow strip 4″ domed outward
- Flower Base cup large (2): green 10″ cup shape
- Flower Base cup small (1): green 8″ cup shape
- Large Flowers in Base cup (6): pumpkin strip 6″, teardrop
- Small Flowers in Base cup (3): pumpkin strip 4″, teardrop
- Green Stems – Fold strip in half and glue to make double thick; glue to edge of flowers
- Green Leaves – Quilling comb, see video below
Now, let me introduce Meredith of The Paper Craftery and her easy to follow youtube videos:
Wow! That is really branching out from your norm.
I love learning new things, Sal, and quilled cards are showing up in many stores these days. They also sell for much more than a stamped card if I ever wanted to start selling cards; you can see why they are costly. With dies and stamps I can add a lot to the quilled cards and use my stash of tools! Win. Win.
Does Stampin’ Up! have quilling supplies?
Unfortunately not, Sal. Meredith said she gets her paper strips from Quilled Creations or Craft Harbor. I purchased a kit from Michaels and then more tools and paper from Hobby Lobby and Amazon.
SAL, Smile A Little
Karen
Click on little Sal in the computer to go to Meredith’s site.
Jo Brooks October 2023 Shoebox Event
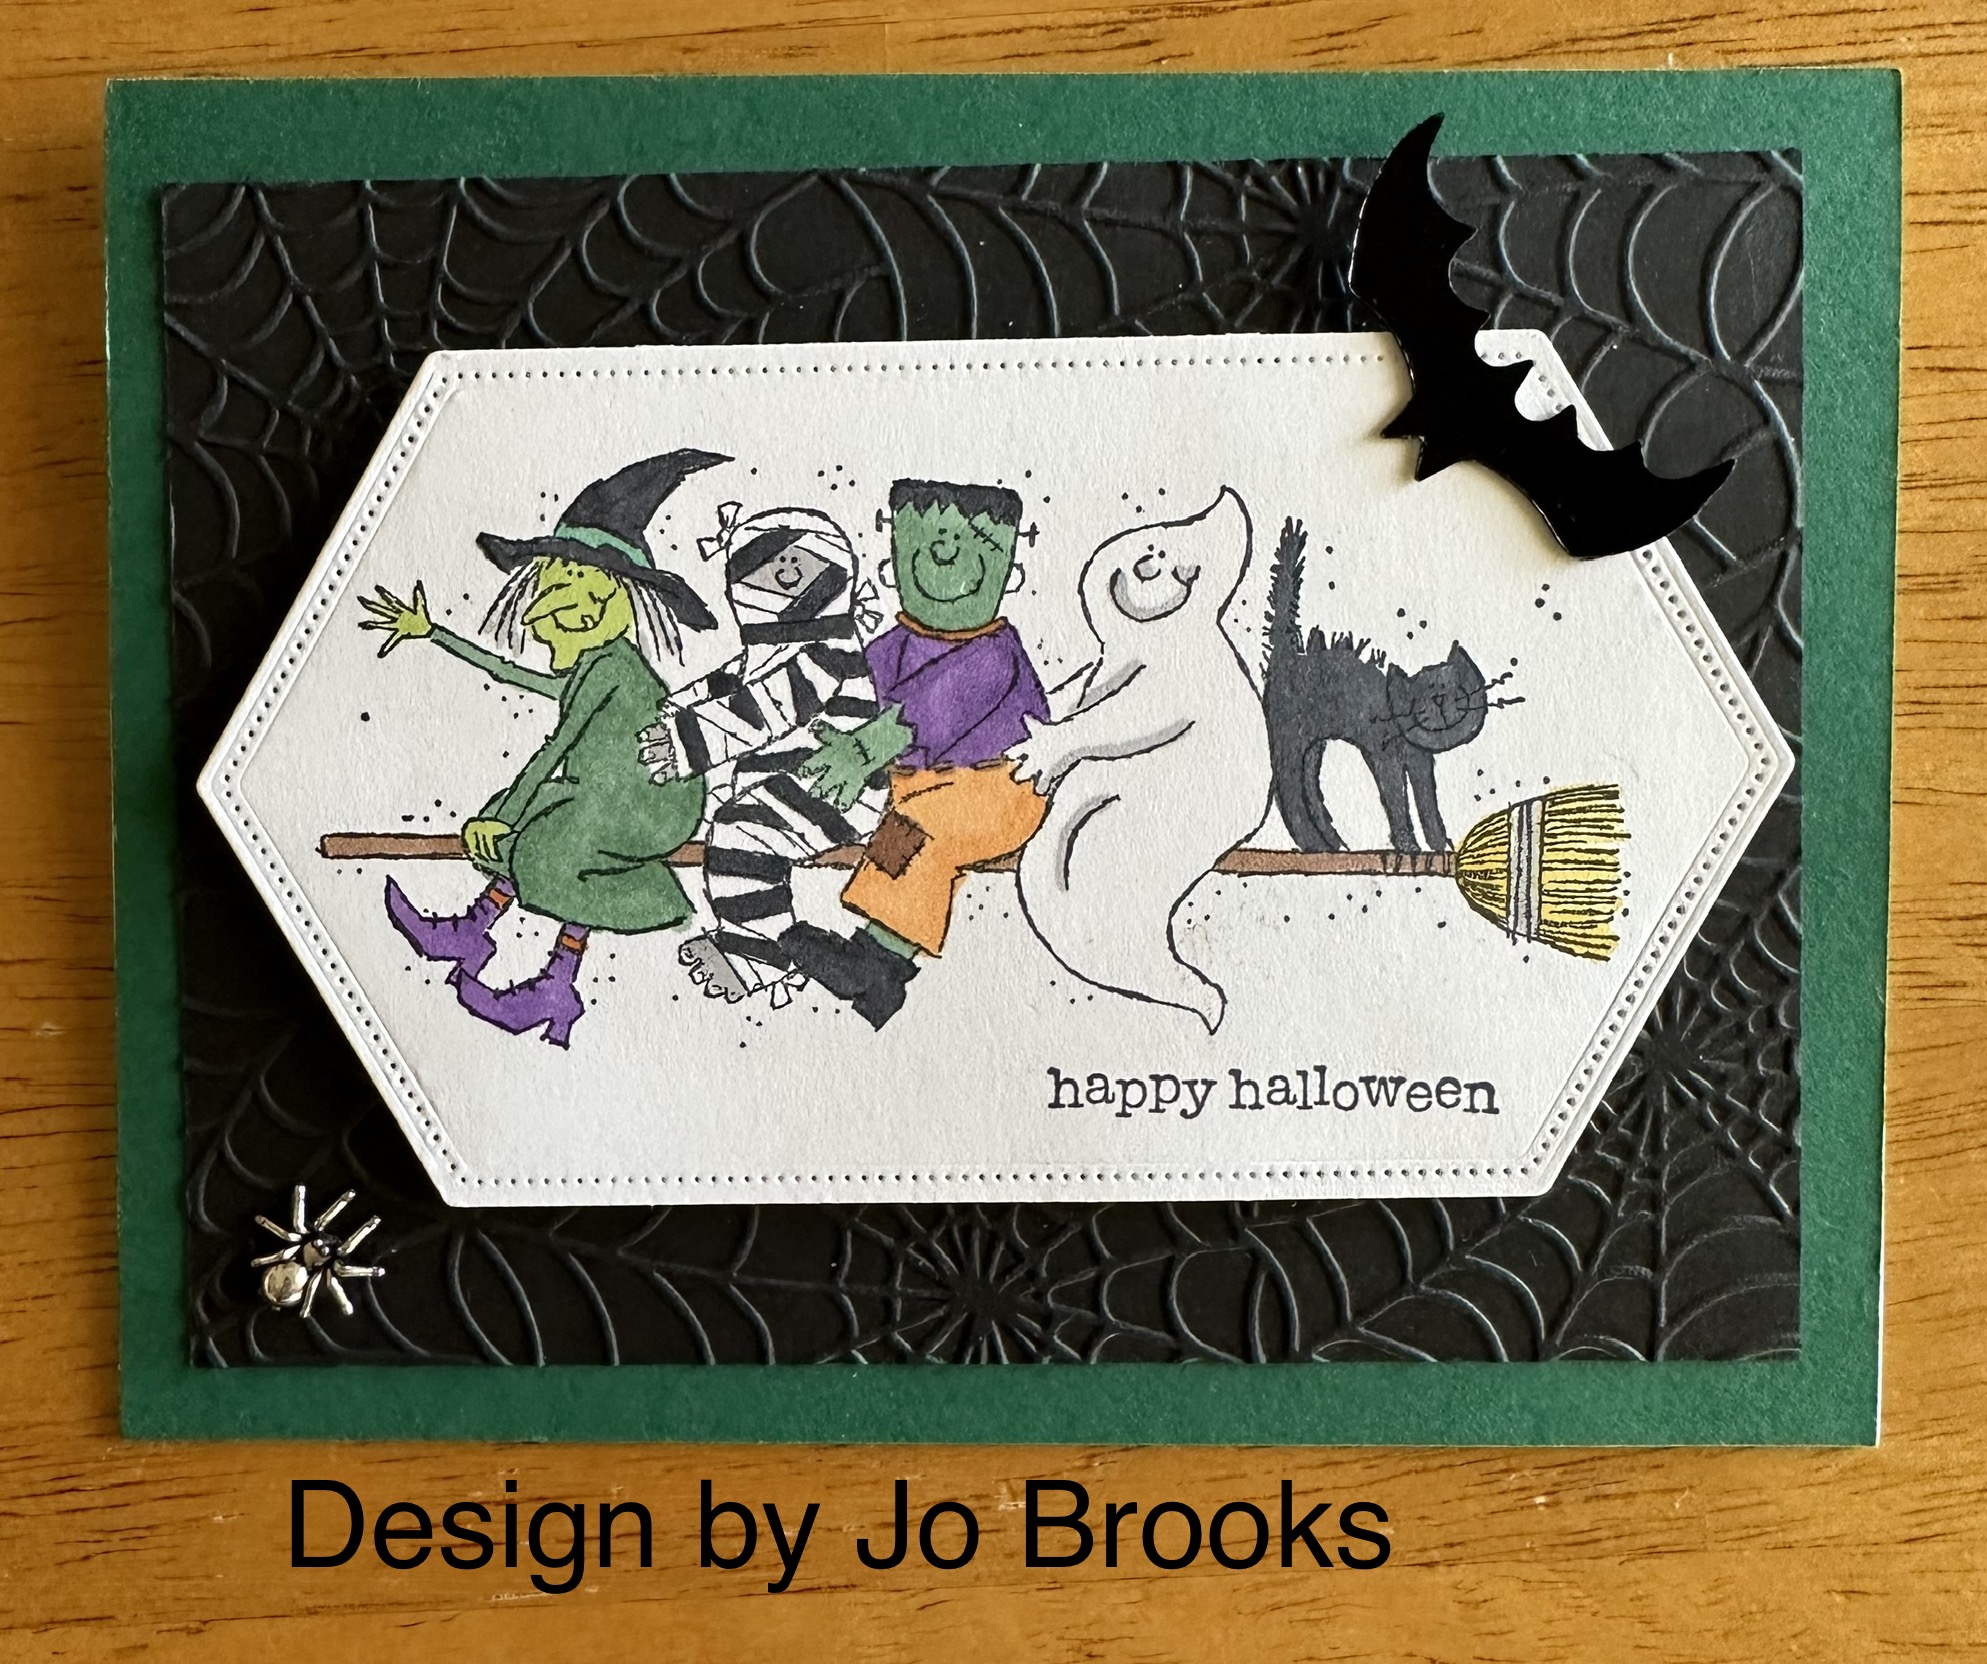
For “next year’s” inspiration I have two super cute Halloween cards designed for the October Shoebox by Jo Brooks.
 .
.
 .
.
 .
.
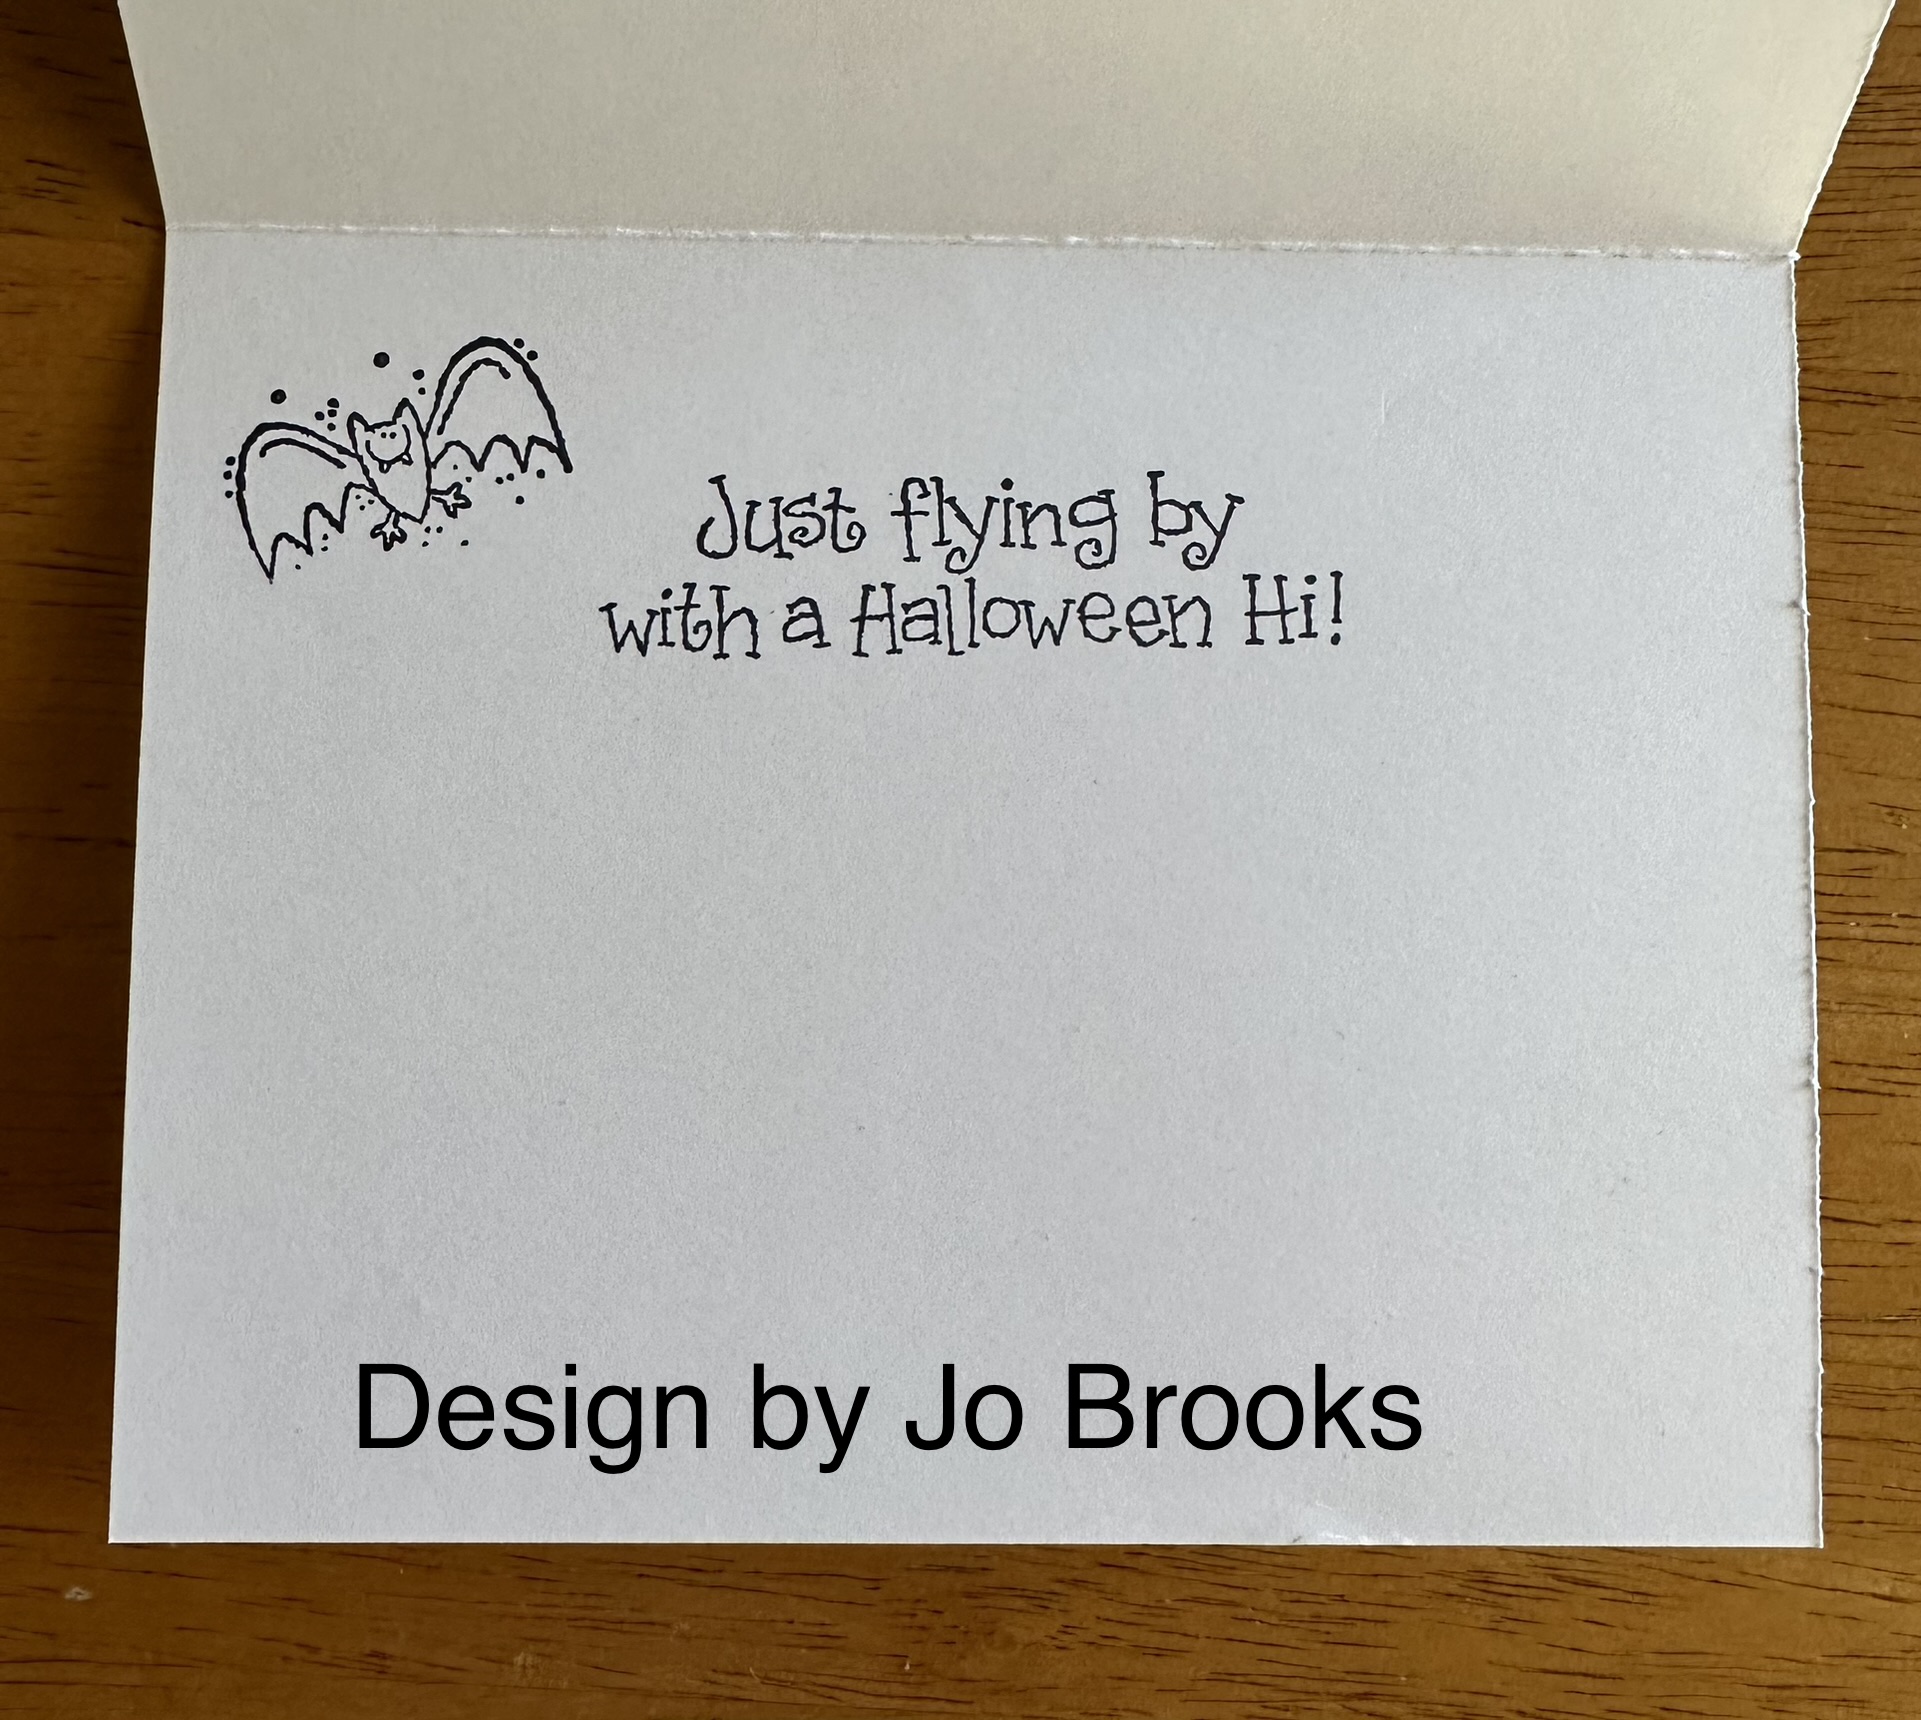
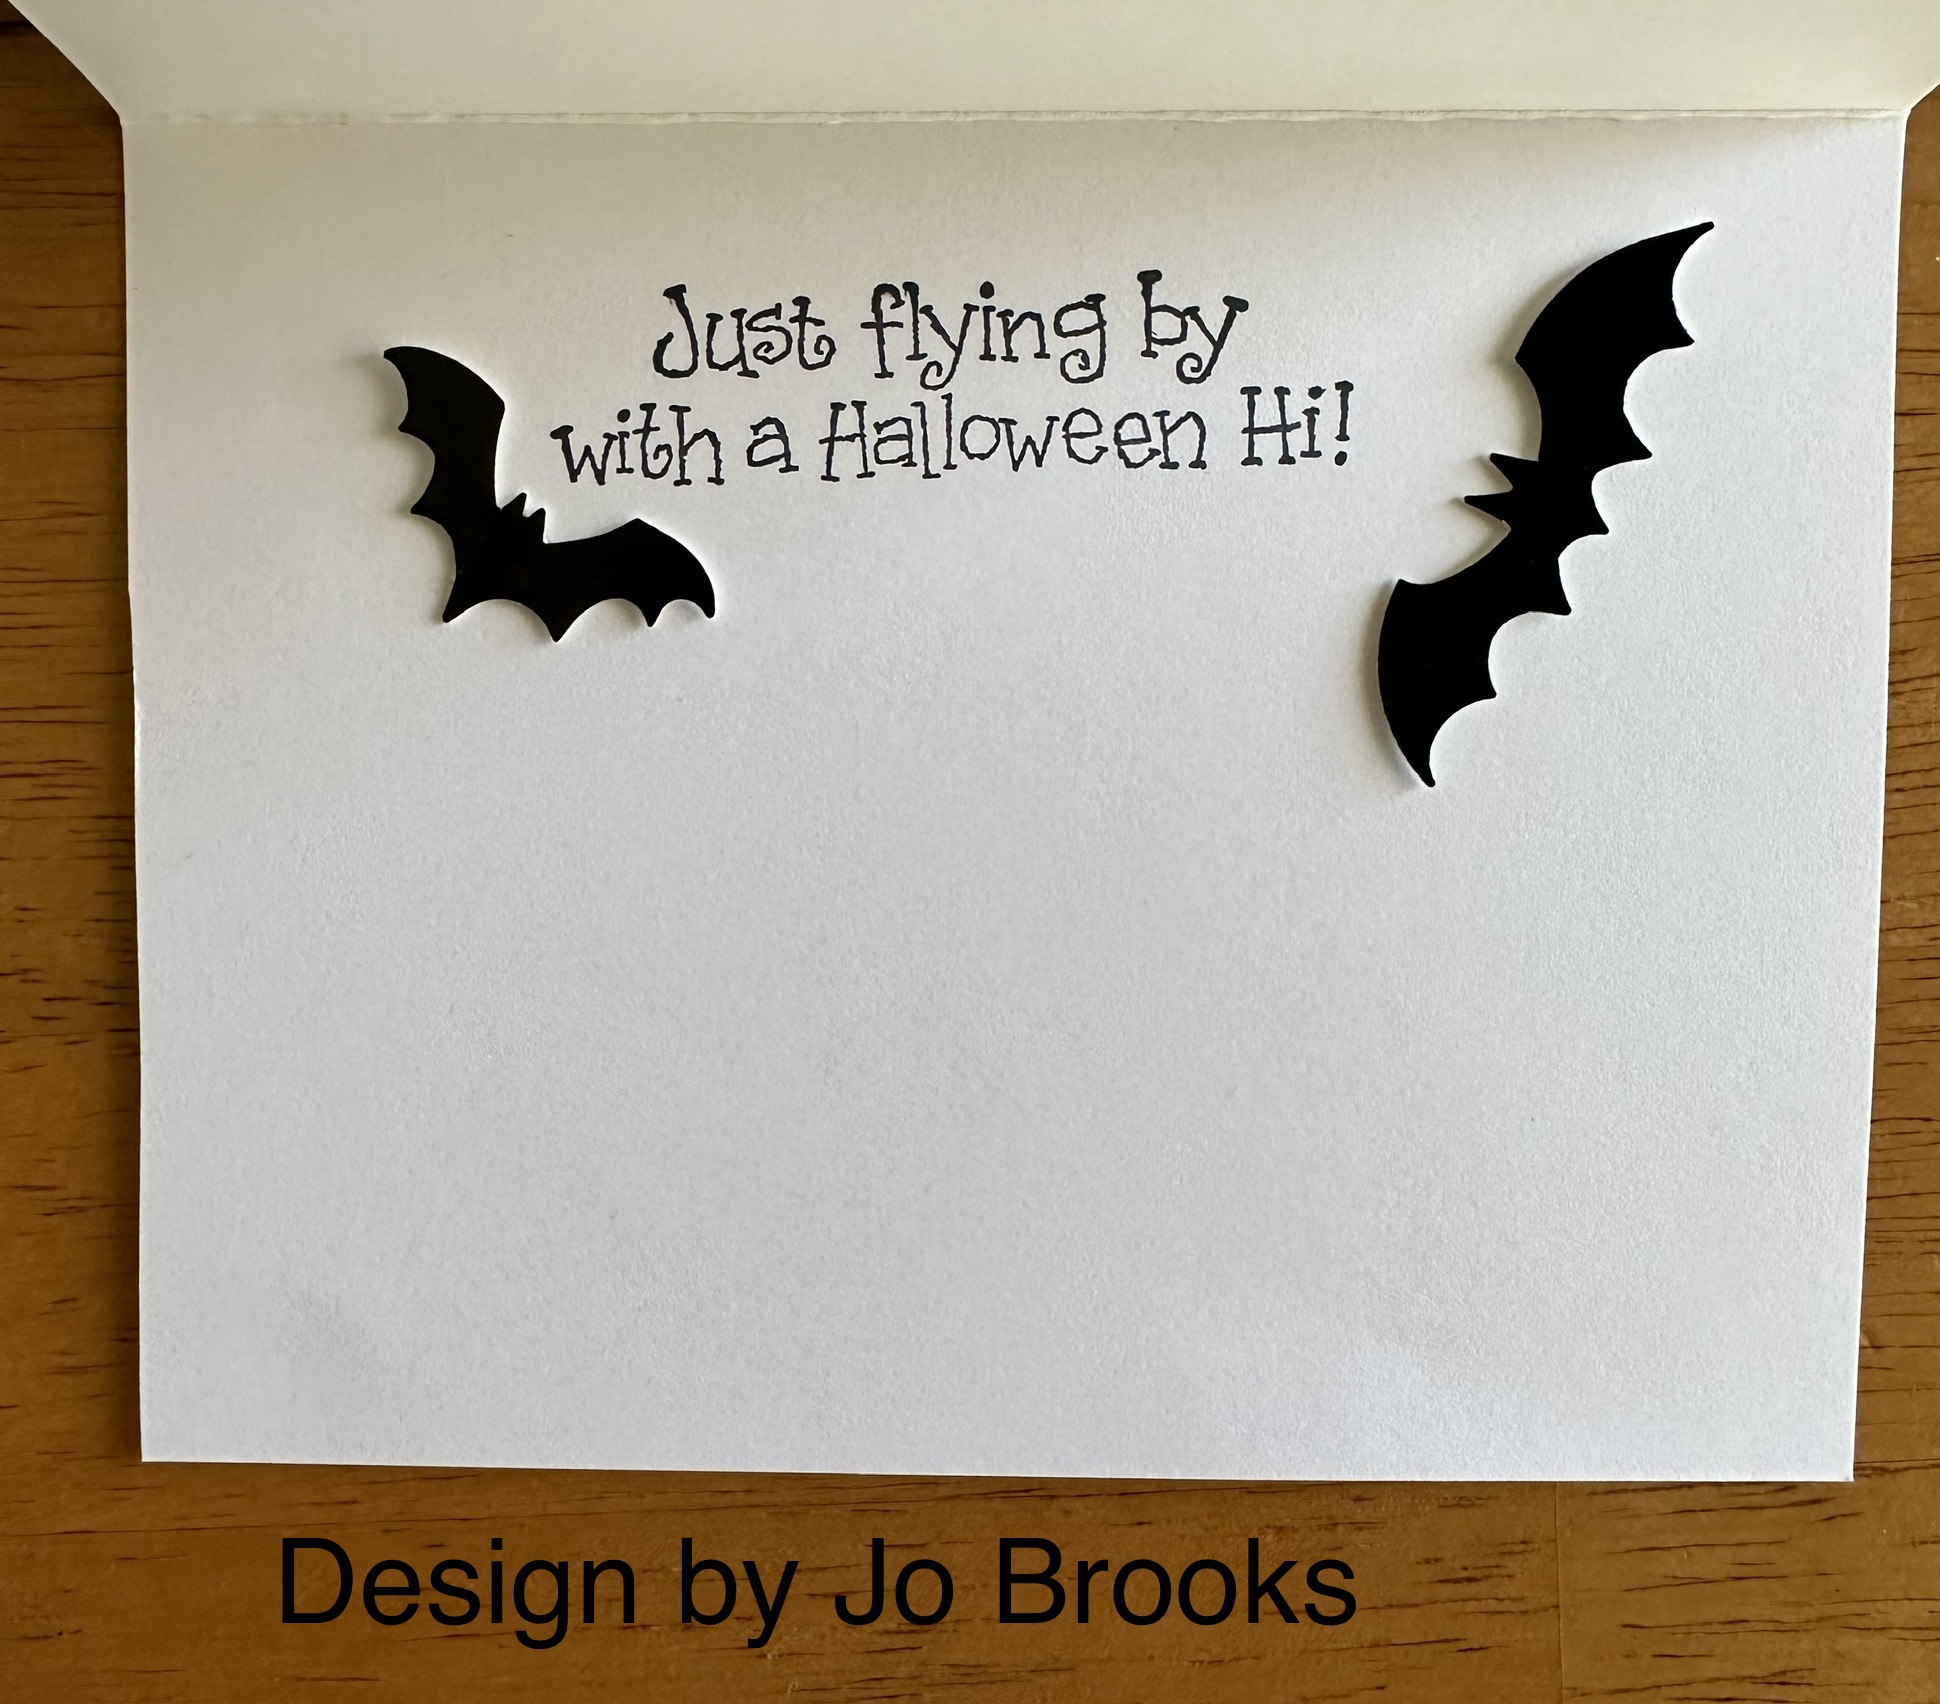
Check out the details! The little spider trinket on the first one and the bat punch used, or the smiley bat stamp, all on a spider web background!
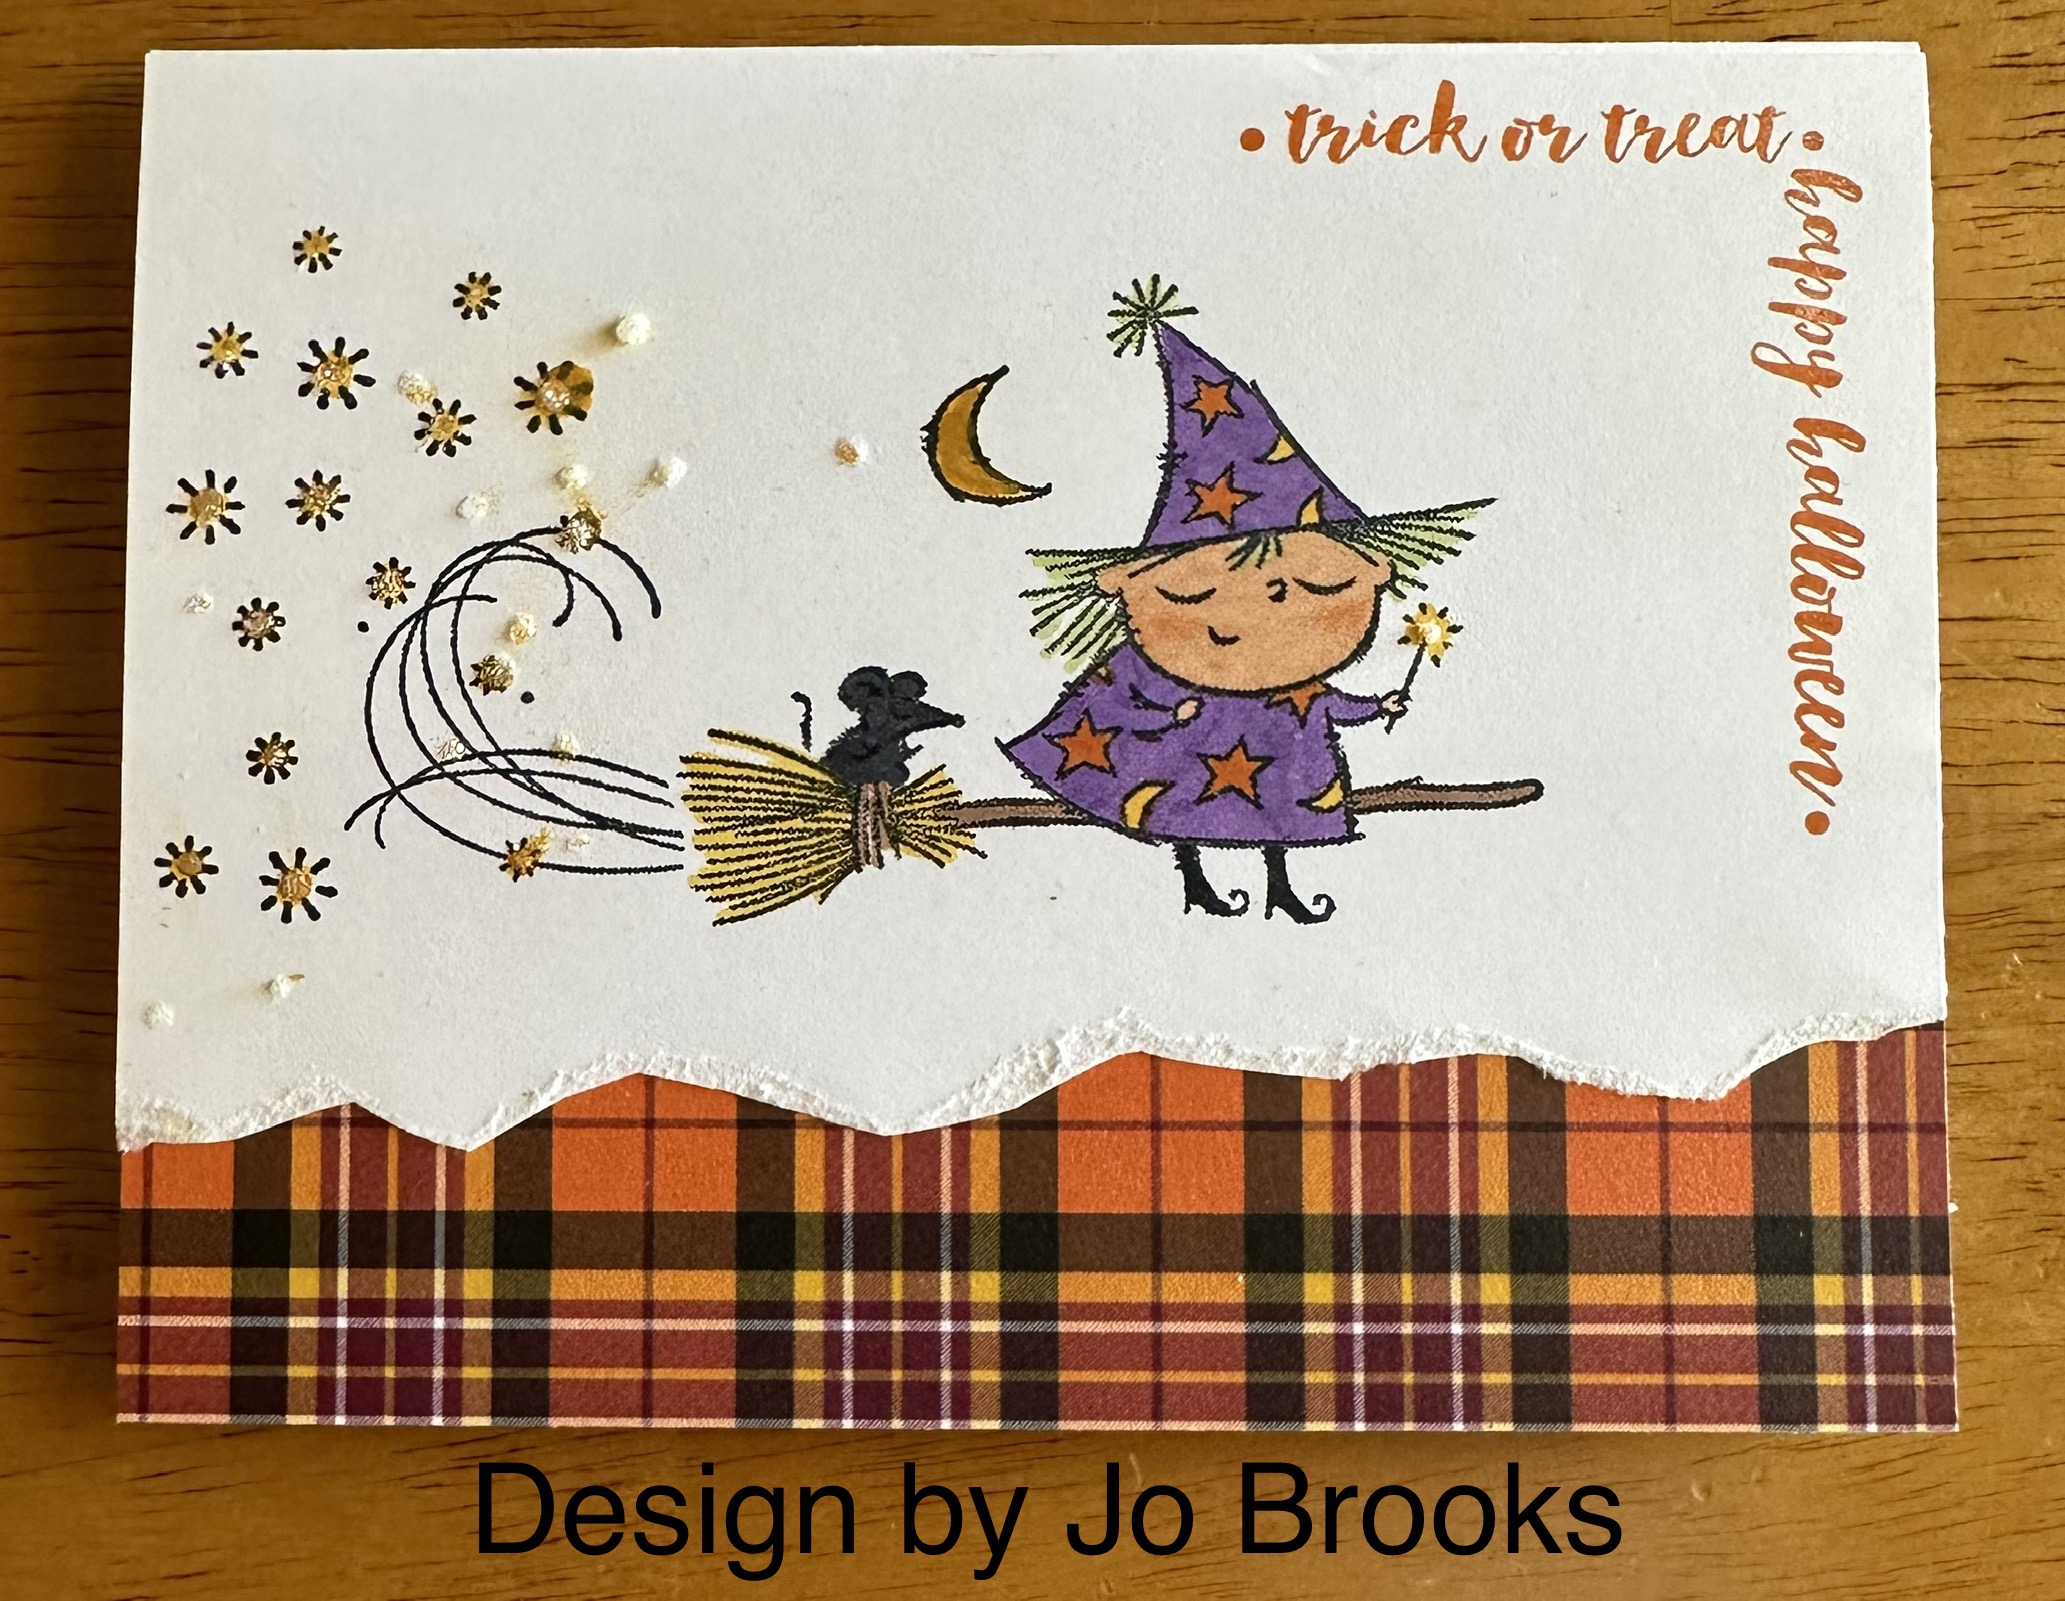
And the smiling kitty on the first one and the little mouse on the second one! Cute, cute, cute…!
And the corner stamp with ‘trick or treat’ and ‘happy Halloween’. It was one stamp so very easy for us to stamp. The inside greeting went perfect with the flying characters!
Thank you, Jo! Your collection of Halloween stamps is amazing. The Halloween sets I had, sold out quickly. Be sure and check out the stamp sets still in the Bake Sale. Click on the bake sale tab.
SAL, Shoebox Swap A Lot
Karen
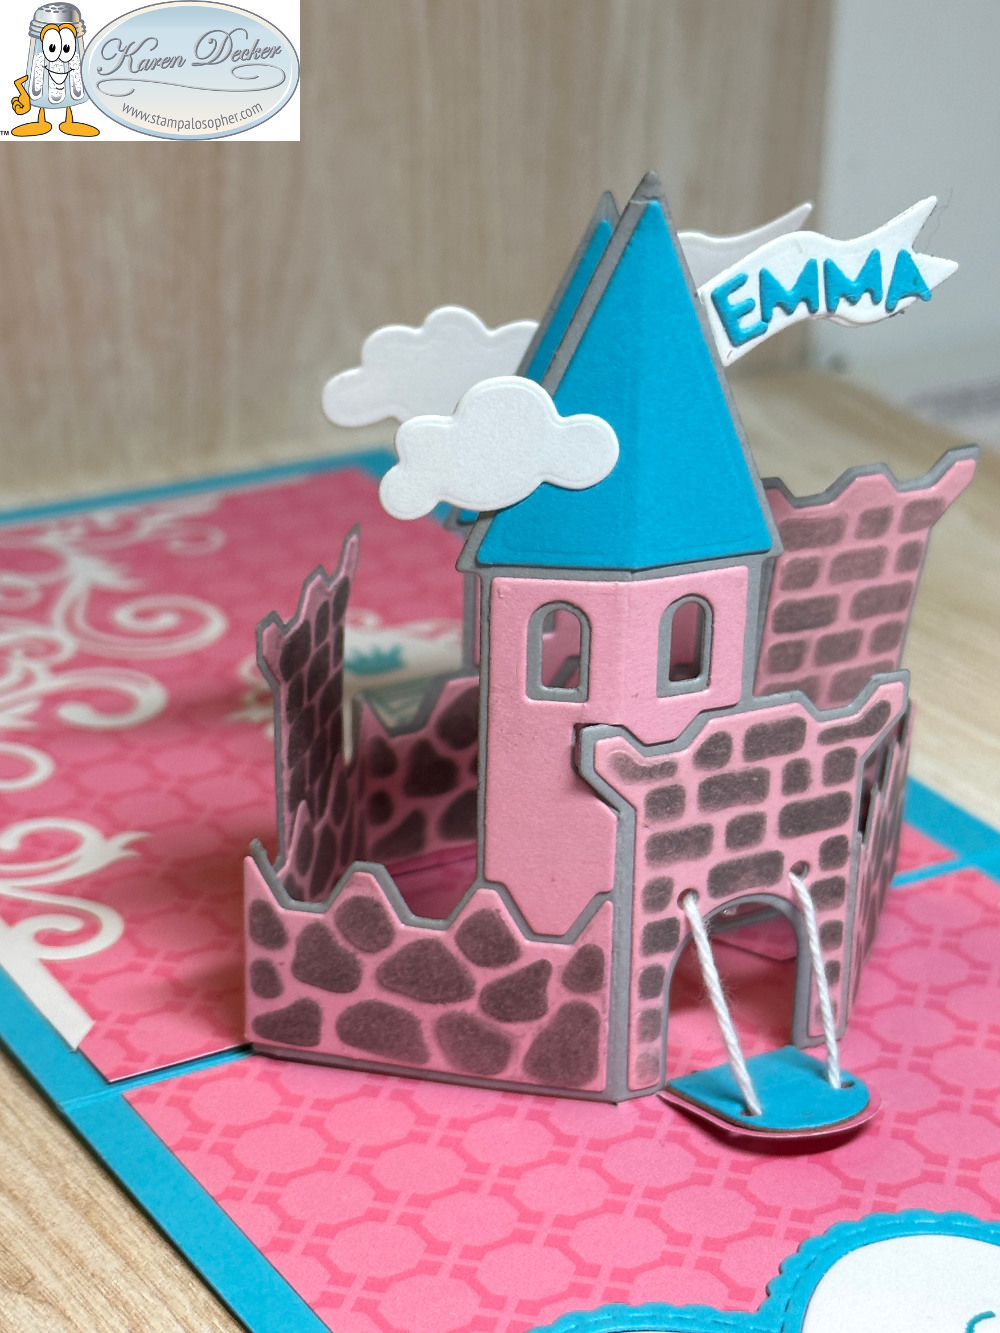
Beautiful Princesses
My granddaughter turned 5 in September and she loves all things Cinderella, so I purchased a pop up castle from the Karen Burniston collection of dies and several Disney stamp sets. I also shrunk down a picture of my granddaughter in the Cinderella gown her mother bought her for a Christmas gift last year. I had to shrink it several times to get the right sizing but wound up using all of the little pictures. She loved the card!
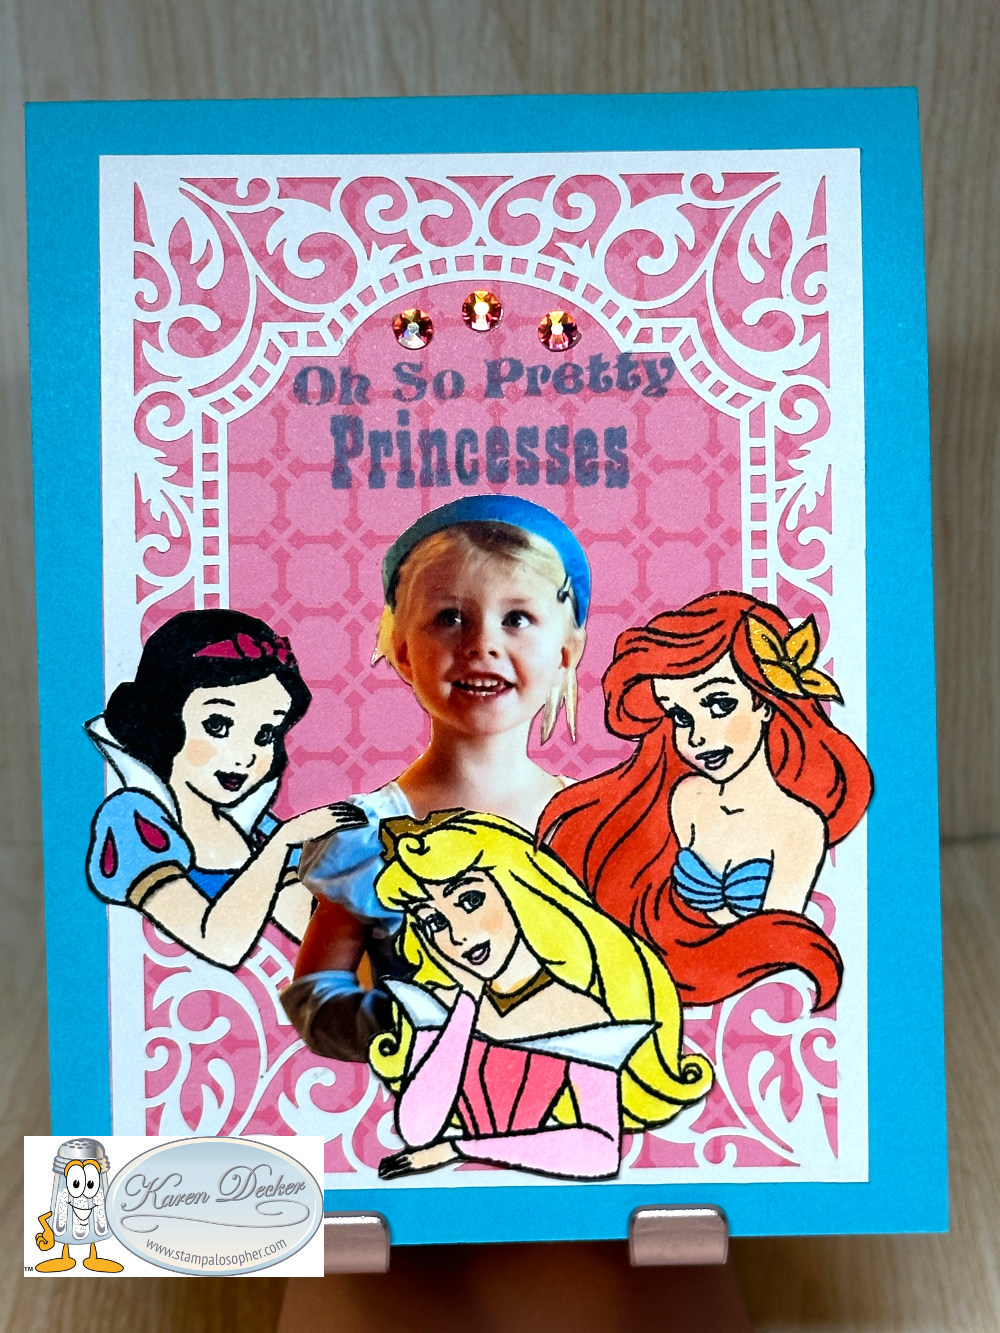
You can guess which of the four princesses is my favorite.
Did you color the princesses or cut them from paper?
I colored them, Sal, with Copic markers. Sadly, I started with Snow White and was diligent to write down the number of the copic I used but then didn’t do the others except Ariel’s hair.
- Snow White
- Bow RV09
- Sleeves B21
- Bodice B24
- Sleeve Band E31
- Skin E000 and YR00 for blush
- Ariel
- Hair R05
The nice thing about the blog is I can come back and edit this post adding the other colors after I do another set of princesses.
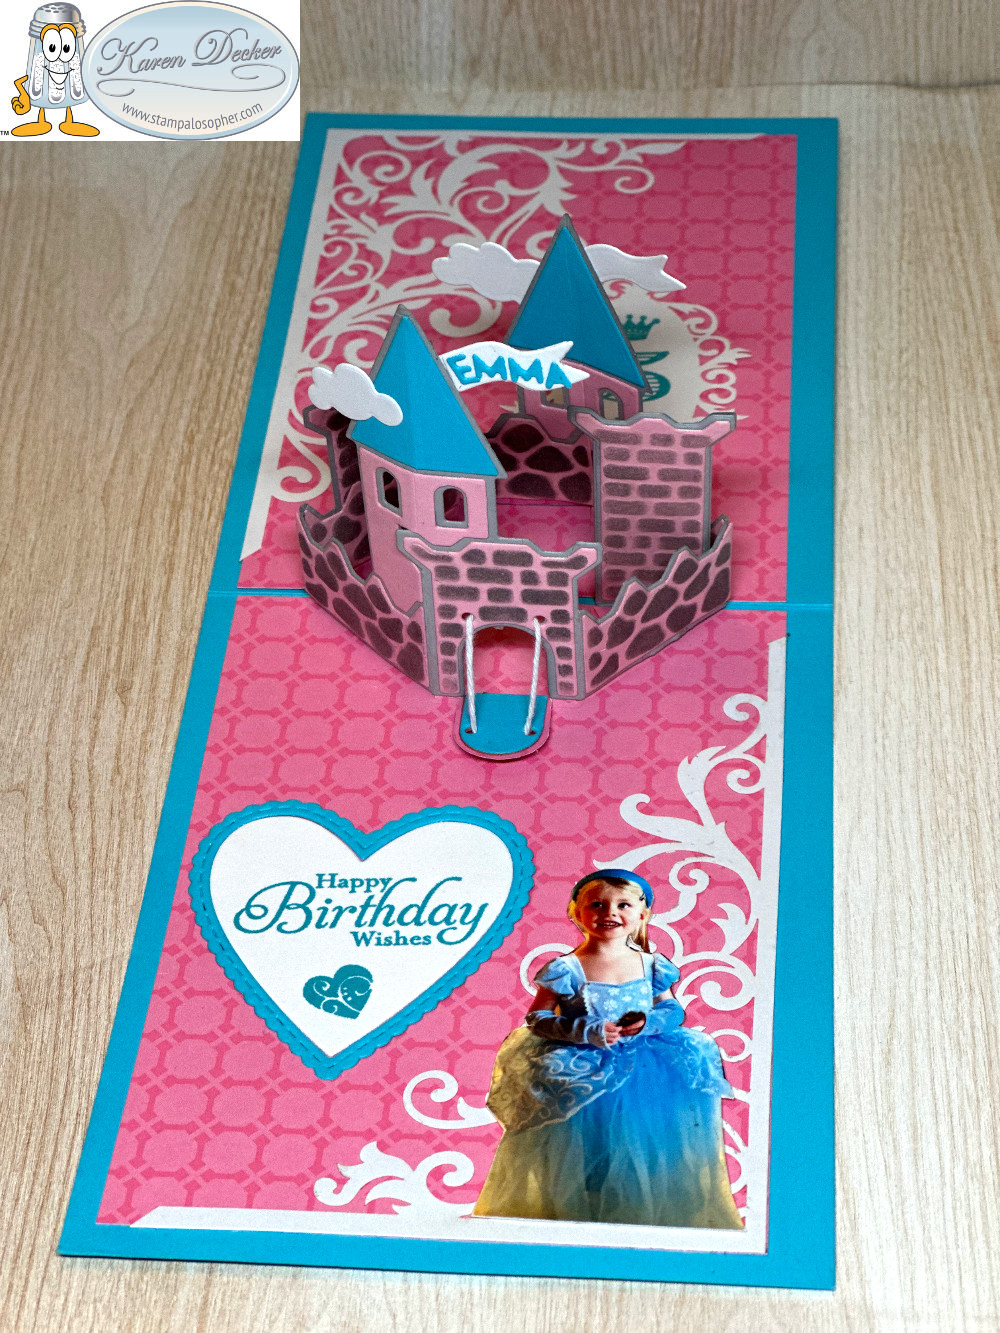
When you open the card the castle pops up…..
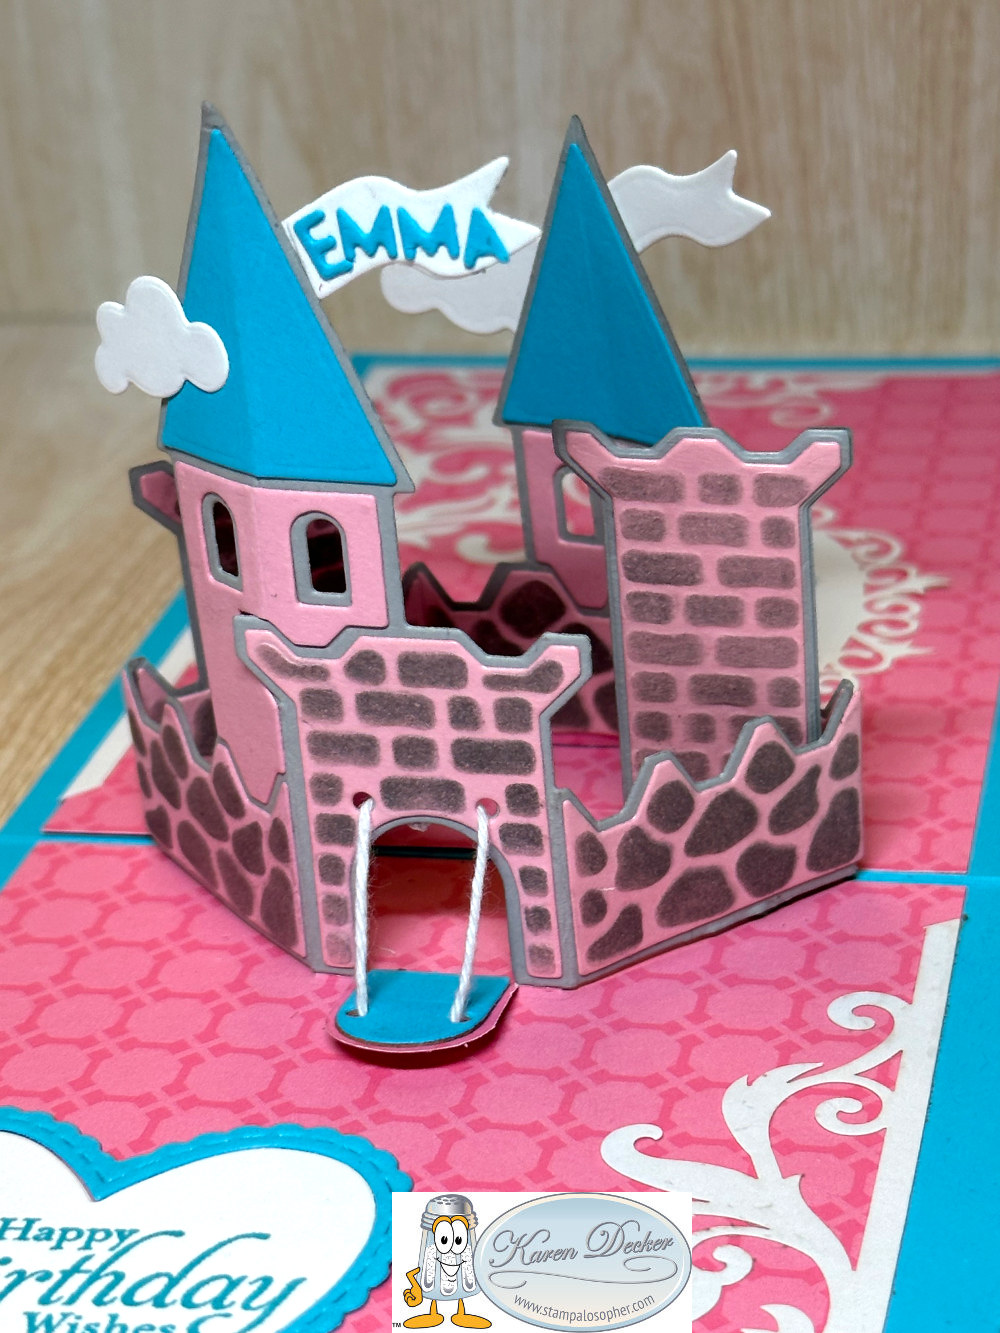
Here are some close up views that show the two towers….
 .
.  .
.
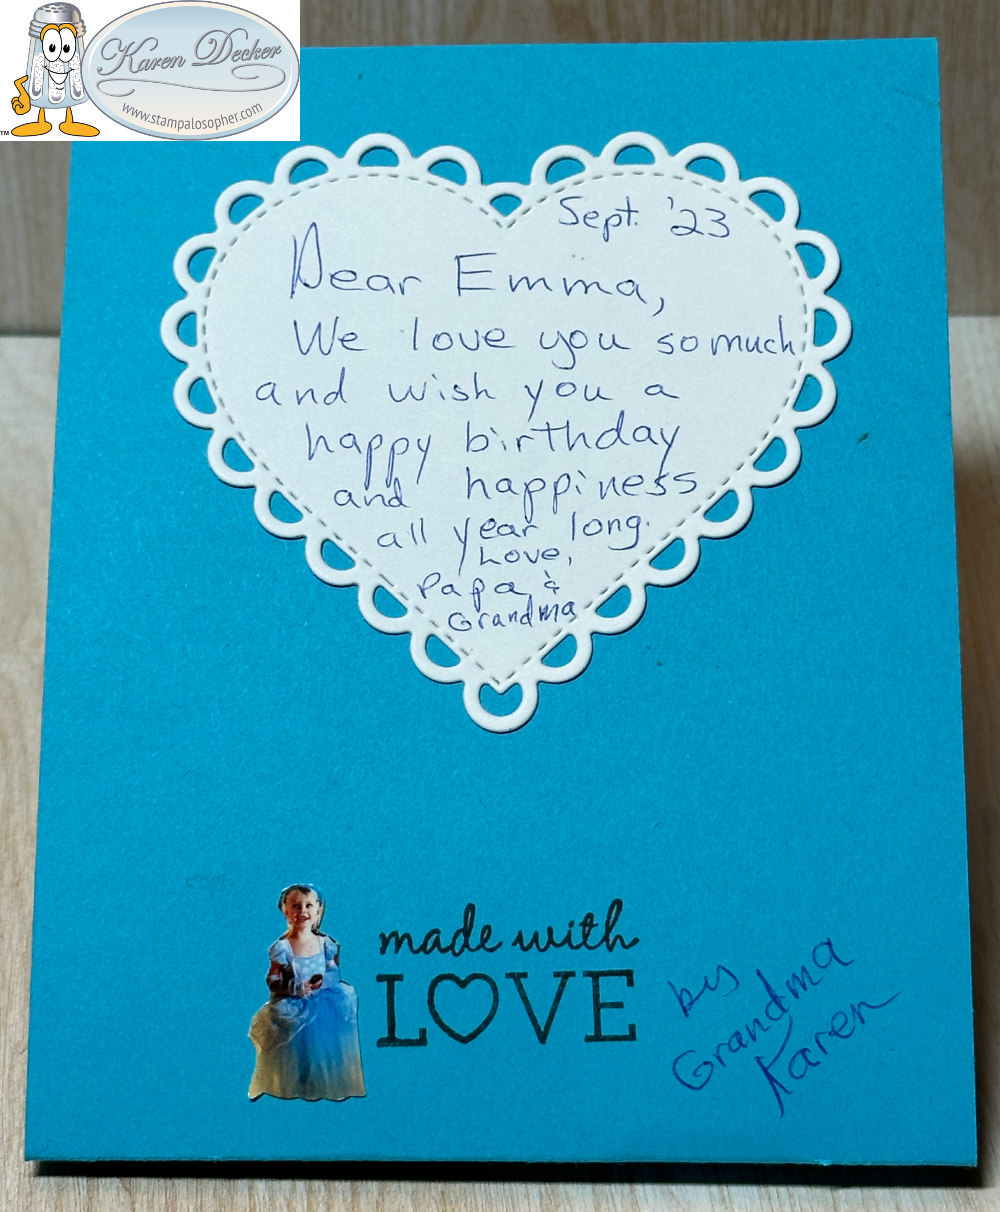
And for a place to sign, I added a cut out heart (Many Hearts Die set) on the back and one of the littlest pictures of Emma.
 .
.
The dies include the little flags and the clouds and you can hold the dies in place and sponge over the dies to add the brick look of the walls and towers.
- The Happy Birthday is from the Simply Sketched SU stamp set.
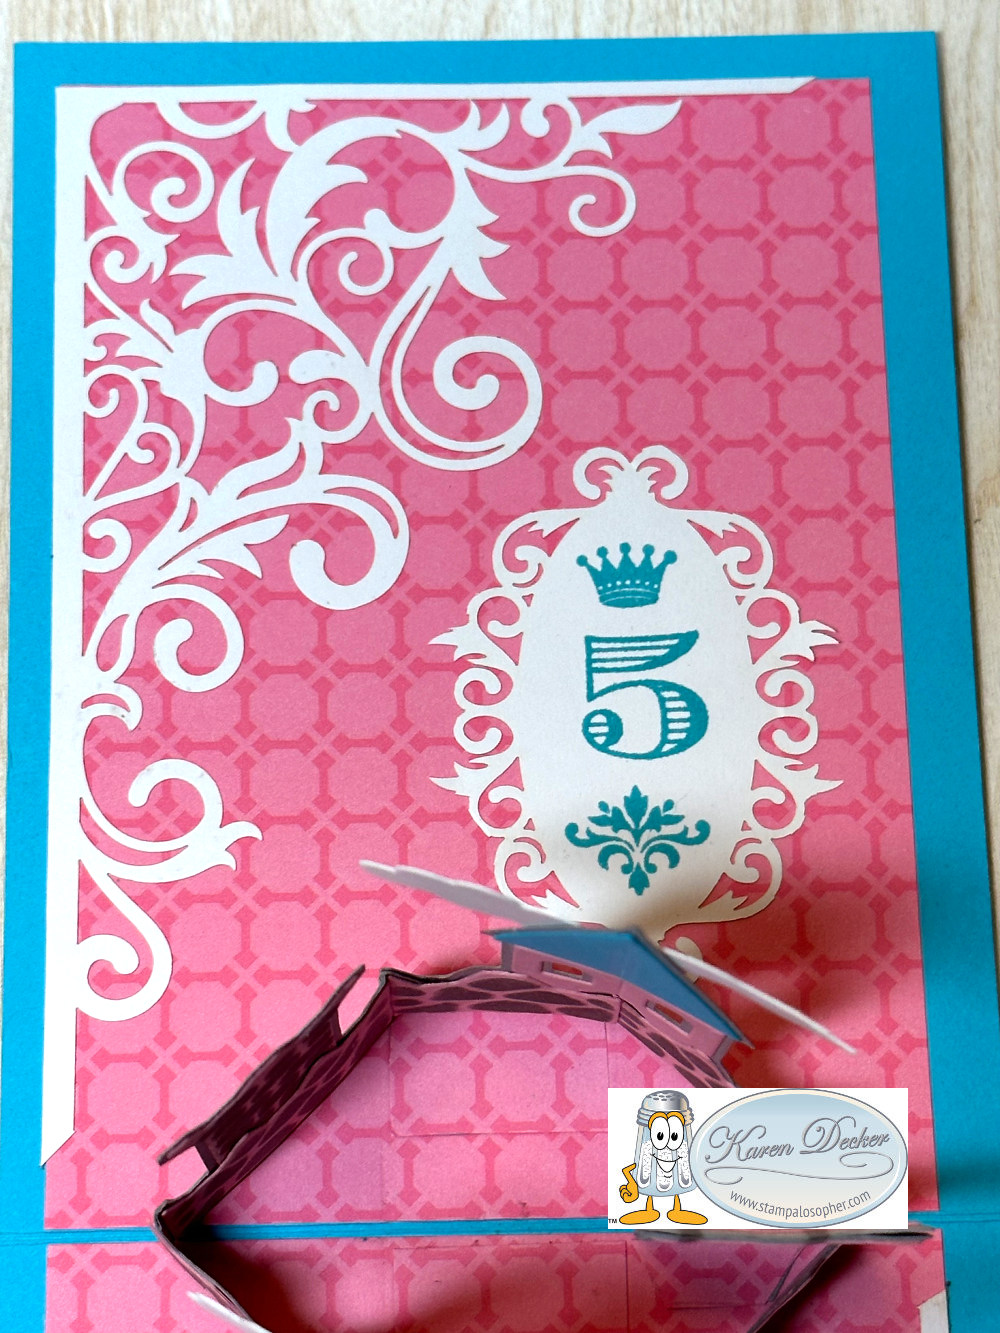
- The ‘5’ is from the Memorable Moments SU stamp set.
- The crown and flourish above and under the ‘5’ are from the Tiny Tags SU stamp set.
Tiny Tags is in the Bake Sale list!
It is, Sal, and it has a matching punch. Some of these miniature sets really come in handy. Click on the Bake Sale tab at the top to see all the available stamps, punches and dies.
- The white laser cut paper was in my stash from SU -Stampin’ Up.
- Base: Turquoise, 4 1/4 X 11, scored at 5 1/2
- Inside Layer (X2), Pink Designer Series Paper, 3 3/4 X 5 1/4
- Cut 3 long brick walls and 2 small walls in pink cardstock and sponge with gray ink as you hold the die in place
Was there a video you could share?
Great idea, Sal! I could never articulate the construction of the castle.
I found a sale at Simple Pleasures on ‘i-crafter Ribbon Rosette Funny Add-on’ dies to cut out the middle of a rosette with funny sayings like, ‘Adulted Today’, ‘Got Out of Bed’, … I don’t have a need for silly rosettes but the dies cut out teeny tiny little letters and that is why I bought them. A month later I wanted to put ‘Emma’ on the little flag of the castle and the letters were perfect!

For sure! There is an example in the video of a prince’s castle which would be good to make for the grandsons! There is also a victorian looking castle you could make for an adult card.
Even if I only used the die once, it was worth it to see Emma’s delight. She even put the card beside her bed.
Thank you for giving me a little bit of your precious time today as I share a creation to ‘bring a pinch of creativity to spice up your crafting world!”
Next time!
SAL, Sharing A Love
Karen
Click on little Sal in the computer to go to Karen Burniston’s shop:
Sharon Fincham September 2023 Shoebox Event
I have so much to show you today, so grab a cuppa and a pencil to take notes about the products in the awesome cards that we did at Sharon’s Shoebox Event.

 .
.
Products:
- Garden Green cardstock, Pearlescent paper and gold foil paper
- Merriest Moments bundle with a stamp set, a set of dies and a hybrid embossing folder
- Poinsettia Petals Stamp Set (outside greeting) & Dies, Ornate Layers Dies
- Farmhouse Christmas (inside greeting)
- Pearl bling and gold cord bow
 You were probably glad to do one more Christmas card!
Delighted, Sal!! And she had another Christmas card for us to make!


Just awesome! Thank you, Sharon.
Products:
- Navy Blue and Gold Foil paper, Gold Glimmer Paper for the star and brown for the stable scene
- Night in Bethlehem Edgelits Dies
- Candy Canes Die Set for the front greeting piece which has the ribbon run through each side
- Stitched Seasons Framelits Dies for the inside white background layer
- Star Of Light stamp set
Perfect choice of gold foil which catches the light!
Sure does, Sal! And Sharon had more for us. Check out the Halloween card kit she had for all of us:

So cute! I can’t help you with the products on this one. I loved that paper and needed a fall card before Halloween so I saved her cat for another card and made this one:
 .
.

I used the Nuts About Squirrels stamp set. The funky cut out for the front greeting is the fence post in the Grace’s Garden die set!
That’s thinking outside the box!
Well, so many of the dies were too big and this one fits the words nicely.
Sharon’s birthday was in September so I made her this birthday card:
 .
.
Sharon gave us a set of the flower blings you see in the card and I wanted to use them on her card so I used the die set I recently bought from Inlovearts and some fun fall designer series paper. The greeting is from the Pretty Petities stamp set with a matching punch. This hasn’t sold from the Bake Sale products so I pulled it out to use it.
You’ve pulled more than one set from those you are selling to use so why sell?
I know, Sal; call it sellers remorse but I have run out of room and need to purge.
Then Sharon sent me a thank you card! She loves bees and I found this die set at Simple Pleasures in Colorado Springs and I knew Sharon just ‘had to have it’!! It is a die set from Elizabeth Craft Designs.

Could you have a salt shaker die set made?
Hmmm……… that could be interesting.
Happy fall everyone! I hope you enjoyed the cards and they ..
I will say it… ….bring a pinch of creativity to spice up your crafting world.
Thanks, Sal!
SAL, Shoebox A Love of crafting
Karen
Click here to go to the Bake Sale Tab.
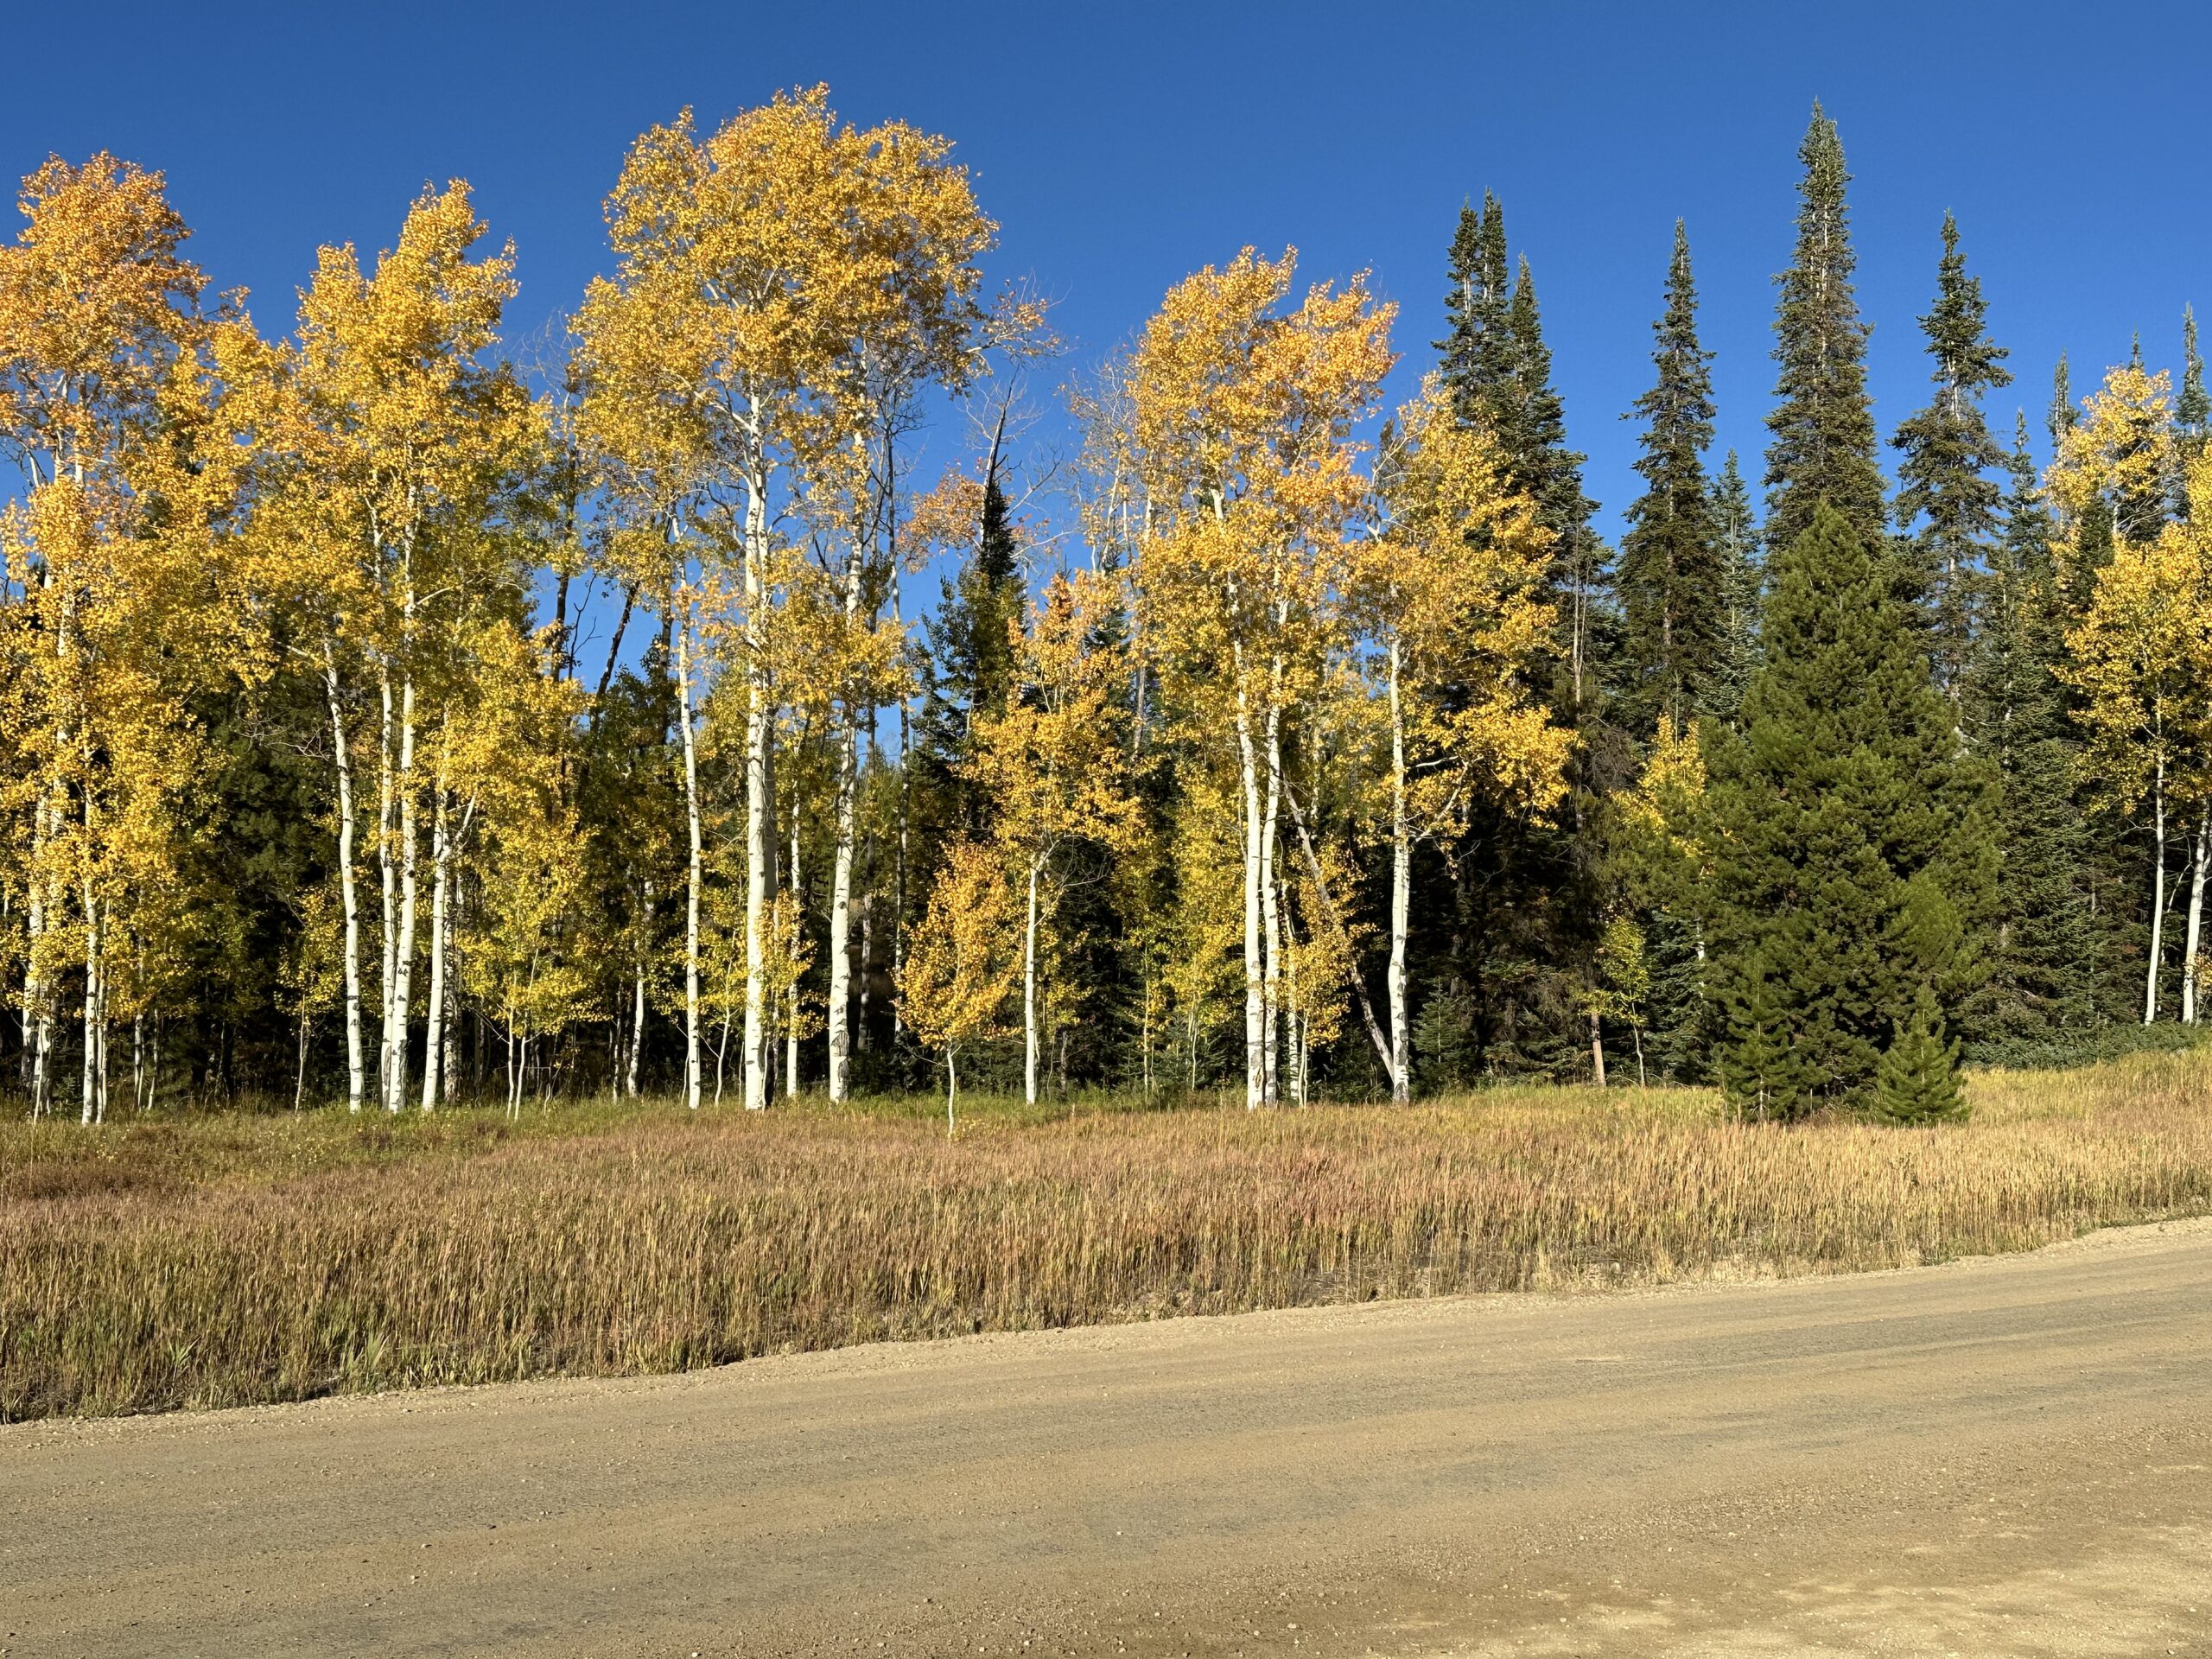
Colorful Colorado Birthday Cards


We were at Steamboat Lake for a week and watched as the colors were changing! It was glorious! The first picture is Pearl lake, another beautiful lake north of Steamboat Springs. The picture captured the various colors and the reflection in the lake.
You must have had your daughter’s fancy camera!
No, Sal, just an iphone on a beautiful day!
Right before we left for camping I purchased a Colorado Stamp and die set ‘Colorful Colorado’ made by Memory Box and another Colorado stamp set, ‘Greetings from Colorado’ at Simple Pleasures in Colorado Springs. It is a design by Ann Corbiere-Scott. The store is a stamp and scrapbook store with an entire section of the store dedicated to products for each state. They market many of the major stamp and die companies’ products and have an amazing stock of scrapbook and card making paper.
ooohhhh, time for a field trip. Let’s see the card you made with what you bought!
Give yourself lots of time when you go to this store!
For the card, I had fun doing sunsets using sponging in different colors. Paul liked this sunset best which used Orchid Oasis for the blue.
 .
. My favorite was this sunset with the darker Pacific Point ink for the blue. I tried Marina Mist for ink sponging as well but it wasn’t much different than Pacific Point. Let’s take a vote…… which do you like best?

This is a picture of a Colorado sunset taken at Ridgway State Park in June. I talked Paul into taking us out on the boat to sit in the middle of the lake and watch the sunset.

The following picture is of columbines at Yankee Boy Basin outside of Ouray, Colorado.

I think you got the color of the columbine perfect. What did you use?
I used Copic marker BV00 which is close to Orchid Oasis.
Can you see the Kissing Camels (Garden of the Gods) in this stamp collage of Colorado?

The stamp set came with the die to cut out the the aspen frame, the mountain and the pinecones. The columbine was in the other set and was fussy cut. The pine bough came from the Poinsetta Petals Stampin’ Up! set with Poinsettia dies.
The hug greeting is the Limited Edition Stampin’ Up! stamp set and the Designer Series Paper (DSP) is birch paper from years ago in Stampin’ Up!
The die does not need to be cut apart. If the die is left intact, all the leaf and pinecone shapes will be cut out when you die cut the frame but you can easily stamp them afterwards. I stamped the leaves in Memento Black and the pinecones in Chocolate Chip.
One pointer for anyone who has this set – the set is photopolymer and the large aspen frame can stretch and not be perfect for the die which cuts it out.
I can guess how you found that out!
True, Sal, and to remedy this situation I used my Stamparatus and mounted the aspen stamp on the plate and then placed the die on the stamp to check that nothing was stretched out of the shape of the die, adjusting the stamp where necessary. This could work with any dies you have that have thin images to cut that might not stamp correctly if the stamp is stretched.
The other cool thing I found with the aspen frame is by stamping the frame on the piece of basic white that I was going to sponge and then popping up the die cut frame on top of the stamped image with white foam adhesive strips (don’t use dimensionals), I achieved a 3D effect for the tree.
I can see that in the right side on the first picture.
Recipe
- Base: Very Vanilla, 5 1/2 X 8 1/2 scored at 4 1/4
- Layer: Birch Bark DSP, 5 1/4 X 4
- Inside Bottom Strip: Birch Bark DSP, 1 X 4
- Background Layer: Basic White, 5 X 3 3/4; stamp the frame in Chocolate Chip, then fussy cut around the outer edges of frame.
- Sponge the sunset in Pacific Point, then Daffodil Delight, Crushed Curry, and ending with Calypso Coral.
- The mountain will be die cut when you cut the aspen frame, then ink the mountain stamp with Memento Black, wipe off the black ring around the sun with a wet wipe (or finger), or mask the black ring before you stamp. Fussy cut the tiny white around the mountains that the die will leave, then color the mountains with Copics B24, or BV00, and the sun in Y06 or Daffodil Delight. Mount directly to your background.
- Stamp the ‘Hugs from’ and ‘Colorful Colorado’ in Versa Mark, then heat emboss with white embossing powder – note – be sure the blue of your sunset comes down far enough to give a good background for Colorful Colorado or it will get lost in the yellows.
- Aspen Frame: Basic White, 5 X 3 3/4, Stamp in Chocolate Chip, die cut and then use a marker to color any white on the edges so you can achieve a 3D look with the background layer.
- Leaves: Stamp your cut out images in Memento Black and color with YG17 for green and Y13 for the tips. Note the placement on the pictures.
- Pine Bough: Stamp in Garden Green using the Poinsetta Petals stamp set and die cut with the Poinsettia Die. Cut the image apart to layer the small bough under the large bough. Top with a little pine cone stamped in Chocolate Chip.
- Columbine: Stamp image in Memento Black and color outside with BV00, or Orchid Oasis, and heat emboss the middle with Crushed Curry embossing powder. Pop up with a dimensional over the largest part of the mountain.
The ‘Greetings from Colorado’ set has a fun stamp for the back of your card that says ‘handmade in Colorado’.
May we see a picture of these stamp sets since they are so unique?
Of course, Sal!


Click on Little Sal in the computer to go to the Simple Pleasures stamp shop. They are happy to ship. Tell them I sent you!
SAL, Share A Love
Karen
For my copic marker users and myself to remember what I used.

‘
Lisa Christensen August 2023 Shoebox Event
It is time to catch up on Shoebox Events before next Wednesday when we have another! In August Lisa Christensen was the designer/presenter and she made two beautiful Christmas cards with kits for each of us to make one of our own. We craft, we laugh, we enjoy being together and then we eat! Thank you, Lisa for a fun time and two gorgeous cards!


Are these pictures of her original?
No, Sal, this is my work which isn’t as perfect.
Lisa introduced us to products from http://thegreetery.com. She used the Nordic Frames Die set for the two beautiful layers. Don’t you just love how the dark green layer shows through the die cut? The smaller Nordic Frame die is popped up for added dimension.
The pine boughs and pine cones are from http://thegreetery.com as well. The layers are a superb design and the layered pine cone is to ‘die’ for! Here is a video of the BotaniCuts Pine Bough set.
https://www.youtube.com/watch?v=O_MILHRYUPg
Lisa’s second card:


Isn’t it amazing how designer series paper (DSP)- and a beautiful foil can be the start of a great card?
Tip: Lisa had a white strip the size of the ribbon to put behind the ribbon so the dark background didn’t show through the ribbon.
I will have to do another inside with the greeting stamped straight but I wanted to show you the stamps Lisa used. The Joy To The World goes perfectly with the inside greeting.
When I returned home from Lisa’s, I colored in the Joy To The World with an alcohol marker forgetting that the words were stamped with regular ink instead of Memento ink, so it ran in a couple places and I had to do a quick fix.
Sometimes you should leave well enough alone.
So true, Sal.
Interestingly, I had both cards displayed on my table and the red foil always drew my attention to that card first. I suppose that is why I invested in a Mini Minc machine to add foil to my cards. I just received the August foil kit from Pink & Main so stay tuned for cards with foil accents/backgrounds. The August Pink & Main kit is fall themed with a beautiful orange foil and the September sneak peak of the kit shows that the kit is Christmas themed with red foil. What fun!
Right after you get Emma’s birthday card done with the Karen Berniston castle, right?
Right O’ , Sal! I have two grandchildren and a dear friend with birthday’s in September so I had better hop to it!
Have a wonderful day stamping friends and thank you for spending some of your precious time with us as we seek to
bring a pinch of creativity to spice up your crafting world!
SAL, Stamp A Lot, Smile A Little and always be Salt And Light in your world
Karen
PS Click on little Sal to go to the Greetery
Christine Dillon July 2023 Shoebox Event
Christine Dillon was our designer/presenter for the July Shoebox swap. There are six of us who take turns designing two projects and make kits for the group which meets monthly.
Ummm….it is September 1st you know.
Yes, I am behind on posting, but I had some wonderful camping trips! Would you like to see my pictures?
Probably be best to help your crafting friends with inspiration instead!
You bet!
Christine designed a 3D watering can for us to make. Note, this is my construction of her kit so not quite as perfect as her original design.
 .
.  .
. Watering Can Template printable pdf
 .
. Click on the blue to get the printable version. The above is just a screen print to show you the pattern.
Christine’s second project was a beautiful birthday card:
 .
.
 .
.
She used the Flourish Thinlits Dies from Stampin’ Up!

Surely you erased all the excess glue before sending it.
Of course I did! I am ‘adhesive challenged’ and I need to use one of the fine tip glue bottles instead of the Tombow glue tip. I stocked up on Tombow so I want to use it up.
So put the Tombow glue in the fine tip glue bottle.
Good idea!
This set is on EBAY and it is a beautiful set to add to your stamping collection with a variety of greetings. I am not ready to sell mine -yet! Keep an eye on the Bake Sale page and it might be available someday.
How about just one picture?
 Paul and I are in front of the Twin Falls in Yankee Boy Basin driving from Ouray, Colorado.
Hopefully we will have a wonderful fall. We have one more camping trip planned for Steamboat Springs, Colorado!
My daughter and Son In Law own the Wild West Balloon Adventures in Steamboat. A hot air balloon ride should be on everyone’s bucket list:

You can follow “Wild West Balloon Adventures” on Instagram for some amazing videos!
Have a wonderful day and I will be back soon with the cards from the August shoebox event.
Bringing a pinch of creativity to spice up your crafting world!
SAL, Stamp A Lot, Share A Love
Karen
Cards for the Cooks and BBQ Folks
 .
.
 .
.
It was my turn for the monthly shoebox event in June and we made the hamburger punch art card you saw in the last post and this apron card using Stampin’ Up!’s retired Apron of Love stamp set and corresponding Apron Builder Framelits Dies. I started by searching my stash of DSP – designer series paper, to find a plaid design I liked. Dandy Designs DSP had a perfect orange plaid with grapefruit grove so I went with those colors. The reverse side of the plaid just happened to be the stars design which I used for the second layer.
Recipe
- Stamp Set is Apron of Love; Dies are Apron Builder Framelits Dies and inside greeting is from Handsomely Suited
- Ink: Memento Black
- Base: Calypso Coral, 11 X 4 1/4, scored at 5 1/2
- Layer 1 (X2): Basic Black, 5 1/4 X 4, Note: Cut the middle out of this piece with the 4th Largest Deckled Die to be the third layer on the card
- Layer 2: Dandy Designs DSP, 5 X 3 3/4
- Layer 3: Basic Black, 2 3/4 X 4 1/8 cut with 4th largest Deckled Die, or See note at Layer 1
- Layer 4: Grapefruit Grove, 3 3/4 X 2 1/2, die cut with next smallest Deckled Rectangle Die
- Inside Layer 2: Grapefruit Grove, 5 X 3 3/4, The greeting is from Handsomely Suited; mask off the handsome to just get Happy Father’s Day
- Apron: Dandy Designs DSP, 2 1/4 X 3, stamp with outline stamp in Apron of Love stamp set and then die cut
- Apron Ties & Neck Band: Basic Black, 3 X 1 1/4
- Pocket: Calypso Coral, 2 X 1 1/2, stamp with outline stamp and word stamps, then die cut
- Utensils: Silver Foil, 2 X 2, Note: use a scrap of woodgrain DSP to die cut handles
- Hearts: DSP, 1 1/4 X 1 1/4
- Buttons: Black sequins adhered with a glue dot
The apron and the pocket are popped up with dimensionals, the other layers are adhered directly to paper.
These are pictures of the sets.
 .
.  .
.
Another set that works well with cooking is the What’s Cookin’ set and Cookin’ Dies:
 .
.

You are messing with my mind. Why show pictures if you aren’t able to sell them?
Well, Sal, I plan on using them and it is nice to go to a post instead of going to my stash to see what I have, and others might have this in their stash and will be reminded what a nice set this is.
You made a birthday card with that second set.
Did I not post that one? Hmmmm……. I don’t see that card in the recipe box so let’s do a quick show and tell:
This is how I started the card but it needed something in the window- a tree, a bird, a ….

So I die cut a white layer with the Deckled Rectangle Die, sponged a sunset sky:
- Orchid Oasis – top
- Daffodil Delight – second layer
- Crushed Curry – third layer
- Calypso Coral – fourth layer
I die cut a bird and branch from the Lovebirds die by Elizabeth Craft Designs and colored the branches and birds with the intent of making the birds look like the red finch birds we see at our feeder every day. I die cut a few extra leaves and colored them with Daffodil Delight for falling leaves. I colored the leaves with Stampin’ Blends of Dk Daffodil Delight and Lt Soft Succulent so they have that fall look as well.
 .
.
Now look at the card with the birds, branches and sunset in the background:

Recipe
- Base: Bermuda Bay, 4 1/4 X 11, scored at 5 1/2
- Layer 1: Beauty of the Earth Designer Series Paper, 4 X 5 1/4
- Using the Window Frame Die cut out window from DSP; note: 5/8″ from left and right sides
- Window: Basic Grey, 3 1/4 X 3 3/4
- Glass: Window Sheet, 2 1/2 X 3 1/4
- Counter Top: Another of the DSP pack, 4 X 3/4
- Cooking tools & Bowl: Basic White 2 3/4 X 4, stamp in Basic Grey the bowl, spatula, cups;
- color the stripes on the bowl in Bermuda Bay
- use an Exacto knife to cut a slit in the bowl for the utensils
- Die cut the cutting board from a scrap of wood tone- I think this is Cinnamon Cider
- Stamp the rolling pin on a scrap of bermuda bay and a second time on a wood tone and die cut; cut off the ends of the wood tone rolling pin and adhere to the bermuda bay rolling pin
- Stamp the spatula a second time on Bermuda Bay and die cut – cut off the handle and adhere the top over the die cut on Basic White
- The turner is die cut from black foil
- The whisk is die cut from silver foil
- Greeting: Basic White, 2 X 2, stamp with Basic Grey and greeting in the What’s Cookin’ set, punch with 1 3/4″ circle punch and sponge the edge
- Inside: Basic White, 4 X 5 1/4, die cut with Deckled Rectangle and sponge per above directions
- Greeting is stamped in Tuxedo Black with the Go To Greetings stamp set Happy Birthday
- Embellish with Bermuda Bay dots, a Bermuda Bay heart and a 1/8″ wide Bermuda Bay ribbon
Those are nice sets where you can mix and match the stamps and dies
Quite fun!
I hope we have brought “a pinch of creativity to spice up your crafting world”!
SAL, Share A Love of cooking
Karen
Father’s Day Fun Cards
Punch art is our fun for today as we punch away to make a hamburger with chips and a pickle!


Recipe
- Base: Thick White, 5 1/2 X 8 1/2, scored at 4 1/4
- Layer 1 (X2): Merry Merlot, 5 1/4 X 4
- Tablecloth: Designer Series Paper in red plaid, 5 X 3 3/4; note: with a 6X6 DSP, cut the 5″ first and then the 3 3/4
- Inside: DSP red plaid leftover from cutting the layer, cut to 1″ X 5″
- Plate: Basic White, 4 X 3, die cut with 4th largest oval die, emboss with Tasteful Textile 3D embossing folder
- Greeting: Basic White, 2 1/2 X 5 1/2,
- stamp in memento black ink with greeting from Sprinkles Of Life stamp set
- die cut with Beautiful Shapes Die
- adhere with dimensionals
- Hamburger
- Bun: Crumb Cake, 2 X 6, run crosswise in Raindrop Embossing Folder so half the strip is embossed for the top and half is not for the bottom of the bun to glue directly to the plate

- Punch 2 from large oval punch, sponge edge with soft suede
- Meat: Soft Suede, 2 1/4 X 1 1/2, punch with Large Oval Punch, dob straight down using sponge and Early Espresso to create speckled texture; use dimensionals to pop up on bottom bun slightly offset, all other layers are glued directly to previous layer
- Cheese: Daffodil Delight, 1″ Square punched from scrap, don’t sponge;
- Lettuce: Granny Apple Green, 1 3/4 X 2 3/4, punched with Pretty Label Punch, sponge edge w/green
- Tomatoes (2): Real Red, 2 X 1 1/4, punch with 1″ Circle Punch, sponge edge w/real red
- Onion: Designer Series Paper w/purple, use 1″ circle punch- cut one full circle, then punch along that cutout’s edge with just part of the punch
- Note: When adhering the hamburger to the plate, use two dimensionals on top of each other to be able to have the right depth for attaching the hamburger at the back side, the front just needs a one dimensional layer
- Potato Chips: 1 1/4 X 11 strip of very vanilla envelope paper; run through crimper, use 3/4″ X 15/16″ oval punch to punch 7 potato chips, adhere randomly on plate
- Pickle: Garden Green Scrap, Granny Apple Green Scrap, punch each color with Word Window Punch lining up on a straight edge and punching only half, or punch a full one and cut it in half, then use your scissors to make tiny divots on the edges and then use a Garden Green Marker to add dots for texture
- Embellish with a bee or a dragonfly or an ant; my little bee is from the So Hoppy Together stamp set

Inside Greeting: Basic White, 2 X 2, stamp using Black Memento Ink with greeting from Guy Greetings, cut with another of the Beautiful Shapes Dies
You used a die that isn’t symmetrical – that’s outside the ‘box’ for you
Sure enough! Another of those dies that I said I would never use! Ha
Summer has finally arrived in Castle Rock so I had better go water my plants! Have a wonderful day and thank you for spending part of it with Sal and I!
SAL, Stamp A Lot if you need to get out of the heat
Karen
Copyright
Unless otherwise indicated, all stamped images are 2009-2023 Stampin’ Up! The projects shown are to spice up your personal creativity and may not be copied for publication or contest submission. The content of this website is my sole responsibility and the use of and content of classes, services or products offered are not endorsed by Stampin’ Up!
Welcome to my blog!

Sal Window to Products


