
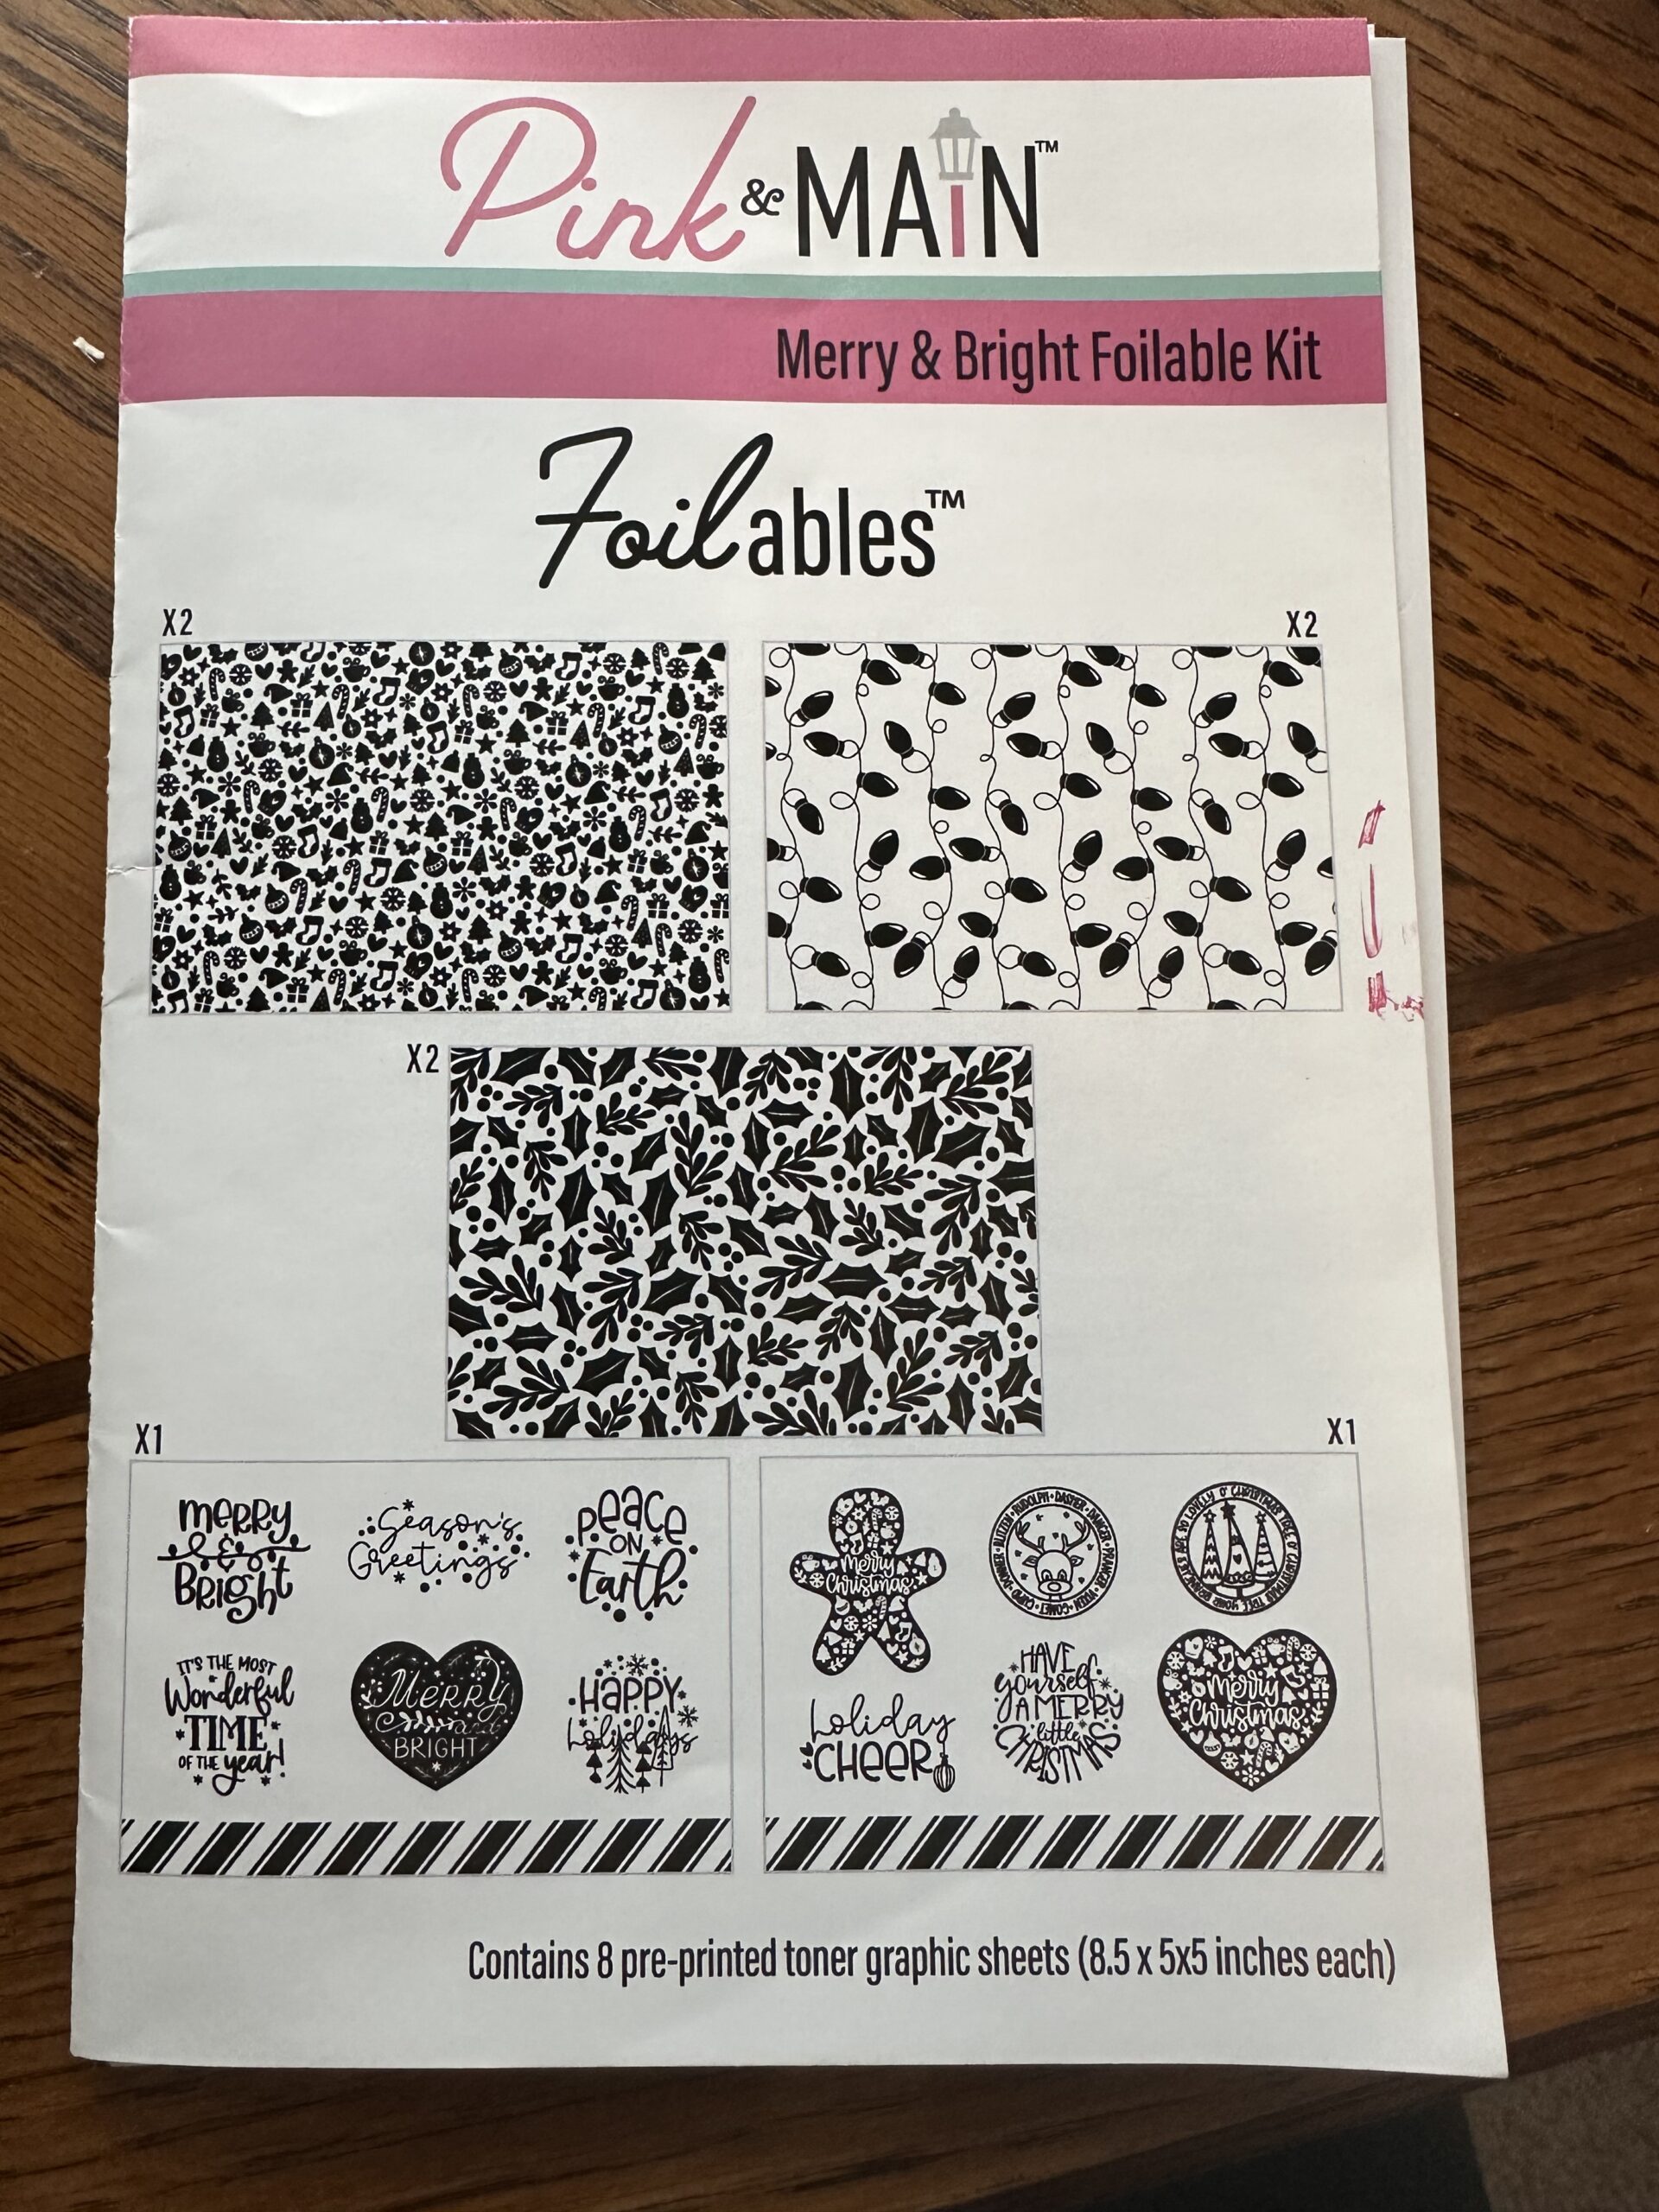
What fun! Using foiling to create Christmas cards! I purchased the ‘Merry & Bright’ foilable kit from Pink & Main which included toner card fronts in three different styles so – of course – I needed to make some of each style! The red foil is Pink & Main’s ‘Shattered Red Cheer Foil’.


When you foil, you have a left over piece of foil where there was no toner image and I used that leftover sheet and an oval die just a little larger than the inside oval to make a lovely border. If you look closely at the inside of this card you can see that the border around the oval is red foil with white images showing through from the cardstock (using the leftover piece of foil), whereas the strip at the bottom is white cardstock with the red foiled images just like the front. I added a little strip of red foil to match the border on the front. The greeting uses Stampin’ Up! red glitter embossing powder for a bit of extra sparkle with Stampin’ Up!’s ‘Very Best Occasions’ stamp set.
For the Merry Christmas I used a ‘poppy’ die. I cut it out of the red layer that I used on the front under the decorative toner sheet. I cut out two additional Merry Christmas Flourishes to layer with the red, which is so much easier than trying to pop up such tiny little areas.
 .
.One of the toner card fronts was holly leaves so I used some green foil from Heidi Swapp which I ordered when I ordered the Minc machine before I learned about Pink & Main. The green foil is 12 1/4″ wide and more suited to scrapbook pages than small card fronts. The Pink & Main Cheer Foil is 6 1/4″ wide and much easier to use.


I purchased full black toner sheet card fronts to foil a layer to go under the foiled designer toner card front but found out it really wasn’t necessary. If you cut the foil exactly the size of the layer you want and center the toner card front carefully, you have a perfect border for your foiled front. I did that with the following card’s red foil strip at the bottom of the inside.
You can really see the ‘shattered red cheer foil’ in this picture.

 and you missed a picture of the front?
Yes, Sal, and that card was mailed before Christmas. Can you imagine calling someone and asking them to take a picture of the front of the Christmas card you mailed them so you could post it on your blog.
This third card really surprised me with how effective the foil turned out. I used Pink & Main ‘Rainbow Cheer Foil’ which has little stars in the foil! It looks so much better than this picture but you get the idea.


In addition to the toner card fronts, the ‘Merry & Bright’ kit comes with several toner greetings and sheets of small greetings in black on white or white on black. The black is the toner so you can choose where you want the foil- a foiled greeting or a white greeting with foil around it. I cut the foil large enough to give a border around the greeting, foiled the greeting, using the black on white,and then glued the left over foil piece behind the foiled greeting for a nice border.


This last foiled card was an experiment. I had purchased Pink & Main colored toner sheets and used the left over foil sheet from foiling the card front with red holly leaves and then ran the left over sheet through the minc machine on top of a green colored toner sheet! It worked! I used regular red foil cardstock for the layer and a green card base. Gold foil card stock was used for the greeting and several gold jewels were used to embellish the front.


The inside greeting is from Stampin’ Up!’s ‘#Elfie’ stamp set. I used circle dies and gold foil cardstock to tie in the gold from the front.
Gotta make that inside match the front somehow!
That’s my stye, Sal!
Recipe Basics
Card 1 & 2-Vertical
- Base: Thick Basic White, 5 1/2 X 8 1/2, scored at 4 1/4
- Black Transfer Sheet: 5 1/4 X 4, Foil in desired color with foil of same size and then die cut Merry Christmas Flourish; to pop up the flourish die cut two additional flourishes in Basic White. You’ll need 4 1/4 X 3 3/4 for die cut.
- Decorative Toner Sheet: 5 1/4 X 4, Foil 5 1/2 X 4 1/4
- Oval Outside: Basic White, 3 1/2 X 4 1/4, Sixth in Stampin’ Up! oval set
- Oval Inside: Basic White, 2 1/4 X 3, Third in Stampin’ Up! set
- Inside Strip: Use what you can form leftover foil
Card 3- Horizontal
- Base: Thick Basic White, 5 1/2 X 8 1/2, scored at 4 1/4
- Decorative Toner Sheet: 5 X 3 3/4, Cut foil at 5 1/2 X 4 1/4, line up carefully to have a perfect border of foil
- Merry & Bright Greeting (3rd card): 2 X 2 cut of the greeting from kit, 2 1/4 X 2 1/4 Starry Rainbow Cheer Foil
- Inside Square: Basic White, 2 1/4 X 2 1/4 , Foil backing 2 1/2 X 2 1/2
- Inside Strip: Toner Sheet, 5 X 1 with foil of 5 1/4 X 1 1/4
Pink & Main has a subscription service for their foilable kits which I signed up for, so you will be seeing more foiled cards in the future! I am impressed with the quality of their products. Click on little Sal in the computer to go to their site.
Thanks for joining me for a foiling adventure!
SAL, Share A Love
Karen
