Card Buffet January 2015
The specials this week are very “special”! Did you know you can use your reinkers and Dazzling Diamonds Glimmer Paper to make many different colors of glimmer paper?!
Technique Alert: Colored Glimmer Paper: Drip drops of ink on your glimmer paper and use your Aqua Painter to spread the color evenly. So easy!
Card Buffet Report:
We had a great time with Valentines, A Sympathy card, A St Patrick’s Day card, A Birthday Card and A Thank You Card. Each stamper took home a Treat Box Holder with a bookmark designed by Peggy Tassler and featured on Too Cool Stamping with Angie Leach. Click on the link for directions. Here is my version with our new Stack With Love Designer Series Paper:

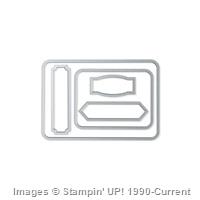
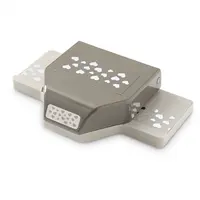
Do you see those little bitty hearts on the bookmark? They are from our new Heart Confetti Punch. Before this punch, our smallest heart was the owl punch heart which I used here with red glimmer paper inside the heart with the arrow. There are two different ways to make the window for the nuggets. Angie Leech used the Modern Label punch, lining up the punch with punched sticky notes. After trying that technique (second image) I used the Project Life Framelit so I only had to make one cut (first image).
Supply List
Built for Free Using: My Stampin Blog


Remember the Thank You card from a previous post? Jennifer did a double punch on the paper piercing and used a candy dot to match the stem of the flower. I love seeing the creativity of my stampers.
Have a great day and use hostess code JEJ32FKT to be entered in February’s online drawing. Congratulations to Shanon who won the set of Rhinestones in January’s drawing and December went to Robyn for post comments.
Stamp A Lot,
Karen
Lotus Blossom Thank You
Hello Stamping Friends,
I didn’t want to overload one post with three items so I overloaded your email with three posts. Let me know which you prefer.
I was anxious to play with the Lotus Blossom Stamp Set and I needed about 10 thank you notes after Christmas so I created a CAS – clean and simple- card. With Paul scoring and doing the paper piercing we were able to do all 10 in about one hour.
It is white on white with the blossom and the Candy Dot done in Calypso Coral. The stem uses Wild Wasabi.
There are three flower images, two stem images and two greetings in the stamp set:
 Best of all — it is free during Sale A Bration with a $50 order.
Base Card Stock: Whisper White 5.5 x 8.5
Top Layer: Whisper White 5.25 x 4 popped up with dimensionals
Ink: Calypso Coral, Wild Wasabi
Embellishments: Calypso Coral Candy Dot
Tools: Paper Piercer Tool and Essentials Paper Piercing Template
Simply Scored Scoring Tool and Stylus
Score two lines across the bottom of the top layer 1/4 ” from the bottom and 1/8″ apart. I scored it on the back, though the picture looks like it was scored on the front. The Essentials Template lets you line up the corner precisely and punch 5 holes across and down in the upper left corner.
The blossom stamps have little 1- 2-3 tags so you know the order to stamp and can line them up perfectly. Ink the first two up and stamp but use the Stamping Off Technique for the third stamp. Do the same-stamp off- with the solid stem stamp after stamping the other stem direct to paper.
Stamping Off Technique: Ink up your stamp — stamp it off on your Grid Paper or scratch paper and then stamp it on the image.
Click On any of the above images to order the product or CLICK HERE to go to the store. I would love to earn your business and be your demonstrator.
Remember that a post does not have the full blog details. CLICK HERE to go to the blog where you can see all the tools.
SAL (Stamp A Lot, Smile A Little, Share A Love)
Karen
Perpetual Calendar Class
‘Twas the week before class and all through the house this stamper wasn’t smiling she felt like a louse.
RSVP’s were in, the money was paid, but alas all seemed lost backordered kits were weeks away.
Ahhhh such was the situation as I prepared for the perpetual calendar class. With my DH’s help we decided we could make the kits ourselves.
I had purchased a kit during the preorder so I knew just what we needed.
For the box, we bought shirt boxes and cut them to 7 x 13 3/4 for the bottom and 7 1/8 x 13 7/8 for the lid. Each side was scored at 1″.
The ribbon holder was shaped like a barbell from a 5 1/4 x 2 1/2 Hello Honey card stock and wrapped with 36″ each of Gold Sequin Trim, Thick Twine, Baker’s Twine, and Lost Lagoon Ribbon.
Hearts were punched, feathers were stamped with Whisper White Craft Ink and then cut out with framelits, banners were made with 3/4″ strips, stars were cut with the stars framelits dies. I had the heart confetti and star confetti punch and made sticker sheets with the double back adhesive paper from which we punched stickers just like the kit.
The calendar sheets were made to fit two to a page – just slightly smaller than SU’s 4 1/2″ calendar sheets.
A nice cardboard backing was made from rectangular cake bases cut at 4 3/4 x 11 1/4.
The clip was a clothespin w/ blackboard found at the local hobby store.
I used MDS to create the label and Word to create the calendar sheets.
Here are those files should you choose to make your own perpetual calendar.
What a fun time we had and the stamper’s calendars looked great!
Have a great day!
SAL (Stamp A Lot, Smile A Little, Send A Letter, Share A Love!)
Karen
Merry Christmas Greetings!
Dear Stamping Friends,
May your Christmas be wonderful this 2014 and may your memories keep your heart warm all year!
Hallmark’s “Mary’s Angels” ornament collection spices up our Lladro nativity scene!
And part of the collection loves to sing “Joy To The World”! May you have a joyful day today!
Need a quick neighborly gift? How about grabbing the Voila’ set from years ago and creating a quick card for a bottle of Martinellis?
I stamped the cover on the silver foil paper, fussy cut it and used our new little brads to attach to the serving platter with Merry Christmas on the platter.
Paul worked on Chapstick holders for all his coworkers. Might be the thing of the future as we learn to eat less sugar!
Merry Christmas!
Christmas Cards from the Stamp A Stack and Card Buffet
Hello Stamping Friends,
I held two Christmas card making events this year- A Stamp A Stack and A Card Buffet.
Thank you to those of you who were able to get away. Order products now for next year- the catalog expires Jan. 5th. Click Here to order.
Drum roll – May I present:
The Stamp A Stack
#A – the Snowflake Flip Card using the Snowflake Card Thinlits Dies (page 22 of the holiday catalog), the All Is Calm Specialty Designer Paper, Frosted Sequins, and the Lost Lagoon Silky Taffeta Ribbon, all on that same page. The card uses the Dazzling Diamonds Glimmer Paper to make the snowflakes, two large and one small layered here, and — the Joy greeting from the Thinlits Set is punched out twice, once backwards; layering the two makes it look wonderfully 3D- almost like our clay with glitter.
Inside we have Jackie Topa’s design for making a gift card holder by punching out a snowflake with the die, rotating it 90 degrees and punching again. Cool Technique! Jackie has a nice video at Jackietopa.typepad.com. The Holiday Invitation stamp set from page 49 is perfect for a gift card – well maybe not Borders or Home Depot- but definitely a Starbucks gift card which is what each attendee received from me.
#B – The second card used the Cheerful Christmas stamp set on page 15 of the Holiday catalog. I cased this from a posting on Pinterest by Inkandpapercafe.com. I have used the Deco Labels Framelits to frame a circular punched image but liked using a punched circle cut in half to frame the deco label. The Filigree Frame Textured Embossing Folder was perfect for lots of little scrollys.
Masking Tip: I taught the stampers how to mask the stamp by stamping the green sections on the sticky edge of a post it note, fussy cut the masks and put them on the stamp before stamping in Real Red Ink. Ink up with Real Red ink, remove the masks, color the green evergreen bows with the Garden Green marker and stamp on your cardstock! Voila – a much richer image than coloring all the red of the image.
I was able to be creative on the inside, (love making the inside special), which you will see as you follow Stampalosopher. I turned the main image upside down for one lovely scrolly to use for hanging ornaments, stamped the message from a retired set – Joyful Christmas – (remember those lovely poinsettias?!), stamped the ornaments, and then drew a line with a ruler to each ornament being careful to not draw over the greeting. Or, as one creative stamper did, draw the line for the middle one over top of the greeting and then stamp the middle ornament on another piece of paper, fussy cut it, and attach with dimensionals for a different 3D look!
#C – The third Stamp A Stack card was a more formal card cased in part – the banner part – from one of my many convention swaps. I wish I knew to whom credit should go but the name is lost.
The greeting is from Seasonally Scattered, page 43 of the Holiday catalog. For those who thought it was too ornate a simple Merry Christmas was stamped instead. One stamper liked the silver snowflakes but not the greeting, so she stamped Merry Christmas, punched it out with the large oval punch, and then mounted the greeting with dimensionals on top of the silver snowflakes. So nice!
For the inside I used the greeting from the Bright and Beautiful stamp set on page 25 and a strip of silver foil paper:
Leftover card kits from the Stamp A Stack were available at my next event The Card Buffet!
The Card Buffet
We had such fun at the Card Buffet and everyone went home with a door prize – a kitchen towel angel. Well okay, they did have to make their own door prize but it was fun. Here is a picture of Michele’s angel:
The angel uses one kitchen towel, a matching rectangular potholder, a dishcloth, several rubber bands, lots of ribbon, a pipecleaner to attach all, and decorations for her to hold. Here is a pdf file with one of the poems I found on Pinterest printed inside a frame from My Digital Studio:
Kitchen Angel Poem
#1 – Moving right along we have the Chapstick holder from Angie Leach at TooCoolStamping.com using leftover silver circles from the November Paper Pumpkin kit. Walmart had peppermint striped chap sticks for $1:
#2 – The November Paper Pumpkin had eight cards in the kit so they were available to make at the Card Buffet, I added Blue Lagoon to the front for an upscale version:
#3 A revised case of a card from the StampWithSandi.com blog. I used three gold embossed middle sized stars from the Bright and Beautiful stamp set instead of two and stamped them on white instead of gold foil paper. I glued sequins on the card instead of using gold embossing and I used a retired stamp set, The Sounding Joy. But wait until you see the inside…….
I used the Confetti Stars Punch-page 30 of the catalog – and taped on a strip of gold glimmer paper underneath to sparkle through the top and tie in the gold of the front! Thanks to my darling husband for that touch of creativity!
#4 – I purchased a Simply Sent Noel Notes card kit from the Clearance Rack and it turned out to be a favorite of all the stampers. The Noel was precut and the card used textured card stock. The envelope and liner were all included. The kit was meant to be for a Christmas family picture but I made it into this card with the alphabet from the photopolymer stamp set and the Merry Christmas greeting from Petite Pairs. The kit had a scalloped inside layer to tie with the scallops on the envelope. I used a greeting from the Many Merry Messages stamp set -retired. I have a new appreciation for the wonderful kits SU offers!
#5 – The Card Buffet would not have been complete without using the White Christmas stamp set, pg. 31. I sponged the Organza ribbon and used the Project Life Cards and Labels Framelits for the greeting. One stamper put the Santa and sleigh from Holiday Home, pg. 16, in the top left which was a very cute addition. I used the Northern Flurry embossing folder and we used the brayer to make a beautiful inside. Stay tuned for specifics on brayering an embossing folder in a later post.
Embossing Folder Tip: To avoid getting little creases in your cardstock from an embossing folder – use a piece of cardstock larger than your embossing folder, for example 6″ wide instead of 4″. Run your folder and extra sized paper through the Big Shot and then cut to size.
#6 – Last but not least is the card I designed for the swap at the Unite and Excite event. Jesus is the reason for the season and The Newborn King stamp set on page 19 says it beautifully!
“May we remember Him this Christmas season and throughout the coming year!”
Merry Christmas Dear Stamping Friends!
Karen
So which is your favorite? I would enjoy hearing from you. Click in the upper right of the main site (not a post) to add your email and follow Stampalosopher. The site is a Model T right now but will improve in 2015 as I learn more about blogging.
Questions? Just email [email protected] I would love to earn your business or have you join our team!
Seasonally Scattered Thank You Card
Hello Stamping Friends,
The Seasonally Scattered set in the 2014 Holiday Catalog, page 43, is perfect for the Baby Wipe Technique used in this Thank You Card. Do you recognize those leaves and the lovely fall colored bling? No? It is from the Seasonal Snapshot Project Life Accessory Pack on page 35 of the Holiday Catalog.
Baby Wipe Technique: Baby Wipes have no alcohol so they are our wet wipe of choice.
1) Protect your surface with the Silicone Craft Sheet (or the lid of a stamp storage box)
2) Place your Baby Wipe on the protective surface
3) Mount your stamp of choice and place it on your wet wipe to determine your outer edges, dry the stamp off
4) Drip drops of ink from various colors of reinkers on the Baby Wipe. You want the colors to run together
5) Stamp

Built for Free Using: My Stampin Blog
Curvy Keepsake Turkey – Headed to France
Hello Friends,
Thank you for your patience as I continue to develop my blogging skills. Today I am posting the Weekly Deals and the Curvy Keepsake Turkey which we made at club. He didn’t look like this when we started but thanks to the imagination and creativity of the stampers we gave him a hat and one lady used the circle framelits to add a medallion around his neck. One lady stamped “DAD” on the medallion and took the turkey to her Dad’s hospital room to cheer him up. Recipe Sheets and Templates now included in the post!

Recipe and Templates:
Curvy Keepsake Turkey- Headed to France
Template for Turkey Front
Replacement Template for Curvy Keepsake Box


