Home » 2015 (Page 3)
Yearly Archives: 2015
Card Buffet January 2015
The specials this week are very “special”! Did you know you can use your reinkers and Dazzling Diamonds Glimmer Paper to make many different colors of glimmer paper?!
Technique Alert: Colored Glimmer Paper: Drip drops of ink on your glimmer paper and use your Aqua Painter to spread the color evenly. So easy!
Card Buffet Report:
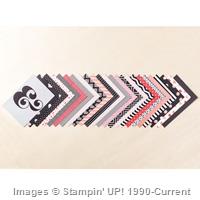
We had a great time with Valentines, A Sympathy card, A St Patrick’s Day card, A Birthday Card and A Thank You Card. Each stamper took home a Treat Box Holder with a bookmark designed by Peggy Tassler and featured on Too Cool Stamping with Angie Leach. Click on the link for directions. Here is my version with our new Stack With Love Designer Series Paper:

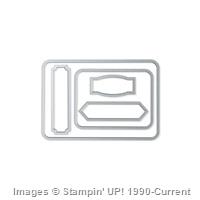
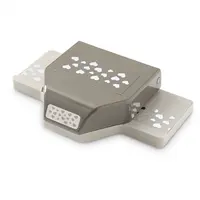
Do you see those little bitty hearts on the bookmark? They are from our new Heart Confetti Punch. Before this punch, our smallest heart was the owl punch heart which I used here with red glimmer paper inside the heart with the arrow. There are two different ways to make the window for the nuggets. Angie Leech used the Modern Label punch, lining up the punch with punched sticky notes. After trying that technique (second image) I used the Project Life Framelit so I only had to make one cut (first image).
Supply List
Built for Free Using: My Stampin Blog


Remember the Thank You card from a previous post? Jennifer did a double punch on the paper piercing and used a candy dot to match the stem of the flower. I love seeing the creativity of my stampers.
Have a great day and use hostess code JEJ32FKT to be entered in February’s online drawing. Congratulations to Shanon who won the set of Rhinestones in January’s drawing and December went to Robyn for post comments.
Stamp A Lot,
Karen
Lotus Blossom Thank You
Hello Stamping Friends,
I didn’t want to overload one post with three items so I overloaded your email with three posts. Let me know which you prefer.
I was anxious to play with the Lotus Blossom Stamp Set and I needed about 10 thank you notes after Christmas so I created a CAS – clean and simple- card. With Paul scoring and doing the paper piercing we were able to do all 10 in about one hour.
It is white on white with the blossom and the Candy Dot done in Calypso Coral. The stem uses Wild Wasabi.
There are three flower images, two stem images and two greetings in the stamp set:
 Best of all — it is free during Sale A Bration with a $50 order.
Base Card Stock: Whisper White 5.5 x 8.5
Top Layer: Whisper White 5.25 x 4 popped up with dimensionals
Ink: Calypso Coral, Wild Wasabi
Embellishments: Calypso Coral Candy Dot
Tools: Paper Piercer Tool and Essentials Paper Piercing Template
Simply Scored Scoring Tool and Stylus
Score two lines across the bottom of the top layer 1/4 ” from the bottom and 1/8″ apart. I scored it on the back, though the picture looks like it was scored on the front. The Essentials Template lets you line up the corner precisely and punch 5 holes across and down in the upper left corner.
The blossom stamps have little 1- 2-3 tags so you know the order to stamp and can line them up perfectly. Ink the first two up and stamp but use the Stamping Off Technique for the third stamp. Do the same-stamp off- with the solid stem stamp after stamping the other stem direct to paper.
Stamping Off Technique: Ink up your stamp — stamp it off on your Grid Paper or scratch paper and then stamp it on the image.
Click On any of the above images to order the product or CLICK HERE to go to the store. I would love to earn your business and be your demonstrator.
Remember that a post does not have the full blog details. CLICK HERE to go to the blog where you can see all the tools.
SAL (Stamp A Lot, Smile A Little, Share A Love)
Karen
Perpetual Calendar Class
‘Twas the week before class and all through the house this stamper wasn’t smiling she felt like a louse.
RSVP’s were in, the money was paid, but alas all seemed lost backordered kits were weeks away.
Ahhhh such was the situation as I prepared for the perpetual calendar class. With my DH’s help we decided we could make the kits ourselves.
I had purchased a kit during the preorder so I knew just what we needed.
For the box, we bought shirt boxes and cut them to 7 x 13 3/4 for the bottom and 7 1/8 x 13 7/8 for the lid. Each side was scored at 1″.
The ribbon holder was shaped like a barbell from a 5 1/4 x 2 1/2 Hello Honey card stock and wrapped with 36″ each of Gold Sequin Trim, Thick Twine, Baker’s Twine, and Lost Lagoon Ribbon.
Hearts were punched, feathers were stamped with Whisper White Craft Ink and then cut out with framelits, banners were made with 3/4″ strips, stars were cut with the stars framelits dies. I had the heart confetti and star confetti punch and made sticker sheets with the double back adhesive paper from which we punched stickers just like the kit.
The calendar sheets were made to fit two to a page – just slightly smaller than SU’s 4 1/2″ calendar sheets.
A nice cardboard backing was made from rectangular cake bases cut at 4 3/4 x 11 1/4.
The clip was a clothespin w/ blackboard found at the local hobby store.
I used MDS to create the label and Word to create the calendar sheets.
Here are those files should you choose to make your own perpetual calendar.
What a fun time we had and the stamper’s calendars looked great!
Have a great day!
SAL (Stamp A Lot, Smile A Little, Send A Letter, Share A Love!)
Karen


