Home » 3-D (Page 3)
Category Archives: 3-D
Wedding Wishes Card & Mother’s Day Box
Hello Stamping Friends,
 It’s May in the Rockies! I think we started the fountain a little too early. No, that is not a real jack rabbit, but the garden statue sure shows up nicely in the snow! The sun melted every flake the next day and the lawn loved the moisture so we are thankful!
Thank you to those of you who ordered in April with the hostess code! Sharon did earn her Big Shot and if you missed her party with all the fun thank you gifts, I will be mailing you a thank you gift for your online order!
May’s hostess code is: 29SANZNQ It is the last month for the Occasions Catalog and the Annual Catalog and many items are already sold out. You can go to the online store and click on Retiring items on the left side to view images of the retiring items. The Clearance Rack has been stocked with other items as well so stop by there while you are visiting to see if anything is a must have! Online Store
Use the hostess code and receive a gift from me if your order is under $150! Order over $150 and you earn the hostess dollars!
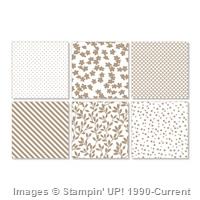
Sharon’s party focused on the Floral Boutique Suite on pages 76-77 of the Annual Catalog. The bundle is still available at 10% off and the Designer Series Paper (DSP) is still available, though inventory is low. The Washi Tape and Baker’s Twine is sold out – so sorry.
For Sharon’s thank you gift I used the gift bag punch board and made a medium sized bag with the Floral Boutique DSP and then filled the bag with the Washi Tape and Baker’s Twine.
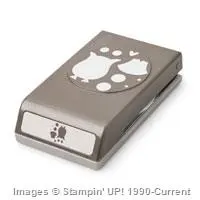
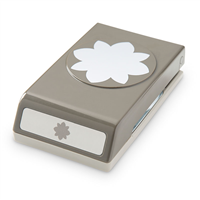
 Sharon had recently purchased the Pansy Punch, #130698, and the Flower Shop stamp set, #130942, so I made her a 3D flower using those products. I will explain how to make a pansy punch flower later in this post.
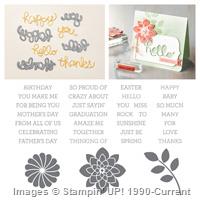
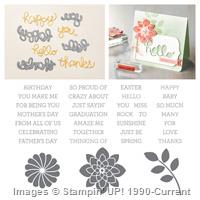
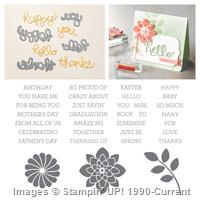
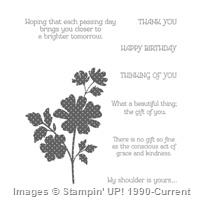
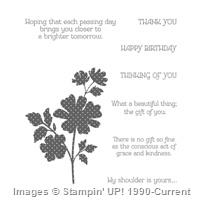
For her thank you card, I used the Detailed Floral Thinlits Dies with the Floral Phrases stamp set. The border stamp was a great way to enhance the greeting on the inside of the card:

 Would you like to host a party? I will plan something special for you as well!
Thank you card:
- Base: Thick Whisper White Card Stock 4 1/4″ X 11″ Scored at 5 1/2″
- Top Layer: Night of Navy 4″ X 5 1/4″ with thinlits positioned on each end and cut, then each end cut with the border thinlit.
We made two projects at the party, a wedding card and a mother’s day box using the Window Box thinlits on page 43 of the Occasions catalog. The bundle is still available and, though the Window Shopping Stamp set and Window Box Thinlits carry over to the new catalog, they won’t have the 10% discount.


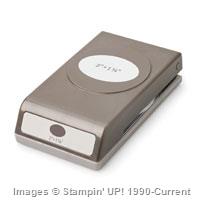
 The little blue flower on the top of the box is from the Flourish Thinlits set #141478. It coordinates with the Flourishing Phrases stamp set which has greetings for many occasions. Check out page 49 of the Annual Catalog. The 3D flower is made using the pansy punch.
3D Flower:
- Using regular Whisper White card stock 2″ X 7″ punch four pansies
- Sponge the edges with Night of Navy ink
- Punch a hole in the center of each flower. I used a business hole punch and punched about three times to make a nice hole
- Using your bone folder curl the petals a bit for softer looking petals
- The 5 petal pansy becomes the base, the first layer
- Make a cut between two petals to the center hole and then glue one petal on top of the other; this is the second layer-4 petals
- Cut out one petal, save it for the center, and glue one petal on top of another to make the third layer-3 petals
- Cut out two petals, save them, and glue one petal on top of another to make the fourth layer – 2 petals
- Roll the two petals you cut out- 1 petal
- Roll the one petal to make a center
- Place a glob of hot glue on the Silicone Craft Sheet #127853 and quickly layer your flowers, the glue should come up through the holes in the middle of the flowers. (Some crafters layered the flowers first then placed them on the hot glue.)
Wedding Wishes Card:
- Detailed Floral Thinlits #141482
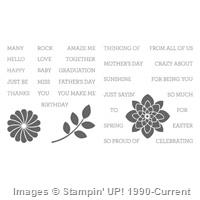
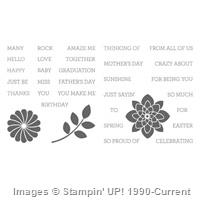
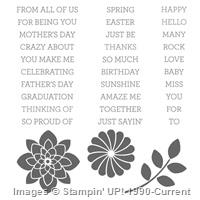
- Floral Phrases Stamp Set #141767 (Can be bundled for a 10% discount through May 31)
- Card Base: Thick Whisper White #140272 cardstock 5 1/2″ X 8 1/2″ Scored at 4 1/4″
- Night of Navy cardstock #100867 cut at 5 3/8″ X 4 3/16″ ( I call it 4 1/4″ (minus a hair))
- Use the smaller thinlit and the border thinlit and cut the right hand side of the Night of Navy
- Glue the cut piece to the card base flush to the left
- Using just the border thinlit, cut the card base to match the Night of Navy top
- Fussy cut along the fold line to make it a bit neater
- Cut an outside 2 1/4″ circle with the circle framelits and a 2 3/4″ X 2 3/4″ piece of Night of Navy
- Using a 2 1/4″ X 2 1/4″ piece of Whisper White stamp your greeting, then cut to make a 1 7/8″ circle with the Stitched Framelits specialty set #145372, the 2nd circle in from the center
- Cut a piece of the Floral Boutique Designer Series Paper at 4″ X 3 1/4″
- Layer the circles and then center them on the DSP and attach
- Wrap the DSP and circles tying a bow with 14″ Bakers Twine and then attach to the Night of Navy layer
- As you trim the Bakers Twine save a little bit and separate the strands to make little antennae for the butterfly
- Stamp a butterfly with the Papillion Potpourri stamp set #123759 and punch with the retiring Bitty Butterfly punch #129406
- I put one glue dot on to attach the antennae and then another to attach to the card
- The inside is the Standard Layers (click here) Night of Navy 5 1/4″ X 4″
- Whisper White top layer of 5″ X 3 3/4″
- Helpful Hint: Mount all three of the stamps on one block to get them nicely squared and then stamp the inside greeting
Imagine the different Designer Series Papers we could use to make this a birthday or graduation or………
Mother’s Day Window Box:
- Window Box Thinlits #142762
- Flourish Thinlits #141478 – use Night of Navy 2″ X 3 1/2″ and cut one flourish
- Pansy Punch #130698 – see instructions for flower above
- Thick Whisper White cardstock 11 X 6 (cut two box bases) See prior post instructions by clicking here
- Designer Series Paper; start with 3 3/4″ X 4″ and then cut just a top with Window Box Thinlit then cut off all the tabs; I had several to make so I used grid paper and made a template of just the top so I could quickly cut off the edges-store this template with your framelits for the future
- Every other side, three of the six sides, was made using #2 of the Stitched Shape square specialty framelits and a piece of DSP that was 2″ X 2″ (Note: #2 means the second one from the center)
- The other three sides used the # 2 Stitched Shape square and a 2″ X 2″ Night of Navy cardstock for the back border
- The top of the Night of Navy used a 1 7/8″ X 1 7/8″ piece of Whisper White and the heart cutout from the Window Box Thinlits layered with the retired #2 Regular Square Framelits Die. You layer both on the Whisper White and only need to cut once. The magnetic platform really helps with this cut!
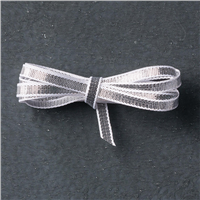
- Before gluing all the pieces to the top of the lid, cut a 2″ piece of ribbon, fold it in half and glue it to the box lid. I used the retiring 5/8″ Organza #114319
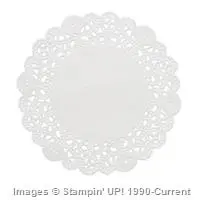
- Cut a Delicate White Doilie # 141701 to fit the left edge of the top and attach your layers: the DSP, then Doilie, Flourish and finally the rose. I made an extra to store with the framelits for a template so future projects will take less time.
- I didn’t want to clutter the top with a greeting so I used the 2 1/2″ circle punch to punch a circle, sponged the edges and added a greeting. My Mother’s Day greeting comes from my stash of Paper Pumpkin stamp sets but the retiring Oh So Succulent stamp set on page 21 of the Occasions catalog #142992 and the That’s The Tag # 142755 retiring set on page 23 both have Mother’s Day greetings.
So now lets go find a beautiful piece of Navy satin and a lovely necklace, or perfume, or gift card to put in the box. Then let’s make a graduation box with a graduation cap instead of a rose what do you think?
SAL, Stamp A Lot this wonderful May month
Karen
Window Shopping Bundle!
Don’t let the Window Shopping Bundle get away! It is on page 43 of the Occasions catalog and is just the cutest! It might get carried over in the big catalog come June 1st, however when Stampin’ Up! introduces a product with matching Thinlits it is bundled with 10% savings but not when it is carried over to the next catalog. The bundle is $50.25 which will qualify you for a free Sale A Bration product.
Remember, purchase $50 of anything from any catalog and get one item from Sale A Bration for free. Three additional items were introduced February 21:
Check out the sample items made with these products:
Click on the brochure picture below to see all the other Sale A Bration products. But hurry the Card Tin is already sold out and product is only available while supplies last!
Thank you, Deana, for a wonderful party to introduce the Window Shopping bundle and the Sale A Bration products.
Our project at the party was either a Birthday Box with matching card which uses the Window Shopping stamp set:
or a Thinking of You box and matching card:
Notice the banners use the Delicate Details free stamp set from Sale A Bration:
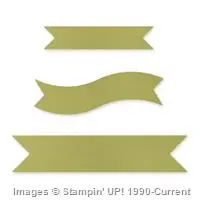
The Emerald Envy box uses the third one down and the Dapper Denim box uses the second one down to be a bit more masculine. The flower and cupcake on the edges of the banner are part of the Window Box stamp set! The banner uses a 5 1/2″ X 7/8 inch piece of card stock and the little Thinlit from the set that scores and cuts the end! The video below will show that in detail.
For a thank you gift, I used the same Window Shopping Bundle and made a little St. Patrick’s Day basket.
Hmmm…. It did have chocolate in it at one time; at least the tea light and mints are still there for the picture. I used Cucumber Crush paper and the Mint Macaron ribbon which is still in the Clearance Rack. Why a tea light? Because the door prize was a tea light holder made with Watermelon Wonder card stock:
 To make the tealight you use two pieces of the main Thinlit just as you do for the box:
 Remember the middle heart is directional so punch your windows accordingly.
I demonstrated the basket pieces with the same color. You only need one piece of the main box Thinlit for the basket and one piece 8 1/2 X 3/4 for the handle:
 The Thinlit set makes a basket just perfect for a little Easter gift!
The regular box uses two Thinlit cutouts which fit nicely on a 6 X 11 piece of paper:
 The home office has a wonderful video for construction of the box so rather than recreate the wheel I will insert it here. If you are viewing this on your smartphone you may need to click on the little SAL image at the top of the post to go to the main blog where videos work.
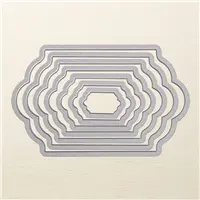
Drum roll please: Presenting The Window Box Thinlit dies:
One more quick note – check the bottom of your Big Shot machine once in awhile. The bottom screws need to be kept tightened as well as the screw on the handle. The machine comes with a little tool to keep the handle tightened but you will need a phillips screw driver to tighten the bottom screws.
Cheerio but be back soon! (I just went to the high school’s performance of Oliver. It was exceptional and I can’t get the songs out of my mind- but who would want too?!)
SAL,
Karen (Click on SAL to go to the online store)
Valentine Treat Box
Hello Stampers,
Just in time for Valentine’s day, Priscilla Ivler posted a cute treat box. It is triangular with a sliding tray that holds five Hershey kisses! I made them for my last two events and they were a hit. Here is a picture followed by a printable PDF file for your files, and for the recipe box here on the blog should you ever want to find it quickly! Click on this blue link:
Treat Box Triangle PDF Instruction Sheet
Here are the supplies used. Just click to go directly to the online store.
Built for Free Using:My Stampin Blog
#12 of 12 Cards of Christmas
Hello Stamping Friends,
Christmas isn’t officially over until we actually go to bed right? So it is still Christmas at my house and I have one last card for you. This card with its removable angel ornament was made for Safyre in New York. She is the little girl the internet was buzzing about who lost her family and her home in a fire. She survived but is badly burned. Her wish was for Christmas cards to hang on her tree so I decided she needed an angel to hang on her tree. Do you remember the punch art angel we made with the Gift Bow Bigz Die? It uses the smaller of the two bows on the die.
I wondered what the angel would look like with our new Bow Builder Punch, so I made one!
Of course I needed to make a card for the delivery of the little winged ornament so voila:
And for the inside I tied in the red and gold using gold metallic ink. That ink is discontinued but gold embossing powder would be better!
Here are the instructions followed by the supplies used:
Punch Art Angel Card PDF Instruction Sheet
Built for Free Using:My Stampin Blog
Gift Bag Punch Board
Hello Stamping Friends,
We had a great time at the catalog launch last Saturday. We made a bookmark and refrigerator magnets with the new In Colors so we could see them up close and personal- they are beautiful colors! And that ribbon………just yummy!
To take those little decorations home, we needed a little bag so we used the new Gift Bag Punch Board (pg. 150 in the 2015 catalog) ((Thank you, Sheri))
The punch board has a Small, Medium, and Large size box, but with a little tweaking we could make an extra small box using a 6 X 6 piece of paper. (note: page 144 of the new catalog has three different paper stacks of 6X6 designer series paper). I didn’t get those in my first order so we made do with scrap from the past. Here are the gift bags ready for decorating with greetings, the starting paper sizes are on the sticky notes.
Stampin’ Up! has a great instruction video as well:


Valentine Shaker Card and 3D Thinlits
Hello Stamping Friends,
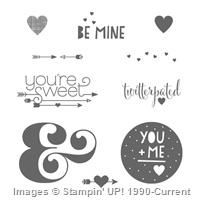
My Early Bird Stamp Club met Saturday and we had a great breakfast provided by our hostess, Sheri, and then made a Valentine Shaker Card and a 3D thinlit Card. I love the word “twitterpated” from Bambi and had to have that stamp set. Here is how I used it:


And here is a Recipe Sheet for you to print if you keep a notebook of ideas:
Valentine Shaker Card Recipe Sheet
Click on any of these products to go to the store:
Built for Free Using: My Stampin Blog
Our second card was a 3D Thinlit Birthday Card featuring the Crazy About You stamp set & Thinlit Bundle:


Recipe Sheet: 3D Thinlit Bday
Built for Free Using: My Stampin Blog
Perpetual Calendar Class
‘Twas the week before class and all through the house this stamper wasn’t smiling she felt like a louse.
RSVP’s were in, the money was paid, but alas all seemed lost backordered kits were weeks away.
Ahhhh such was the situation as I prepared for the perpetual calendar class. With my DH’s help we decided we could make the kits ourselves.
I had purchased a kit during the preorder so I knew just what we needed.
For the box, we bought shirt boxes and cut them to 7 x 13 3/4 for the bottom and 7 1/8 x 13 7/8 for the lid. Each side was scored at 1″.
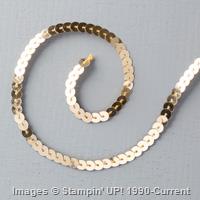
The ribbon holder was shaped like a barbell from a 5 1/4 x 2 1/2 Hello Honey card stock and wrapped with 36″ each of Gold Sequin Trim, Thick Twine, Baker’s Twine, and Lost Lagoon Ribbon.
Hearts were punched, feathers were stamped with Whisper White Craft Ink and then cut out with framelits, banners were made with 3/4″ strips, stars were cut with the stars framelits dies. I had the heart confetti and star confetti punch and made sticker sheets with the double back adhesive paper from which we punched stickers just like the kit.
The calendar sheets were made to fit two to a page – just slightly smaller than SU’s 4 1/2″ calendar sheets.
A nice cardboard backing was made from rectangular cake bases cut at 4 3/4 x 11 1/4.
The clip was a clothespin w/ blackboard found at the local hobby store.
I used MDS to create the label and Word to create the calendar sheets.
Here are those files should you choose to make your own perpetual calendar.
What a fun time we had and the stamper’s calendars looked great!
Have a great day!
SAL (Stamp A Lot, Smile A Little, Send A Letter, Share A Love!)
Karen
Merry Christmas Greetings!
Dear Stamping Friends,
May your Christmas be wonderful this 2014 and may your memories keep your heart warm all year!
Hallmark’s “Mary’s Angels” ornament collection spices up our Lladro nativity scene!
And part of the collection loves to sing “Joy To The World”! May you have a joyful day today!
Need a quick neighborly gift? How about grabbing the Voila’ set from years ago and creating a quick card for a bottle of Martinellis?
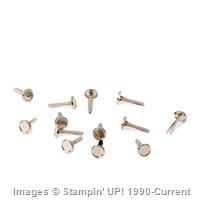
I stamped the cover on the silver foil paper, fussy cut it and used our new little brads to attach to the serving platter with Merry Christmas on the platter.
Paul worked on Chapstick holders for all his coworkers. Might be the thing of the future as we learn to eat less sugar!
Merry Christmas!
Curvy Keepsake Turkey – Headed to France
Hello Friends,
Thank you for your patience as I continue to develop my blogging skills. Today I am posting the Weekly Deals and the Curvy Keepsake Turkey which we made at club. He didn’t look like this when we started but thanks to the imagination and creativity of the stampers we gave him a hat and one lady used the circle framelits to add a medallion around his neck. One lady stamped “DAD” on the medallion and took the turkey to her Dad’s hospital room to cheer him up. Recipe Sheets and Templates now included in the post!

Recipe and Templates:
Curvy Keepsake Turkey- Headed to France
Template for Turkey Front
Replacement Template for Curvy Keepsake Box


