
Home » Posts tagged 'Give It A Whirl Dies'
Tag Archives: Give It A Whirl Dies
Paradise Palms for May Swaps, Sweet Songbirds Catalog Launch
Hello Stamping Friends,
 Let’s take a moment to remember those who gave their lives for their country!
Jo Brooks sent a swap card that is so perfect for the day:

 .
.  .
.
The little red star is attached to the left and fits inside the blue star creating an awesome hinge. Opening up the stars, Jo has inserted ‘A Soldier’s Poem’:

May we honor their sacrifice by protecting our freedoms as best we can!
Jo’s card uses many Stampin’ Up! Dies– Celebrate You, Basic Borders, Cross of Hope, Scalloped Contours, and Stitched Stars. What a great card for Memorial Day! Thank you, Jo!
I have so much to share I hardly know where to start. Grab a cuppa and settle in for some wonderful inspiration from my group of swappers and the projects at the catalog launch.
 You had better hurry! You have so much to share.
Catalog Launch Fun

Stampin’ Up!’s new annual catalog made its debut May 3rd and it was so hard to decide what to showcase. I love birds and wasn’t sure about the Sweet Songbirds stamp set until I saw a card made by Sue Vine of Miss Pinks Craft Spot with the bird in the air so I went with that idea and voila:
 .
. 
 .
.  .
.
There are two different sets of eyes- open or closed- and two different feet -standing or walking- and a punch to punch out our little songbird! Laura Mellinger of laurasworksofgheart.blogspot.com designed the little nest which was perfect for a party favor!
I used the Tea Boutique Cards and Envelopes with strips of the new Tahitian Tide, Parakeet Party and Sweet Sorbet card stock adhered to the white side which I made the front. The clouds are from the Give It A Whirl Dies! The clouds have stitched edges for a fun look and there are hearts and circles and rectangles, a must for your collection, even if you never make a whirly card like I did here.
 .
.  .
. All the attendees got to see the new In Colors up close and personal as they made their color chart:
 .
. Sweet Songbird In Flight Recipe
–Sweet Songbirds stamp set, Songbird Builder Punch
-Base, Tea Boutique Cards and Envelopes
-Basic White, 2 3/4″ X 4″; stamp the songbird and then punch out. Stamp and punch an extra belly to make the larger wing. Helpful Hint: Punch the songbird out of scrap to make a template for positioning the stamps on the Stamparatus. Save your template with the stamp set.
-Side Strips X2, 5 1/2″ X 3/8″ in one color for the songbird and one color to match your choice of card
-Basic White scraps, various sizes to die cut clouds with the Whirly Dies
-Baker’s Twine, 12″ and 3 Opal Round embellishments (There is Baker’s Twine to match the In Colors)
-Inks, Memento Black, Soft Suede, Old Olive, Tahitian Tide, Crushed Curry, Sweet Sorbet (Poppy Parade)
Sweet Songbird Favors
-Nest box, Soft Suede, 3X3, score at 1″ and 2″ on both sides, cut from one score line to the other on opposite sides 
-Nest, Soft Suede, 2 1/2 X 3, stamp two nests and fussy cut
-Bird, Tahitian Tide 2 X 2 1/4, punch – no stamping, Basic White scrap for belly, Daffodil Delight scrap for beak
-Sign, Basic White, 2 X 2, stamp the post full strength and then the rectangle after stamping off (2nd generation) so the greeting stamps nicely over top, stamp the notes in memento black and fussy cut
May Swaps
I chose the Paradise Palms stamp set and Palm Dies on a background of New Horizons Designer Series Paper (retiring June 30) with a Pale Papaya Base and Basic Black accents. The greeting and birds are from the retired Beautiful Moments stamp set. The coconuts are from the Pebbles Enamel Shapes . I added the setting sun and sponged a bit of extra colors in the sky.


I made a vertical book fold with the same palm tree design and a different piece from the same DSP for the inside of the card that looks like a beach with sea foam just coming in!
 .
.  .
.
Horizontal Paradise Palms Recipe
- Base, Pale Papaya, 8 1/2 X 5 1/2, score at 4 1/4
- Layer, Basic Black, 5 3/8 X 3 3/8; 1/16 reveal top and sides
- Top Layer, New Horizons DSP, 5 1/4 X 3 1/4
- Designer Strip, Basic Black, 3/4 X 5 1/2, die cut with Palms Die and center 1/8″ up from bottom and 1/8″ from black layer
- Palm Tree, Basic Black, 2 5/8 X 3 3/8, die cut with Palms Dies
- Greeting and birds, Memento Black Ink; stamp set – Collect Beautiful Moments
- Sun, use a sponge dauber to make a circle in Crushed Curry with a little extra sponged in the sky
- Embellish with Pebbles Enamel Shapes for coconuts and 3 In Color gems on DSP
- Inside Layer, Basic Black, 2 5/8 X 5 3/8
- Inside Top, New Horizons DSP, 2 1/2 X 5 1/4
- Inside Greeting, Memento Black, Paradise Palms Stamp set
Vertical Book Fold Paradise Palms Recipe
- Base, Pale Papaya, 8 1/2 X 5 1/2, score at 4 1/4; Turn 180 degrees and score at 3 3/8″ and 3 3/8 + 1/16, (7/16) for a decorative extra score line
- Layer (X2), Basic Black, 3 1/8 X 5 1/2, this will be flush with top and bottom with 1/16 reveal right and left
- DSP Top Layer (X2), New Horizons, 3 X 5 1/2; Hint: with 3″ in width you can make two from a 6 X 6 which is the goal if you are making multiples. Obviously, a different DSP used for inside.
- Designer Strip, Basic Black, 3/4 X 5 1/2, die cut with Palms Die and center 3/16″ from side and 3/16″ from black layer
- Palm Tree, Basic Black, 2 5/8 X 3 3/8, die cut with Palms Dies
- Grass, Basic Black, 3 1/2 X 1
- Greeting and birds, Memento Black Ink, Stamp set – Collect Beautiful Moments
- Sun, use a sponge dauber to make a circle in Crushed Curry with a little extra sponged in the sky
- Embellish with Pebbles Enamel Shapes for coconuts
- Inside Greeting, Memento Black, Paradise Palms Stamp set
 Do you crafters really measure to the 1/16 of an inch?
Well, Sal, we often just eyeball the placement but that doesn’t make for very good instructions.
Let’s look at the swaps from the rest of the group. We saw Jo Brooks’ swap up top so now let’s look at Sharon’s swap using a tea cup very similar to our new tea cup in the Tea Boutique Suite. She uses three layers for the butterfly- a Fresh Freesia base, a Blushing Bride die cut and then tops her butterfly with a vellum die cut and a unique oval gem.

Heather used the Flowering Fields DSP (retiring June 30) and a greeting from the Flowering Tulips stamp set in beautifully layered circles on a gold foil circle. The base is Poppy Parade and she used a corner rounder punch on opposing sides of the DSP for a unique look.

Ann’s swap used embossed strips of the new In Colors on a Crumb Cake base and the greeting from Biggest Wish stamped in Parakeet Party with the ‘happy’ stamped over in Starry Sky. The ribbon is the 1/8″ Metallic Woven ribbon in Orchid Oasis

Lucille Kearin used the DSP with butterflies (retired) and a fun ‘hi’ Die. She embellished with white ribbon and Paper Studio Flowers.

Joy’s card uses the new Nature’s Prints stamp set and Natural Prints Dies. She used the Gray Granite side of the Sun Prints DSP, the Layering Circles Dies, a doily and beautiful gems. You would love the sparkly Wink of Stella she used on the branch but the camera didn’t capture the sparkle. Her gems really sparkled!

You must see the other card she made using the Nature’s Prints Dies! I love the shape of the greeting and had to go look up the dies since I hadn’t even noticed that die. She used the new Fern 3D embossing folder on a base of Starry Sky and then sponged the top lightly with white craft stampin’ ink.

Lori Moore made a slimline card on a white base with Design A Daydream DSP for her first layer and then a layer of embossed Basic White, a layer of Blackberry Bliss with the top layer of Basic White stamped with the Art Gallery stamp set flower in Berry Burst and Rich Razzleberry. The leaves and ribbon are Soft Succulent. The greeting is from the Floral Gallery Dies.

Wow, you will have lots of samples to show at your next party!
So true! Thank you everyone for participating in our monthly swaps!
Hopefully, I will have some cards from the May Paper Pumpkin to show you soon.
Now, now, Sal, be kind! Though you make a good point and I think I even missed the April swaps.
Thank you for spending some time with me!
SAL, Sharing A Lot of inspiration
Karen

Whirly Wednesday for October Swaps and Mystery Card #17
Hostess Code: ZRTHHK33
Use this code before you check out online if your order is under $150 and our club hostess will get credit so no dollars are left on the table.
If you are opening this blog post in your email be sure and click a second time on the header to go to the full blog. If you would like to receive an email when I add a new post be sure and put your email address in the box at the right on the blog.
For those of you who have followed me for years, it seems repetitive to say these things every time I post, however my circle of followers keeps growing so I need to help those who are new to blogs and such. Thank you for your patience!
 So where are you going to start today with so many cards to show everyone?
Well, Sal, I had better start with my swap since I have two youtube videos to upload. I had trouble when I did an unscheduled Facebook Live. Facebook cancelled me when they decided I had gone long enough and I had to start a second Facebook Live.
The first video is the long one showing the coloring and cutting. The second shows the assembling.
 .
.  .
. Recipe:
- Stamps: Pretty Pumpkins, Delivering Cheer
- Dies: Give It A Whirl Dies, retired Pillow Box Dies for small leaves
- Inks: Tuxedo Memento Black, Old Olive, Early Espresso
- Tools: Small Brad, 1 3/4″ circle punch, Foam Adhesive Strips and Stampin’ Dimensionals, Masking Paper, Purple Tape, Cut and Emboss Machine, Stamparatus, Scissors, Tombow adhesive, Picker Upper Tool
- Stampin’ Blends:
- Lt Misty Moonlight (coat)
- Dk & Lt Pumpkin Pie(pumpkins)
- Lt Cinnamon Cider (gloves)
- Lt Cherry Cobbler (two sprigs, stocking stripes and scarf)
- Lt Mango Melody (stripe on sock)
- Lt Daffodil Delight (two outside branches & one stripe on sock)
- Lt Shaded Spruce (one sock stripe, four spruce branches)
- Lt Old Olive (two branches)
- Lt Soft Succulent (Pumpkin Leaves)
- Black Marker for drawing the arrows and adding detail between circle and the top layer
- Base: Cajun Craze, 8 1/2 X 5 1/2, scored at 4 1/4
- Layer: Beauty Of The Earth Designer Series Paper (DSP), 3 7/8 X 5 1/4, cut with large rectangular Give It A Whirl Die
- Top Layer: Basic White, 2 3/4 X 4 1/4, Cut with 4th smallest Stitched Rectangle Die
- Inside Layer: Basic White, 4 X 5 1/4, Cut with largest Stitched Rectangle Die
- Circle for the Spin: Basic White, 3 3/4 X 3 3/4
- Copy Paper: 5 1/2 X 5 1/2 for masking the die cut opening and a scrap to die cut a second circle for positioning foam strips
- Little Leaves: 2 1/2 X 3/4, punch three little leaves for embellishments (I used the retired pillow box dies)
- Circle Punch: Basic White, 2 X 2, punch with 1 3/4 circle punch
- Greeting: Pumpkin Pie, 3 1/2 X 1 1/2, stamp with greeting and pencil draw around the stamp to fussy cut
Tips:
- Mount the Delivering Cheer coat stamp on one stamparatus plate and mount the greenery stamp on the second stamparatus plate to stamp in line with the coat. Keep the greenery stamp in place. Once you have the pumpkins stamped on each opening, you will mask the pumpkins and stamp the greenery over the masked pumpkins.
- Cut the shape for the opening in the DSP and Basic White top layer (after stamping the coat), lining up the little circles
- Place a template of the large die cut circle on the back of the DSP to know where to put strips of foam adhesive so the circle will not touch the adhesive and get stuck
- The brad goes through the middle circle cut by the big circle die and then through the middle of the punched 1 3/4 circle (in which you created a little circle in the middle with the Take Your Pick tool or a hat pin). Place Stampin’ Dimensionals around the brad and mount to the base, temporarily holding the DSP in place to position the circle
- Summary of Layers:
- Base
- 1 3/4″ punched circle attached with Stampin’ Dimensionals after attaching to large circle with brad
- Large Circle attached to little punched circle with the brad
- DSP cut with the rectangular Give it a Whirl die with the opening cut, mounted with foam adhesive strips to base after mounting the whirly circle
- Stitched Rectangle stamped with coat and cut for opening, adhered with Tombow glue to the DSP
- Greeting attached with Stampin’ Dimensionals
. I think you may have gone over your word limit just like you went over your time limit on Facebook
It was really hard to explain in words and so much easier to show in the video. I make it sound complicated and I don’t want to scare people off when the Give It A Whirl dies lend themselves to so many fun cards and just making one shows you how easy it can be.
Let’s look at some of the other’s swaps:
Joy made a fabulous friendship card using Blackberry Beauty DSP, Be Dazzling DSP, and a Blackberry Bliss base. The circle is cut with the Encircled In Beauty dies and the leaves are cut with the Intricate Leaves dies. The stamps she used are Gorgeous Leaves and Quiet Meadow. I love how Joy used the background stamp with the little dots especially on the inside behind the little leaf.

 .
. I have four fun Halloween swap cards; let’s take a look:
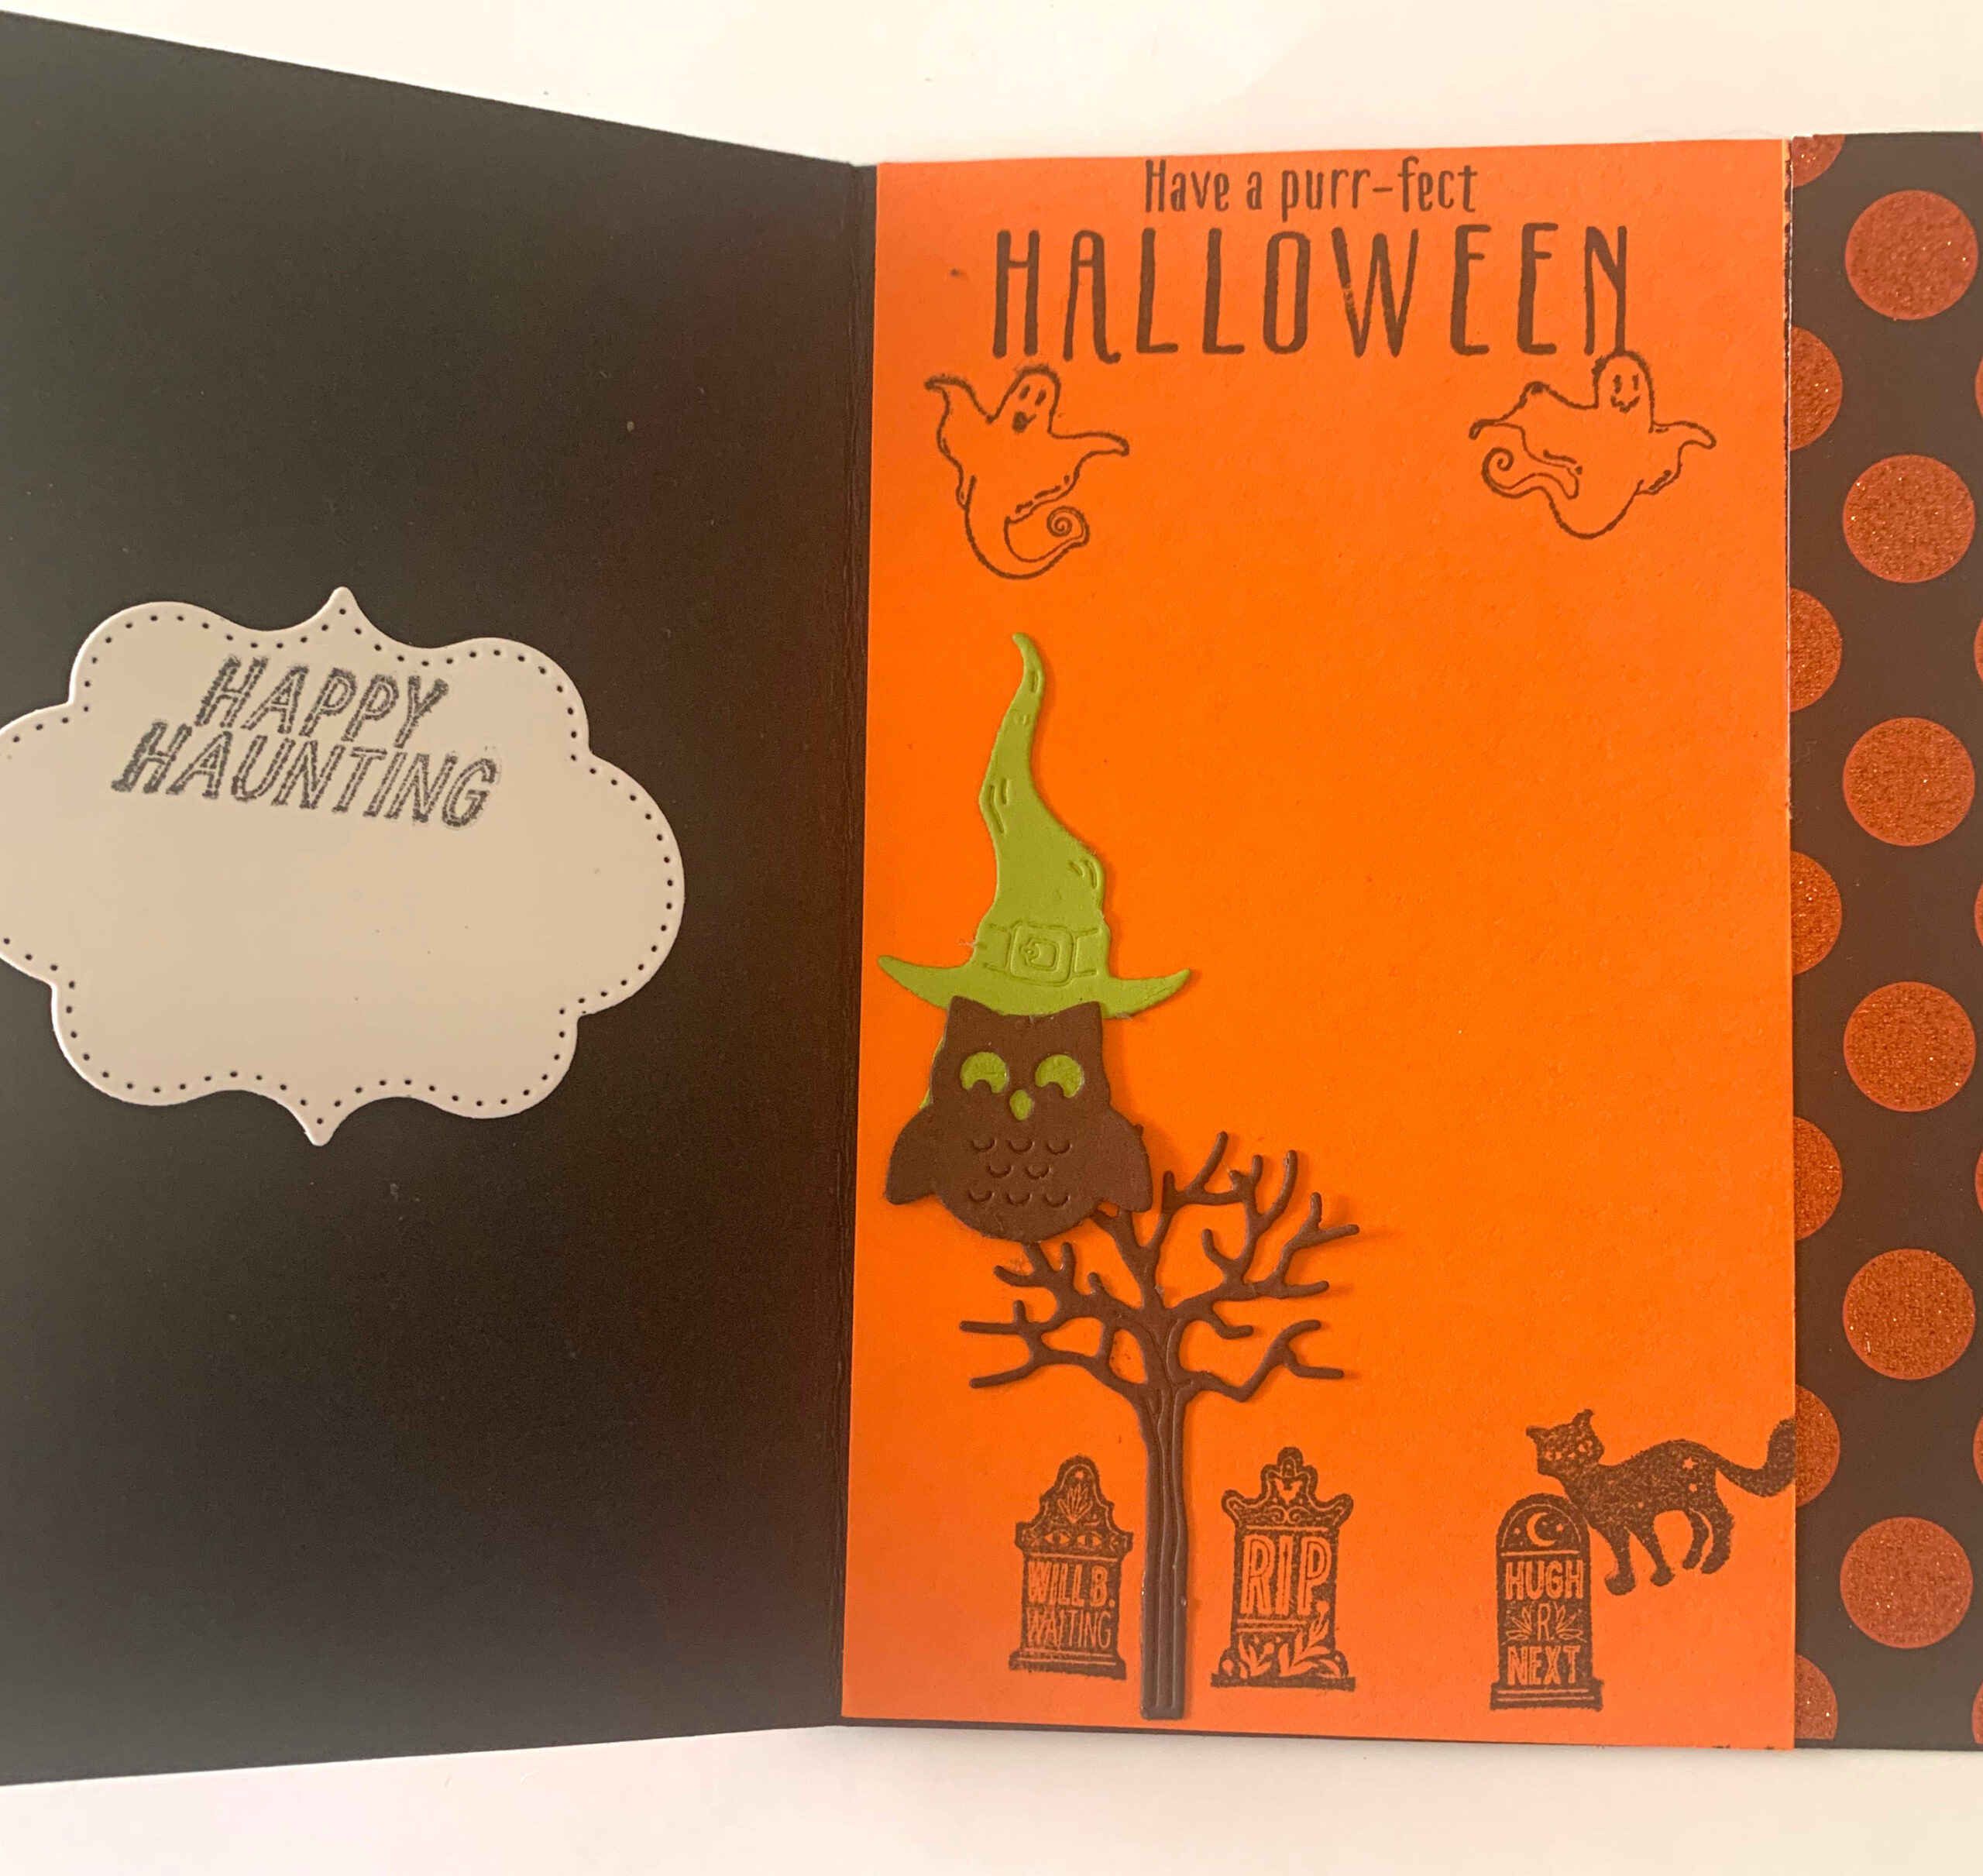
Jo made this fun monster card with the retired Stampin’ Up! Hallows Night Magic Stamp set (inside stamps), the retired Stampin’ Up! Boo To You, and the Peek A Hoot Dies from last year’s mini catalog. Love those googly eyes!!
 .
. 
Heather used the Clever Cats stamp set, Frightful Tags Dies and the retired Spooky Bats Punch with nested circle dies for the card. The stars are from a Paper Pumpkin set, the blue layer is Island Indigo with miscellaneous scrapbook paper on top. I must show you the inside so you see how she stamped those bats around the greeting:

 .
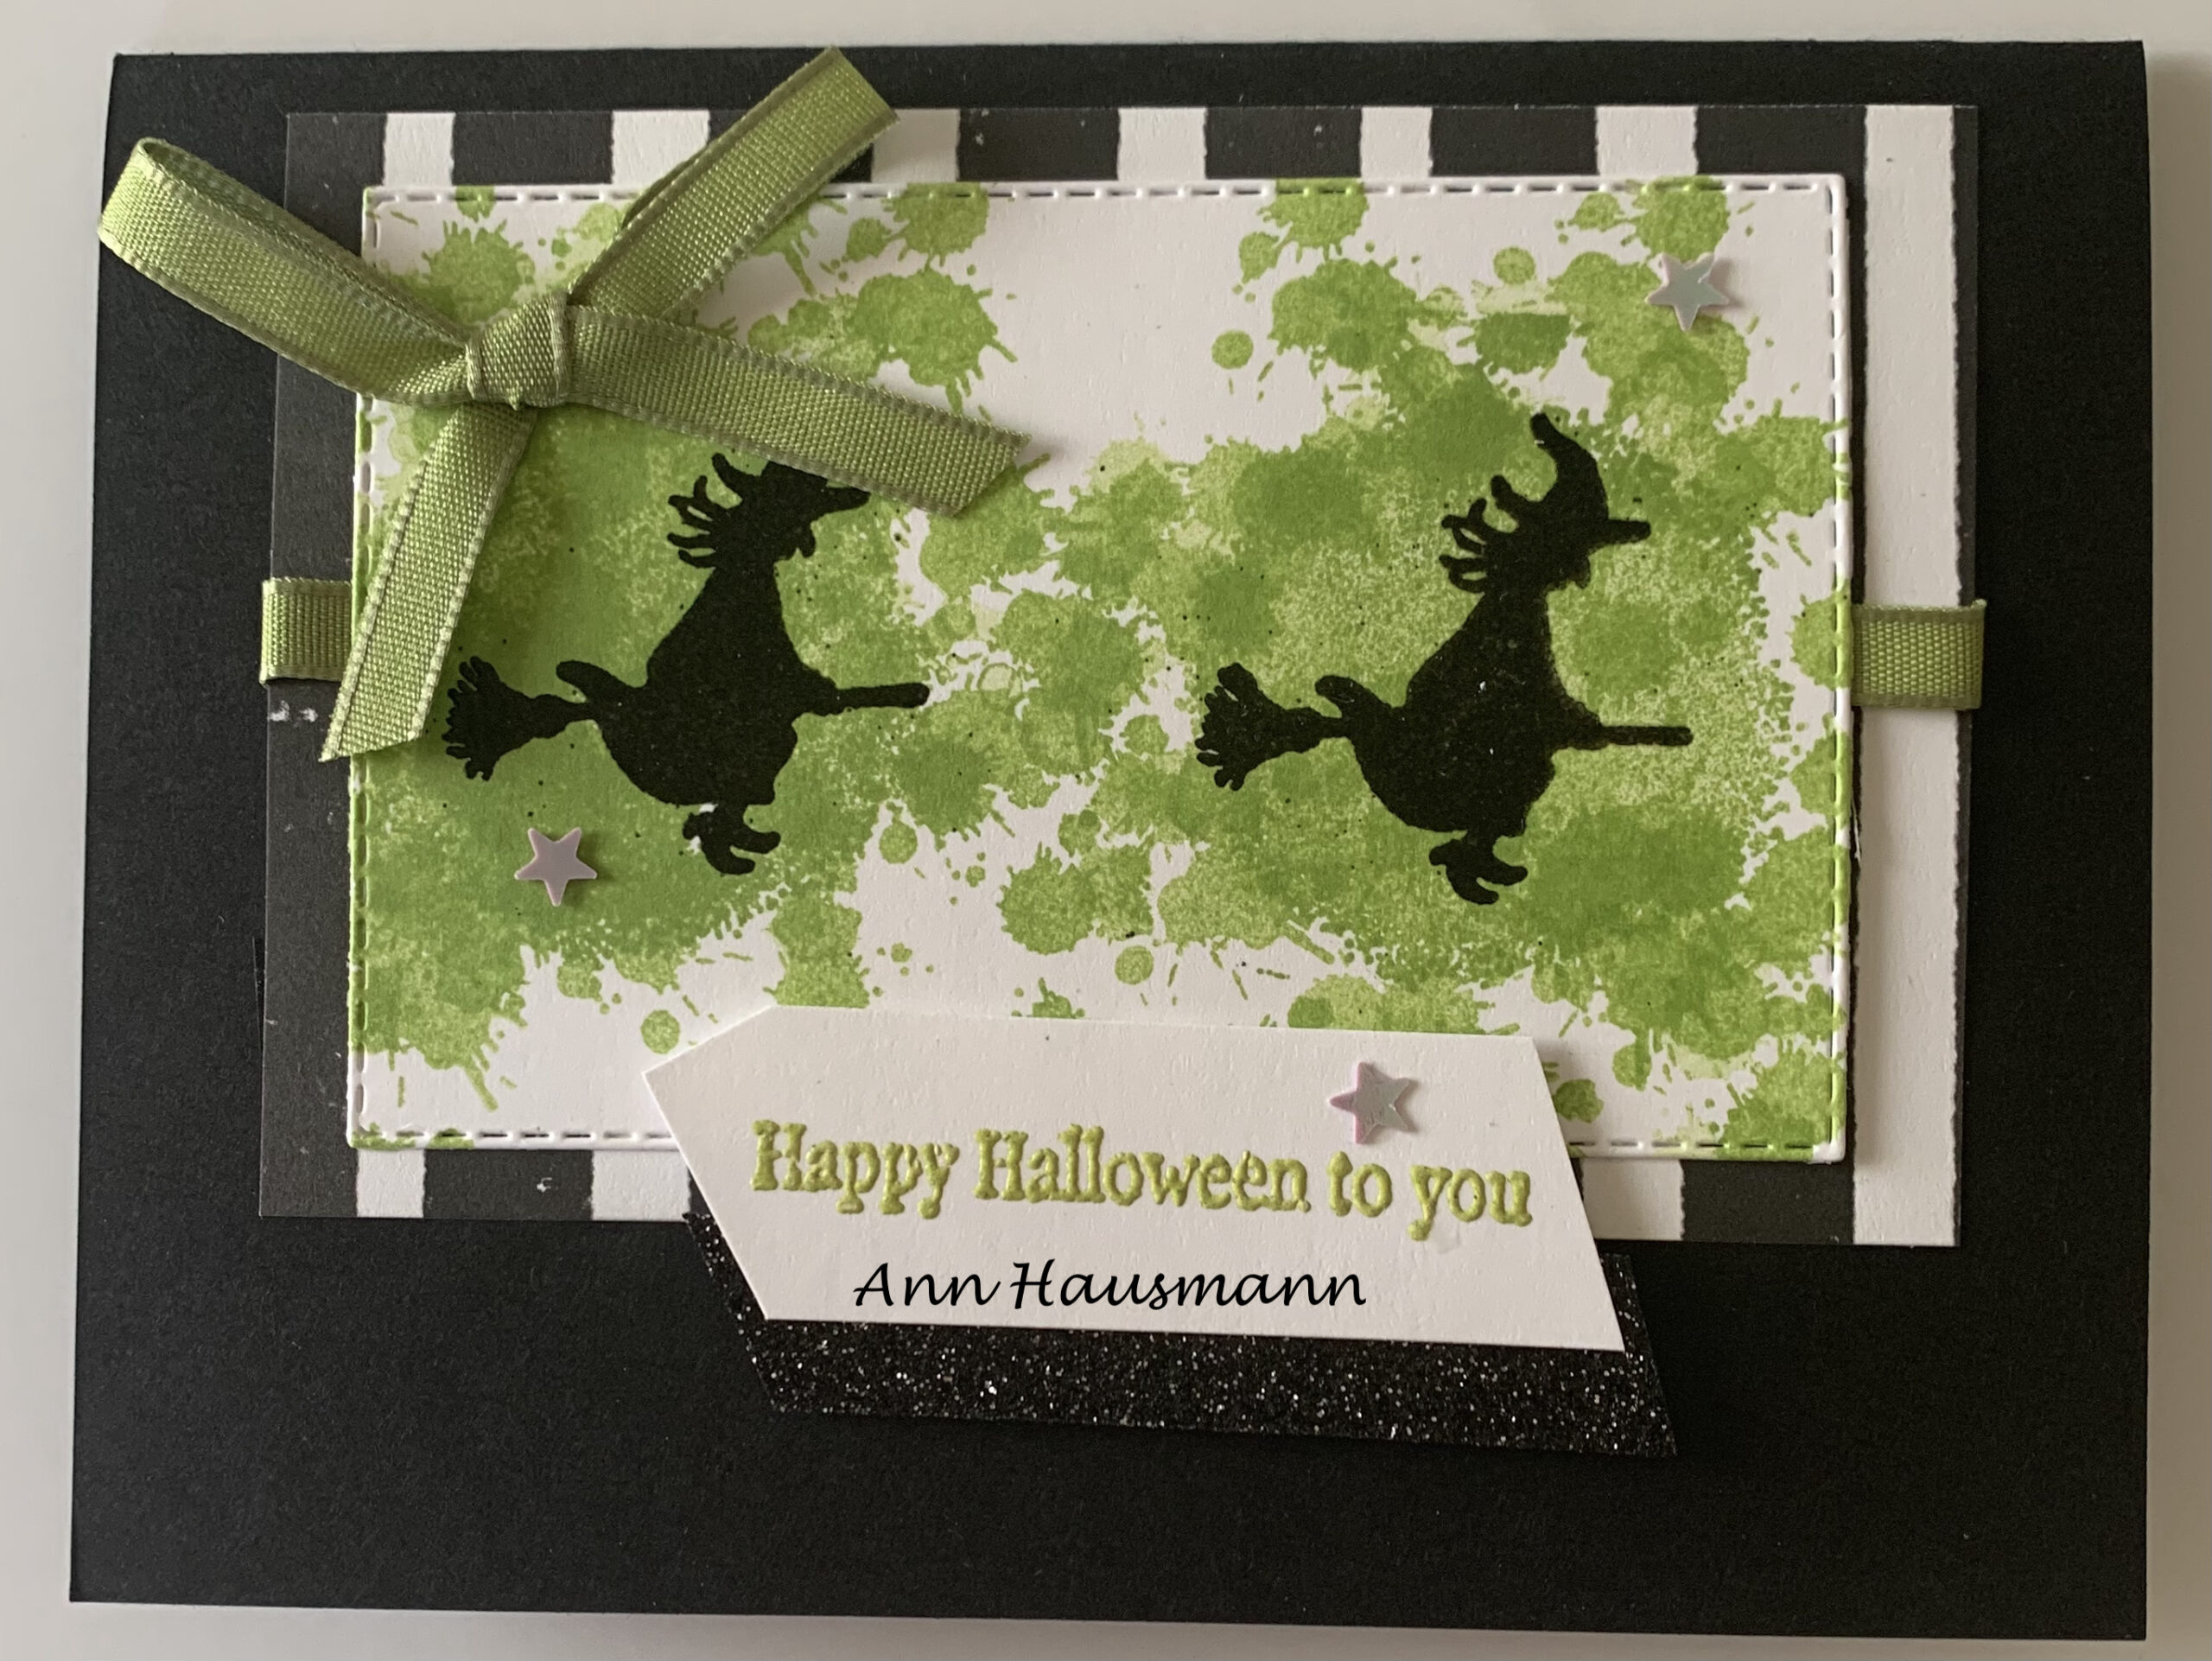
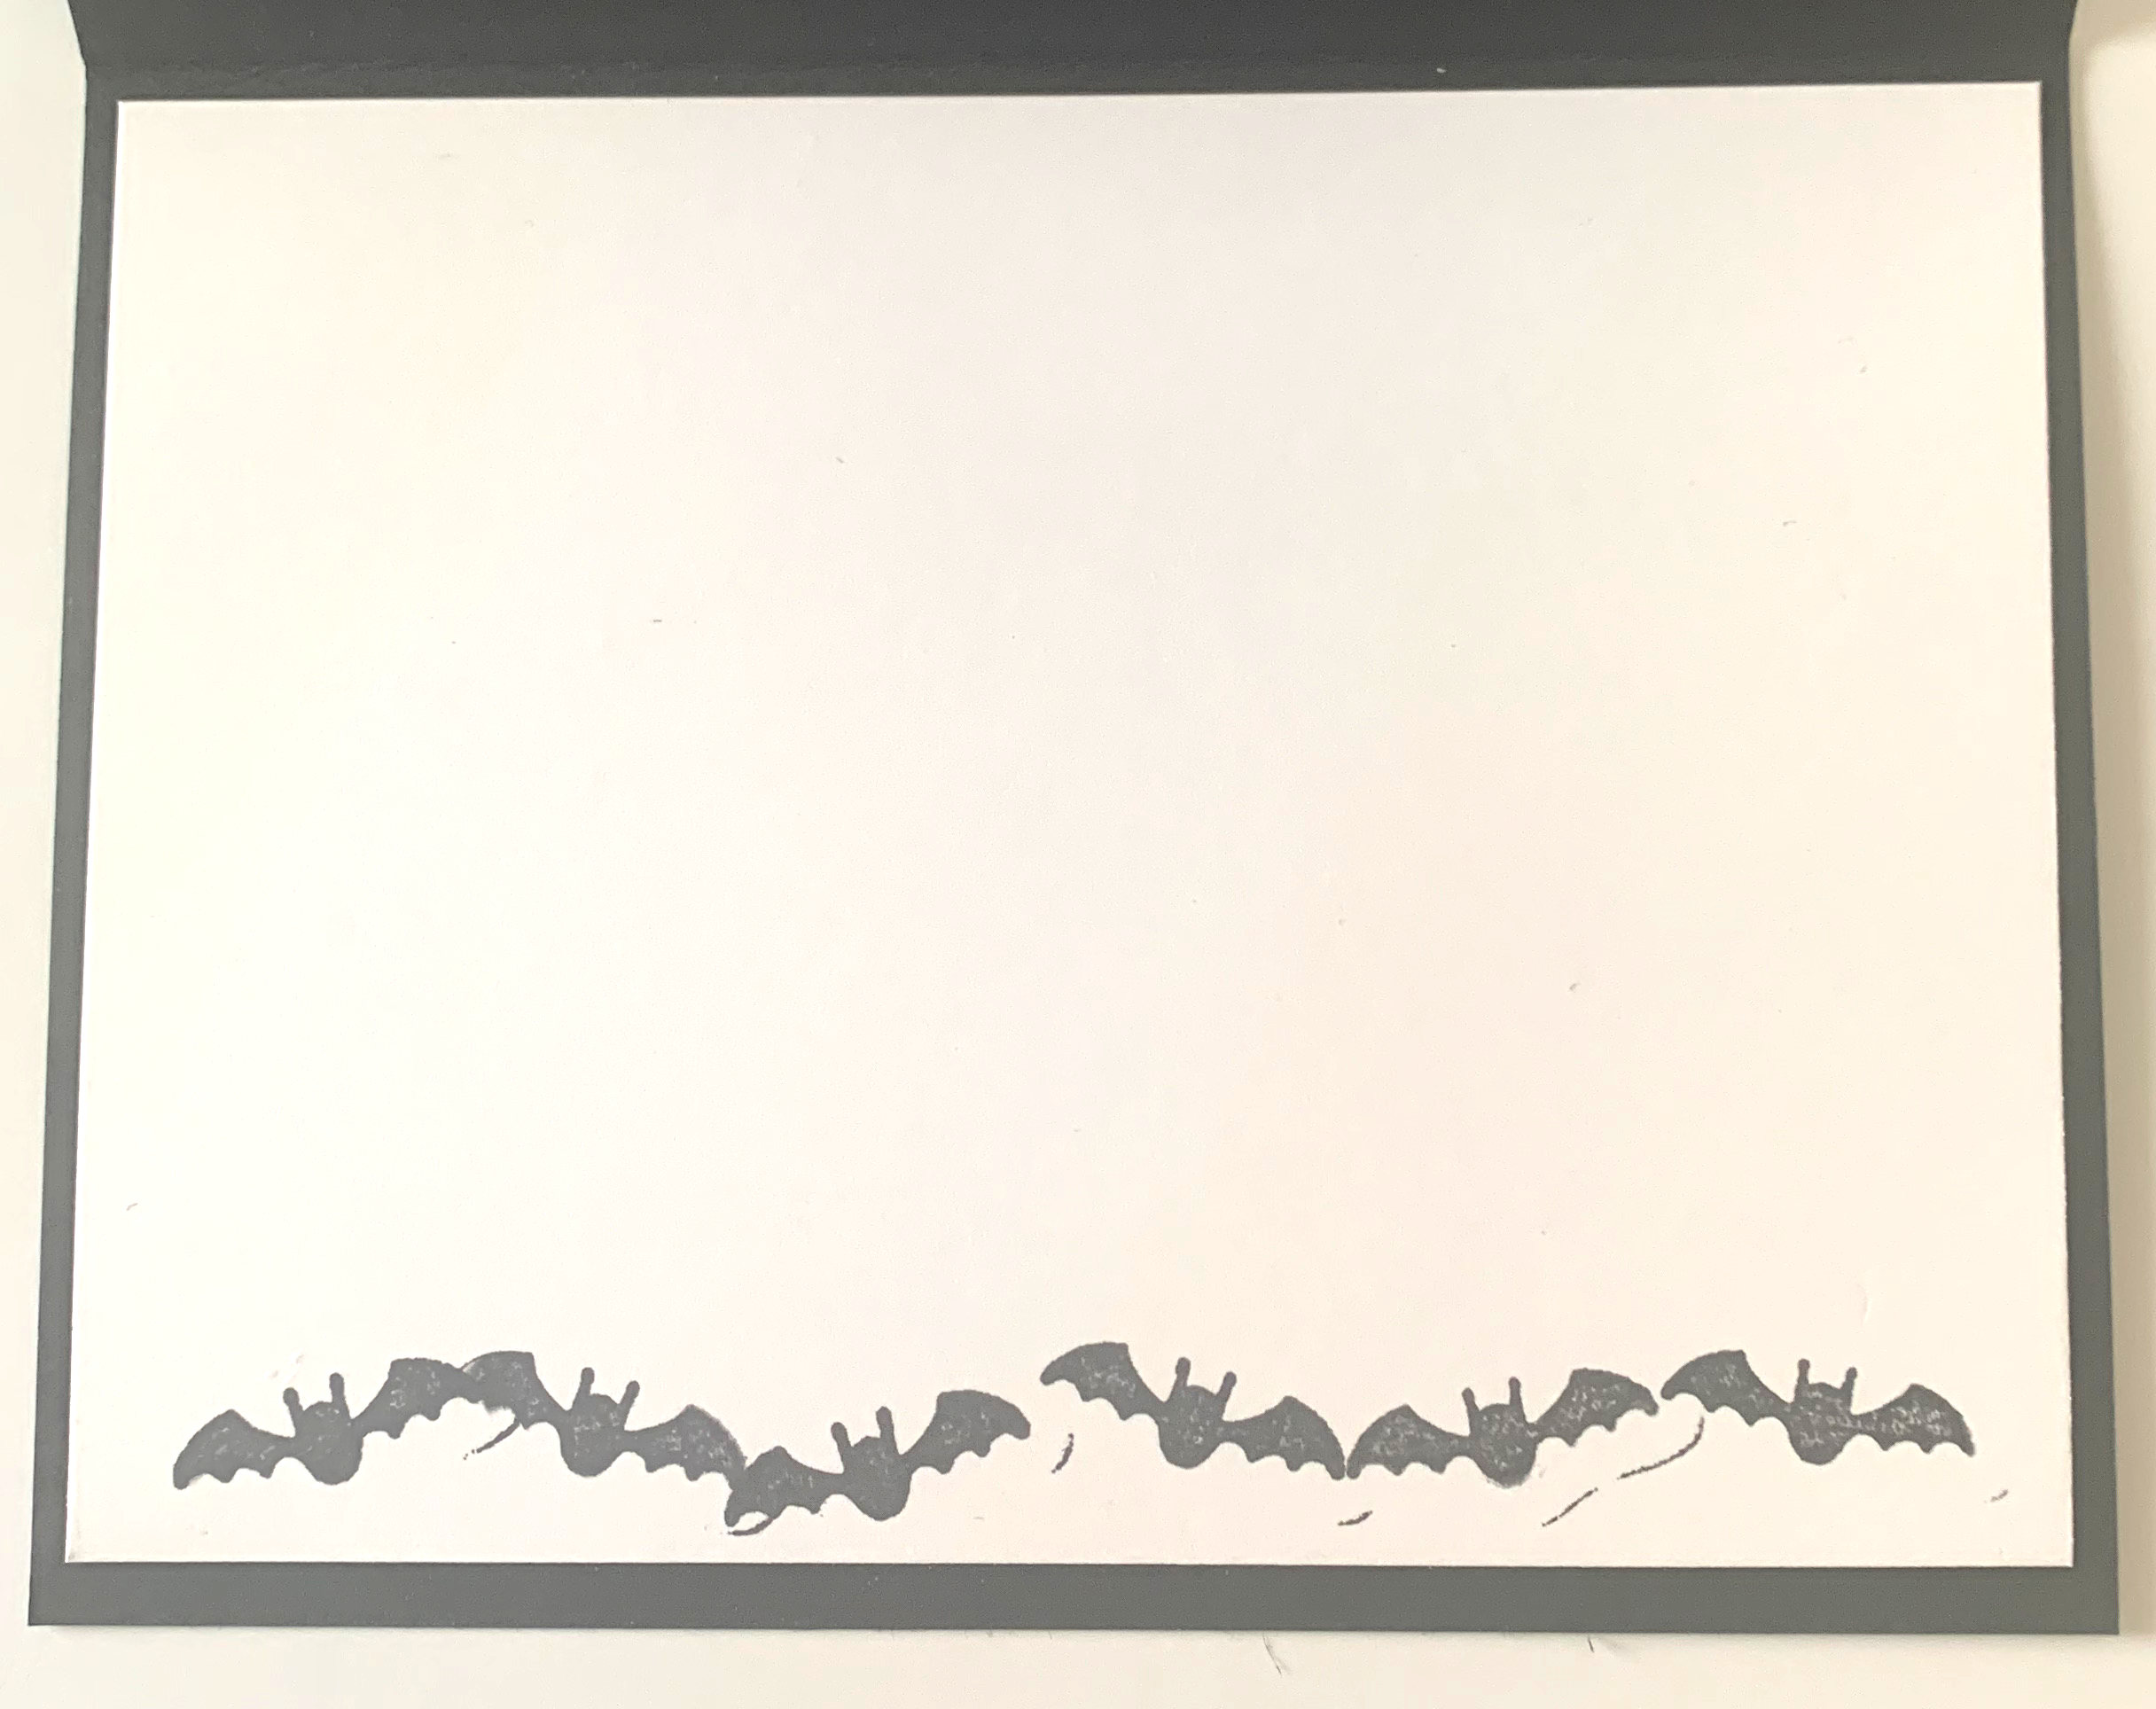
. Ann used the Frightfully Cute stamp set and the Textures and Frames stamp set with witches embossed with black embossing powder! She used Rectangle Stitched Dies, Black Glitter Paper, Cute Halloween DSP, Cute Stars Sequins and Old Olive Ribbon. The greeting is Zing! Leaf embossing powder and look at her bats on the inside flying toward you!

 .
. Sharon’s card uses almost every one of the Frightful Tags Dies with a 3D sticker spider from her stash:
 .
.  .
. Lori is getting a head start on Christmas cards with a card made with the Whimsical Trees Bundle in the mini catalog. The blue DSP is part of the Whimsy and Wonder Specialty DSP – special because it has lots of foil embellishing the paper. The dies have six different sizes of Christmas trees and then fun embellishments to die cut.

 .
. Why are the pictures of your cards not focused?
Well, Sal, I am cutting corners by sizing the cards for the blog with the tools in Word Press. If I size them using Gimp they are focused a little better but I would be here much longer and I have a Mystery Card to show everyone!
Mystery Card Challenge #17. Click on the blue to print
Mystery Card Challenge #17 printable pdf file
 .
. It is a full pleated front card! I used the Expressions In Ink DSP and Artistically Inked stamps and a Pretty Pumpkin stamp. Which do you like better the one with dots of gold foiling on the Pale Papaya or the gold bling?
 .
.  .
.  .
.
The pleated DSP can go pointed to the bottom as I did, to the top as Sharon did or horizontally as Joy did.
 .
.  .
.
 .
.
 .
.  .
. 
. That should be enough to spice up someone’s crafting world!
So true, Sal! If you would like to be a part of club or join with friends to create a club of your own, contact me by text at 303-815-0838 or email [email protected]. We have club on the second Tuesday of the month or an event here at my home if it is an off month for club. November 8th is the next club!
It’s time to think Christmas cards! I can help with that. Paper Pumpkin has a set in November that can help as well just subscribe by November 10th:
 .
.

Nine treat packages – three each of three designs. Hmmmm….. so the snowman is only one of the three. Sounds perfect for a small classroom or for a few neighbors. You can always adjust your order to get extras or buy refill kits.
You can order the subscription directly, just click on the picture above or go to the store and order one, three, six or 12 months so you can add paper and other supplies you need. Click on little Sal in the computer to go to the online store:
SAL, Sharing A Lot this fine fall day
Karen

Welcome to my blog!

Sal Window to Products


