Home » Posts tagged 'Dragonfly'
Tag Archives: Dragonfly
Lions & Dragons – Oh My!
Hello Stamping Friends,
Let’s have some fun with Lions (dandelions) and Dragons (dragonflies)!
January’s hostess code is : UEEZKD2D for use if your order is under $150.
Yesterday I was live on Facebook with January’s club cards. Each club member had kits with all the supplies so this time my presentation was different with just the construction of the card without going from the beginning to the end and listing all the sizes of the card cuts, so this blog post will fill in the gaps!
Dragonfly Z Fold Club Card Introducing The Dandy Garden Suite
This suite is on Page 25 of the JJ catalog (Jan-June mini)!
Recipe:
Base: Bumble Bee, 5 1/2 X 10 7/8, Lay the base horizontally at the 7 1/4″ mark and cut down 1 1/8 inch, then score the rest of the way.
Secondly, mark the left hand side down from the top at 3 3/8″ and cut the base from 1 1/8″ to the 3 3/8″ mark. (Note: the tip of the cut is at 1 1/8″).
Score the base at 3 5/8″ from the left. You now have two score lines: one at 3 5/8′ and one at 7 1/4″.
Your base is done!
Let’s mount our little dragonflies and the bumblebees on little strips of window sheets.
Window sheet strips (X2): 3/8″ X 1 1/4″
Bumblebees: Use the Dandy Wishes Dies little Bumblebee die to cut two bumblebees from the Dandy Garden DSP (Designer Series Paper). Color the back of the bumblebees with Mossy Meadow. Place glue dots on the top of one of the window sheets, one on the front and one glue dot on the back, and then adhere your bumblebees back to back. The “Garden Wishes” stamp set has a bumblebee image to stamp if you would rather have a stamp set than a die set.
Dragonflies: The Dandy Garden DSP has sheets that match up with the Dragonfly punch (which is bundled with the ‘Dragonfly Garden’ stamp set for a 10% discount) and you will punch out two matching small dragonflies and mount them on your window sheet strip with a glue dot on the window sheet front and on the back.
Back Layer of the Z fold: Dandy Garden DSP, full rectangle – 3 3/8″ wide X 5 1/4″ tall. The DSP is directional.
Middle Layer of the Z fold (which is on the back of the base): Dandy Garden DSP, Start with a piece of DSP, 3 3/8″ wide X 4 1/8″ tall, Mark down 1 1/8″ on the right hand side and cut from the tip of the left hand side to the mark on the right hand side. Flip your base over and place your bumblebee where he will be on top of a dandelion at the back when you fold the card flat. Use a glue dot to position the bumblebee and then adhere the DSP.
Front Layer of the Z fold: Dandy Garden DSP, 3 3/8″ wide X 3″ tall to start. Mark 1 1/8 ” down -this time on the left hand side and cut a diagonal from the tip of the 3″ to the 1 1/8″ mark. Before adhering, wrap your linen thread around the DSP and tie a bow.
Note: On both the middle and the front layer, you can place your DSP where it will go, and make your marks for your diagonal cuts without measuring so that if your diagonal cut is not quite perfect your layer will be and will have a nice 1/8″ border.
Greeting Border: Bumblebee, 3 1/4″ X 3 1/4″, cut with the Largest Square Stitched Shape Die (2 5/8″)
Greeting Top Layer: Whisper White, 2 1/2″ X 2 1/2″, cut with the 2nd largest Square Stitched Shape Die (2 1/8″). I stamped the greeting from Dragonfly Garden, “May Good Things Grow All Year Long”, in green, and then did a stamp off of the dragonfly cluster across the greeting in Bumble Bee ink.
Embellishments: One little ladybug mounted with a glue dot. 16″ of Mossy Meadow Braided Linen Trim.
Alternative Cut: Diagonal Z fold with the diagonal from the back to the front.
The base of this card uses just 1/2 of a piece of cardstock so you can make two cards from one sheet.
Base: Bumble Bee, 5 1/2″ X 10 7/8″ scored at 3 5/8″ and 7 1/4″ with a diagonal cut from left to right at the 5 1/2″ cut down to 1″ from the bottom on the right.
Note: I have a 1/8″ border on the right, left and tops but did not have a border on the bottom.
Back Layer: DSP, 3 3/8″ wide X 3 1/4 ” tall, cut diagonally left to right from the 3 1/4″ tip to 1 3/8″ down from the top.
Back Greeting: Shimmer White, 3 3/8″ wide X 1 7/8″ tall, For this greeting I stamped the “Thank You For Your Kindness” from Dragonfly Garden in blue and then added a punched out dragonfly.
Middler Layer– goes on the back of the base: DSP, striped in this case, 3 3/8″ wide X 3 7/8″ tall , diagonally cut from the right to the left from the tip to left marked at 1 1/2 “. Tip: place the top of your layer with a nice 1/8” border and trim the bottom since it is flush to the bottom.
Front Layer: 3 3/8″ wide X 2 3/8″ tall, cut diagonally from the left to the right marked at 1 3/8″ from the top. Now wait — don’t adhere yet.
Dragonfly: Dandy Garden DSP, punch two large dragonflies and mount them with glue dots on a strip of Window Sheet 3/8″ X 1 1/4″. Use another glue dot to adhere the window sheet to the front of the base.
After the Dragonfly is adhered – adhere your front layer.
Embellishments: Die cut a bumble bee from DSP and adhere to front; adhere a ladybug trinket with a glue dot to front; tie a little bow with 8″ of Mossy Meadow Braided Linen Trim and adhere it to the back.
Which do you like better? A rectangle back or a diagonal back? Leave a comment with your vote by January 25 for a chance to win the ladybug trinkets!
Sand and Sea Club Cards Introducing The Sand & Sea Suite
This suite is on page 41 of the JJ catalog.
I used the Whale Of A Time Designer Series Paper instead of the paper in the suite so I had a smaller background behind the shells. The cards shown above have three different backgrounds from the Whale of a Time DSP:
Which do you like best? #1) little fishes amongst the seaweed, #2) seahorses, #3) the coral reef
Leave a comment with your vote by January 25 for a chance to win The Opal Rounds embellishments!
Recipe:
Base: Pretty Peacock, 5 1/2″ X 8 1/2″, Scored at 4 1/4″
Layer 1: Whale of a Time DSP, 5 3/8″ X 4 1/8″
Layer 2: Garden Green, Start with 5 1/2″ X 4 1/4″ and cut with the largest Seaside Seashell Die to make a base.
Layer 3: Granny Apple Green, Start with 5 1/2″ X 4 1/4″ and cut with the largest Seaside Seashell Die, then cut out all the little vines and glue them to the Garden Green base. This gives you a nice contrast of greens. Note: you can cut into the seashells to give more area to adhere the vines since the seashells will be glued on top.
Layer 4: Pearlescent Specialty Paper, Start with 5 1/2″ X 4 1/4″ and cut with the largest Seaside Seashell Die, then cut out all the seashells and glue them on the base over the greenery.
Greeting: Shimmery White, Start with 1 X 2 1/2″, stamp the greeting, and then cut with the rectangle stitched die to make a perfectly sized rectangle. Cut one end, stop halfway, reposition the die on the other end and cut that half. I demonstrate this in the video.
Inside: Shimmery White, 5 3/8″X 4 1/8″
Inside strip: DSP cut from the same piece as the background, 5/8″ X 4 1/8″
Here are two examples of what I did on the inside:
So you can vote and really see the backgrounds here are up close images of the cards:
#1 – Little fishes
#2 – seahorses
#3 – Coral Reef
Remember it is Sale A Bration time with free products for each $50 or $100 order!!
January’s hostess code is : UEEZKD2D for use if your order is under $150.
SAL, Share A Love
Karen
Dragonfly Congrats, Butterfly Flip Flop, Watermelon Curvy Keepsake
Hello Stamping Friends,
Dragonfly Congrats Card– Printable PDF File


Spritzer Recipe: 3/4 spritz bottle of alcohol with 20 drops of ink. To dry faster get a higher alcohol content %, for example 91%.
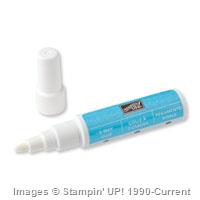
Blender Pen Solution: In a one ounce eyedropper bottle, combine 1/3 parts Glycerin (found in cake decorating section), 2/3 parts distilled water, 1/4 teaspoon alcohol. 1) Remove pen tip (pull and twist gently) and lay the tips flat overnight in fluid. Next day: 2) Fill the pen barrel with the solution. 3)Place the pen tip back in the hollow by pushing gently- do not push the tip but glide it in holding on the sides.
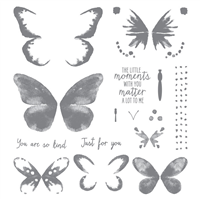
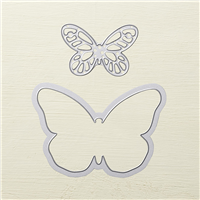
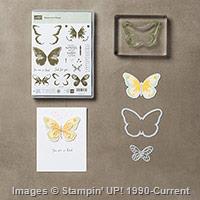
Thank you, Deb, for those instructions!! Here are the supplies, click on any image to go directly to the store.
Built for Free Using:My Stampin Blog
Butterfly Flip Flop Card – Printable PDF file
The outside:

 Finally all the way over. Okay, so it really just took seconds but without a video I thought I’d better show the flip flop! The fun part was using almost every one of the Watercolor Wishes stamps as we did the three part stamping. We used Daffodil Delight – stamped off once for the first step, Crushed Curry for the second step, and Memento Black for step 3. Pinterest is full of charts of all different color combinations that you can use for gorgeous butterflies, just search on Watercolor Wings. The black satin ribbon (retired) was stamped with white craft ink for the greeting. The pictures don’t do it justice. Here are the supplies:
Built for Free Using:My Stampin Blog
 For extra detail, again with a 3″ piece of Whisper White, cut two parts with the slotted part of the Thinlit to be the watermelon rind. Glue them on the inside of the green.
Built for Free Using:My Stampin Blog


