
Christmas Magic Diamond Fold Card Class
Hello Stamping Friends,
Today I will spotlight the Christmas Magic Diamond Fold Card Class I held in November. The class fee included your choice of the wood or clear Christmas Magic Stamp set, card instructions, two kits and a luncheon. I loved this stamp set. It reminded me of the Polar Express train and the Polar Express production my third grade class put on years ago.
The tables are set:
 I am ready to go:
 The Diamond Fold card with the Christmas Magic Stamp set as designed by Stephanie Fischer:

 I changed a few things on the front and used a Garden Green background. The banner is mounted so the card stands nicely like an easel card. I added two sizes of rhinestones for the front train lights and I used a silver Sharpie to add dimension to the bell. I stamped just a little of the train smoke on the North Pole side to make it look like a scene. Our Acrylic Block size D was exactly the size of the middle square making it easy to position the train. The three little red dots on the greeting use the retired cupcake punch and red glimmer paper and the leaf is from the Square Pillow Box Thinlits as is the snowflake shown here:

Not having to design the front gave me opportunity to design something special for the back to truly make it a “Carin’ Card” as my husband so fondly states:
 Above is the card which I used at the class and had drawn in the red and white striped ribbon between the bells. When I made more to send I used the other greeting from the set and drew in a solid red ribbon since I ran out of the little white striped ribbon (retired product).
 The bells are stamped just like a Triple Time Technique. Use just a bit of snail to hold the white in place and stamp on the white and green. After stamping the bell, remove the white and mount to the black border then reattach to the green for a great image! If you measure carefully on the second bell on each side, when you close the card you will get two ribbons that match, (I am asking Santa for a camera so I don’t struggle focusing my phone camera). I love the bells in the Christmas Magic stamp set. I used them on the envelopes as well.
 This is a diagram of the fold:
 And here is a printable pdf file for your folder just click on the blue:
We broke at noon for salad and baked potato broccoli cheddar soup.

Thanks for coming Kris, Virginia and Sheri! It was a fun day!
SAL,
Karen

Fall Warm Wishes Card with Leaves Acrostic
Hello Stamping Friends,
Thank you to all who were able to take part in the online extravaganza! Now that December is here Stampin’ Up! has closeout specials with some, not all, products on sale for a great price! They have a new category in the online store:

The Year-End Closeout contains the Clearance Rack Items, Holiday Retiring Items, and excess inventory items. Here is a list in an excel file which shows which category each product falls in: clearance, excess or retiring. However, bundles that retire do not mean the stamp and framelits retire, just the bundle with its discount.
year-end-closeout-list
or click on the picture above to go directly to the store where you can see pictures of the products.
While sales are fun, card examples are even more inspiring and I have been slack in posting all the fun cards and techniques we have been doing.
October Club:


I know October seems so long ago and though the card we made is for fall, imagine doing the same Watercolor Wash technique with Christmas colors and making ornaments instead of leaves. Send me an example if you do!
The Watercolor Wash technique comes from a video by Patty Bennett on pattystamps.com
I did a few things differently than Patty. I used the retired spider web embossing folder to emboss the leaves after cutting them out, you could get the same effect by scoring, and I used the retired “Think Happy” stamp set for the little smiles on the leaves, though it would be quite easy to draw them in.
The acrostic was one I wrote when teaching poetry to my third graders one lovely fall afternoon. I wrote the above for the example and then had them all sit outside and write their own acrostic from something they saw, or smelled, or touched, or heard – hopefully not tasted! What a fun memory!
Stampin’ Up’s Watercolor Paper #122959 is 6″ X 9″ and makes enough leaves for two cards. You could also use Shimmery White cardstock #101910. Remember to leave enough room to stamp and punch out your greeting from the paper.
Watercolor Wash Technique
Step 1) Put 4 drops of various reinkers in a paint palette (or a cool whip lid)
I used Daffodil Delight, Tangerine Tango, Cajun Craze, Pear Pizzaz
Step 2) Wet one side of the paper and then the other side so it lies flat
Step 3) Dip a paintbrush in the ink and then dab it on your paper, wash out the brush and apply a different color,
repeat until the watercolor paper is covered. Let dry.
Step 4) Using Gold Wink of Stella Glitter Brush #141898 flick gold flecks on your dried sheet by flicking the brush against the edge of its case
Step 5) Cut out your leaves with the Leaflets Framelits #138283 and cut out one leaf with the Pumpkin Pie Glimmer Paper #142029
-note, cut the leaf with the glimmer side of the paper facing down so the framelit cuts into the white backside to protect your framelit.
The base of the card is Cajun Craze 4 1/4 X 11 Scored at 5 1/2
The Woodland Embossing Folder is used with Very Vanilla card stock 4 X 5 1/4 for a great background to the leaves. I typed the acrostic on Word, making four card insides from one sheet of Very Vanilla.
The greeting is from the Butterfly Basics stamp set (pg. 113) and is punched out of the watercolored paper with the Decorative Label Punch #120907. Remember, stamp first -then punch. A small dab of glue is run around the edges and then the label is dipped in Pumpkin Pie glitter.
A little piece of burlap ribbon #141487 is glued on the Very Vanilla, the leaves are added with glue dots, and a gold ribbon tied on top.
Faux Icing/Snow Technique
The Technique I taught at club came from last spring’s Stampin’ Up! convention where we learned how to make faux icing.


My glitter was not Dazzling Diamonds #133751 so it has a rose tint. Lesson learned! Stay with the best! The cupcake and the tree are from the Sprinkles of Life stamp set, pg. 106. I loved how the ink from the stamped image bled through the ‘icing’ to give the shadowed effect. Be careful that your mixture isn’t too thick or you won’t get that result. If you store the leftover mixture in a jar be sure and add a bit of water to make up for what has evaporated. The Tree Builder Punch #138295 was used for the birds and the cherry on top. I wish you could see the 3D effect of the snowman built from the Owl Punch 5/16″ circle on top of the 3/8″ circle punch.
And finally, I must put in a plug for Paper Pumpkin, the October kit was a set of 8 shaker cards and the kit was exceptional!

Go to paperpumpkin.com to sign up before December 10 and you will receive your kit around Christmas. Last year the December kit was a calendar for each month of the new year with a gold display stand. It was an exceptional kit. Hmmmm…I think I am saying that about all of them!
I will be posting again soon with the details of the Magic Christmas class I held at the first of November and then the Stamp A Stacks held in Elizabeth.
Stay tuned for more….
SAL,
Karen
Double Z Fold Box Card & Clearance Rack
Hello Stamping Friends, (Click little SAL to go to the full blog if you are on your phone)
 Stampin’ Up! just added lots and lots of goodies to the clearance rack. They will be available while supplies last. I will post screen shots at the end of this post to entice you! If your order is $150 you earn hostess rewards; if it is under $150 use the hostess code FCZSQ336 and get a treat from me!
For now let me show you my version of a Double Z fold box card. The standard double Z fold card base is cut and scored like this:
 Do you see how the base is a Z fold one way and then the 1″ on the bottom is Z folded the other way.
Base card is 9 3/4″ X 4″ (This gives you the option of adhering the entire card to a base of 5 1/2″ X 4 1/4″)
Cuts: Using your Stampin’ Trimmer, with the 4″ side on top, cut at 1″ starting at 3″ to 7 1/2″. (I love how our Stampin’ Trimmer has the inches marked on the vertical bar to guide us.) Turn to long side and score at 3″ down to the cut line and then score at 5 1/4″ all the way top to bottom. Lastly, score at the 7 1/2″ from cut line down to bottom. That is a standard Double Z fold.
I chose to do a Double Z fold “Box” card instead of having an open middle as shown above so I could add a middle box strip to put on a jar of flowers. Our stamping friend, Terri, is getting married this month and her colors are gray and hot pink. Congratulations Terri!

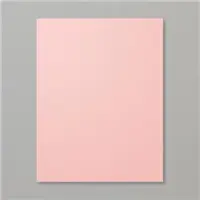
Base Card: 9 3/4″ X 4″ Score at 3″ and 5 1/4″ all the way top to bottom. Basic Gray used here.
Bottom Strip: 9 3/4″ X 1″ Score at 5 1/4″ and 7 1/2″. Basic Gray.
Box Strip: 4 1/4″ X 1″. Score at 1″ and 3 1/4″. Basic Gray.
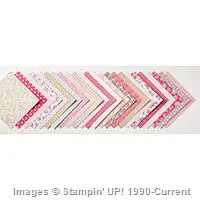
Front Panel: 2 3/4″ X 3 3/4″ to glue on before the 1″ bottom strip is adhered. Pop of Pink Designer Series Paper (DSP).
Back Panel: 4 1/4″ X 3 3/4″ to glue on before the 1″ bottom strip is adhered. Pop of Pink DSP.
Bottom Strip DSP: 9 1/2″ X 3/4″ Score at 5 1/8″ and 7 3/8″. Pop of Pink DSP.
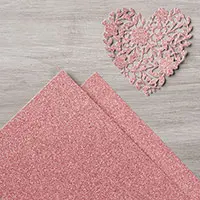
Whisper White cardstock was used for all the embellishments with the bow on the heart stamped first in Melon Mambo then cut with the bow framelit in the Everyday Jars Framelit set . I cut one full Flourish Thinlit for the front, and for the bouquet I used the top of another full Flourish thinlit for two of the flowers, one of the single Flourish thinlit flowers and one of the single stem bud Flourish thinlits. I cut off a few of the extra buds that made it a bit too busy.
The jar is stamped twice from the Jar of Love stamp set and cut out with the shortest of the Eyeryday Jars Framelits. I stamped the bow in Melon Mambo on one of the jars and then put sticky tape/glue dots on the top of the back of the jar to hold the flowers as I arranged them, being careful to not place a flower too far to the left where it would be crunched in the fold. I attached the back jar to the front jar just at the top and slid the two over the middle gray box strip adhering both sides with Tombow glue.
The border comes from the Flourish Thinlits set.
The Heart and Congrats are from the Sunshine Wishes Thinlits.
I found it easy to adhere all the thinlits by putting a few drops of Tombow glue on our Silicone Craft Sheet and then using a toothpick to put glue on the thinlit. The glue in the new Fine Tip Glue pen has a tendency to dry too fast for my slow speed.
 The greeting comes from the Rose Wonder stamp set. It should be stamped on the middle of the base before adding the embellishments. I had to add a 3″ X 2 3/16″ panel with the greeting. Design opportunity…..I could have used a different cardstock, but you know how I like the monochromatic look. (If you don’t get the card mailed in time for a wedding, you could easily add a panel that says Happy Birthday!)
Questions? Email [email protected] or text 303-815-0838
 Only good while supplies last:


Just remember it is only while supplies last and while you are at the Clearance Rack check out the weekly specials in September!
SAL, (Save A Lot)
Karen


Catalog Launch Open House Craft Sale
Hello Stamping Friends,
This coming Saturday, June 18, from 10am to 2pm I will have an open house to introduce the new catalog and the new In Colors. We will make a new In Color color sheet:

It is a great organization tool if you store your paper by color family as I do. An 18″ Elfa drawer stores two sets side by side:

You can make a bookmark for your new catalog with the In Colors and the new Swirly Scribbles Thinlits Dies and there will be a quick make and take card using the new Floral Affection Embossing Folder. A fun day with no entrance fee!!
I am going to part with a few of my Stampin’ Up! stamp sets and Big Shot dies and will have them for sale at the open house. You are invited to set up a table of your own sales items if you would like.
Join the fun and pick up your catalog this Saturday! (Click to view it in PDF form)

SAL, (See A Lot, Save A Little)
Karen
May Club Cards and Stamp A Stack Cards
Hello Stamping Friends,
(This is a post; click on the SAL icon to go to the full blog)
Happy Memorial Day Weekend! Hopefully your vacation day is a sunny one.
This post will include cards from our bimonthly club and the Elizabeth Stamp A Stack. Check back in a couple weeks for recipes. Today I will just show you the cards so you can decide if you want to make that last purchase from the catalog before savings and product are gone forever! Tuesday, May 31, is the last day to place an order from the Occasions catalog and the big catalog. Several items have already sold out so hurry!
My favorite project was the Birthday Blooms Surprise Pull Out card. I saw this card on My Tanglewood Cottage and the directions are on Splitcoast Stampers. Scroll through the Splitcoast Stampers pictured instructions to go down to the video (click here) to get the measurements I used. The greetings in the pull up are in the Birthday Blooms stamp set.
 The flower image is stamped with Stazon black on a piece of Shimmery White cardstock and colored with Blender Pens using Blushing Bride and Wild Wasabi Ink. The bottom parts of the image’s leaves are fussy cut and then the oval framelit #4 is slipped under the cutout and run through the Big Shot. When you run the stamped image through the Big Shot you will get a nice indentation to fussy cut the oval between the two large leaves. The little flowers in the corner are the top flowers of the image stamped a second time, fussy cut, and mounted on greenery from The Bird Builder Punch. The butterfly is from the hostess Best Thoughts set. It is stamped on vellum and then placed upside down on the Stampin’ Pierce Mat and rubbed with the Stylus to give a nice white color.
When you pull on the ribbon – Voila!

The inside words come from the Best Thoughts hostess set which has the butterfly we used on the front:
 Retiring Products: The Bird Builder Punch (117191), The Best Thoughts hostess set (139234), The Curvy Corner Trio Punch (139683) that made both the corner and the ribbon slider hole, and It’s My Party Designer Series Paper Stack (140552) from which I pulled the green striped paper. You will see more of this paper in another card. The Paper Stack has 48 sheets with 4 each of 12 double-sided 12X12 designs.
The masculine version of the Surprise Pull Out card uses Butterfly Basics, In The Meadow and Guy Greetings stamp sets, all of which carryover to the new catalog- Yay! Once again it uses the “Think outside the Framelit” technique to stamp an image, cut out a little of the image and then slip the framelit under the cutout part and run through the Big Shot.


 I will miss the Blackberry Bliss cardstock which is part of the retiring In Colors (see page 137).
Our technique sheet for club was the Mirror Image technique:

We mirrored the little yorky from the Hey Girl stamp set (#138706) which is retiring. I used the retiring Oval Scallop punch(#119856) to create the clouds. Join my team, or the bimonthly club, and you will make the technique sheets at our meetings. If you live far away or can’t make the meetings, I will mail you a completed technique sheet.
The Stamp A Stack held at the Elizabeth library was another fun time of stamping! Here is the first card:


The Sunburst Sayings stamp set and Sunburst Thinlits Die used on this card are currently bundled for a 15% discount. See page 25 of the Occasions catalog. Though both products are in the new catalog, there is no longer a bundle. Blackberry Bliss and Hello Honey are used together on this card and both are retiring colors in only three days. See page 137 for all the In Color retiring products.
The second card: (Stampers make six cards- two each of three designs for $20)


What could be better than Bermuda Bay with a black accent?! The flower is from the Butterfly Basics stamp set which is carried over to the new catalog, however the Honeycomb Embossing Folder (#129378) is retiring, as well as the Honeycomb Hello stamp set (#134075) which has the little “hello” and a cute little bumble bee that a couple of my stampers added to their card front. The Curvy Corner Trio punch is retiring (#139683) and the Candy Brads (page 161) are being replaced with shaped enamel dots.
The third card demonstrates the Drapery Fold Technique, modified from that found on Laura’s Stamp Pad:


Once again I have used the retiring It’s My Party Designer Series Paper Stack (#140552). Sadly, all the Scallop Circle Punches are retiring (see page 165). I used the 1 3/4″ scallop circle punch and punched the white inside layer of the card so that the main card stock showed. I then stamped “make a wish” in Basic Black with the Party Wishes retiring stamp set (#140651). The ‘It’s My Party’ enamel dots (#140554) are retiring as well. The Happy Birthday is from the Rose Wonder stamp set (#140697) and thankfully it is NOT retiring. If you wanted a stamp set with words that fit many different occasions, this set is a must have. See page 18 of the Occasions catalog. The more masculine version of this card:


The balloons are from the Balloon Bouquet punch (#140609) and will still be available in the next catalog but the mini balloon punch in the Party Punch Pack (#140608) on page 4 of the Occasions catalog is retiring. The punch pack and the Party Wishes stamp set used for the “make a wish” shown above is available as a bundle at a 15% discount in a wood mount (#141073) or clear mount (#141071).
The drapery fold starts with a piece of Designer Series Paper (DSP) that is 4″ X 11 1/2″ so you can get three cuts out of a 12X12. Be careful if your design is one that shouldn’t be upside down. (Yes, I learned that the hard way!)
Score your DSP on the long 11 1/2″ side at: 3″, 4″ , 6″ , 7″ , 9″ , and 10″ .
Turn the paper to the short 4″ side closest to the 10″ score line and make a small score mark or pencil mark at 1″.
Use your cutter to cut diagonally from the 1″ mark to the bottom of the 3″ score line. Make a z fold. I trimmed the right side of the top of the folded DSP to 5 3/8″ so I could have a border around each edge.
I love the way the drapery fold shows both sides of our pretty Designer Series Paper. There are many different fold sizes you can make. I would love to see one you have made!
My next event is the catalog launch on June 18 from 10:00 – 2:00, open house style. I will have catalogs, and you can make new In Color sheets, a bookmark for the catalog and a quick make and take with a new product. Retired product will be available for purchase.
Have a wonderful weekend and remember all those who gave the ultimate sacrifice for our freedom.
SAL (Salute A Life)
Karen
Click on SAL to be redirected to the online store:
The Wedding and SU Convention
Hello Stamping Friends,
Did you miss me? It was a flurry of a month in more ways than one! We spent 10 days of April at my daughter Stacia’s and Jonathan’s wedding in Puerto Rico, returned home for one evening and then I flew out to the Stampin’ Up! convention in Salt Lake City. A major snowstorm hit Colorado and I was stranded for an extra day in Salt Lake—rough, one more day to be with friends, eat pizza and soak in the hot tub.
So we left this scene in Puerto Rico:

And returned to this scene in Castle Rock:

A little more than a flurry I would say!
Convention was so much fun. Jean and Wendy attended with me and those two beloved friends knew I hadn’t had time to make swaps before I left for Puerto Rico so they got together and made a whole sack of swaps for me. Thank you both so much!
Look at this fabulous swap card they made:
 The inside says “and eat cookies”. Both greetings are from the Balloon Celebration stamp set.
Here we are at the photo booth:
 And here they are winning the prize patrol:
 I walked the stage to celebrate making Silver Elite status:

 And was part of the many stampers honored at the Grand Hotel with a five course formal dinner:
 followed by entertainment from the Dueling Pianos- a funny, witty and amazingly talented couple:

There were chandeliers and marble everywhere – even in the bathrooms!! As the bus left to go back to the convention center they handed each of us a really awesome bag. Thank you to everyone who has supported me and helped me to this level.

And look at the stash I brought home:
 Stampin’ Up! welcomed us with streamers that popped out and flew all over the auditorium so I saved a few.
Stamp sets and pens and markers and ribbon and buttons and bookmarks and a calendar notebook and two bags!
The Paper Pumpkin booth was a fun surprise with a business kit and a party kit to buy:
 And a sneak peak at future products:
 Grid paper?! Woo hoo!!
There was even a Paper Pumpkin make and take – a sneak peak at the May kit! Hurry- sign up by tomorrow. If you buy a three month subscription (or maintain your subscription for three months) I will send you a snail adhesive, a pen, a bag and a case for your stamps. To sign up for a one month subscription you can go to http://www.paperpumpkin.com and choose me as your demonstrator or for a three month subscription go to my online store and enter item #137859. You will receive an email with a code and you will go to the paper pumpkin site and enter that code. Deadline is tomorrow, May 10th for the May kit with this cool card:
 You could make it a birthday card, too, but we didn’t see what the other stamps were so there is still a little surprise.
There were four other make and takes showing upcoming products:
A new all inclusive kit; this card has a fun fold as the heart goes up and the next layer down to reveal the inside:
 A cool new two pack of Embossing Folders and beautiful Designer Series Paper (DSP).
 A confetti punch and foam adhesive strips to make shaker cards:
 You will love the new catalog! Come to my catalog launch on June 18th, 10 – 2, and we will have fun as we ooh and ahh and play with the new products! Last but not least – a make and take with the new In Colors:
 These events are the icing on the cake after becoming a Stampin’ Up! demonstrator. Join my team as we make plans for the November On Stage Local in Kansas City. The more the merrier!

After returning home I received this stunning card from Jean thanking me for the roommate gifts! I have looked at it daily and it is like having a bouquet of flowers (that never die)! Love it! Thank you, Jean! This uses the Flower Patch Stamp set and the greeting is from Birthday Blooms:
 You can scroll through all this pretty fast so I am going to risk overload and show you a few wedding pictures.
My daughter, Stacia, was married to Jonathan Whitehead on April 8, 2016 at Tres Palmas in Rincon, Puerto Rico.


 The End (for this post)! A great beginning for the two of them.
SAL (Such A Love)
Karen
March Cards
Hello Stamping Friends,
March was a fun month with the Elizabeth Stamp A Stack, the bimonthly club, and Sale A Bration events! You have through tomorrow, March 31, to place an order of at least $50 and get a free stamp set. Subscribe to Paper Pumpkin for three months and you would qualify for the free Sale A Bration set. The April Paper Pumpkin will include two stamp sets to celebrate Paper Pumpkin’s third birthday and shipment of their one millionth kit! The kits just keep getting better and the three month subscription is on sale for $55. Go to my online store and use item #137859. Instructions will be sent to your email with a redemption code for the 3 months you have purchased.

The most popular Sale A Bration free set in my events was the “What I Love” stamp set. I did a Triple Time Stamping card to demonstrate this stamp set.


For the next card, I used the Party Wishes stamp set, the Confetti Embossing Folder and the Party Punch Pack casing the card in the Occasions catalog:


The embossing folder is sponged in the three colors, Melon Mambo, Pool Party, and Crushed Curry before running it through the Big Shot. Sponge the side with the indents if you want the confetti to be white like it is here. The confetti behind the cake is created by coloring only the confetti of the Make a Wish stamp with a marker. For the inside Happy Birthday, I used the Wet Wipe Technique, placing several drops of reinker on a wet wipe (placed on a silicone sheet to protect your work surface) and then use that for your ink pad! Voila! Lots of random color! The Melon Mambo balloon is stamped and punched, the cupcakes are colored with a marker, stamped and punched, and the candle on the cake is colored, stamped and punched. All three punches come in the Party Punch Pack. The cake is fussy cut and popped up after attaching thick twine with glue dots! One stamper used Perfect Plum instead of Melon Mambo for a more masculine card.
The following card uses another embossing folder technique-Stamping With An Embossing Folder. This is simply inking up your embossing folder and then using it to stamp on your card. I used the Honeycomb Embossing Folder and Sahara Sand Ink and purposely left some areas of the folder uninked for a subtle background:

 The Whisper White paper is cut at 8″ X 5 1/4″ and scored at 4″. It is adhered to a piece of Blackberry Bliss cut at 4 1/4″ X 5 1/2″. This gives a nice alternative to our standard layering. The greetings are from the Rose Wonder stamp set and stampers could choose from a variety of greetings in that stamp set to create the perfect card. Kinda Eclectic was used for the sunbeams and greenery, and the butterflies are from the stamp set Papillon Potpourri. There are matching small and large punches to make quick and beautiful butterflies. The little flowers are from the Itty Bitty Punch set and gold metallic thread is looped behind the greeting. The silver metallic thread is used for antennae on the large butterfly.
My favorite card for this month is a birthday card using the Party Pop Up Thinlits Dies:

 The paper is from the “It’s My Party Designer Series Paper Stack”. Page 5 of the Occasions catalog. The Hip Hip Hooray is cut out using the Thinlit Die. The confetti pieces from cutting it out were used on the inside for a little extra bit of celebration!
“A Day All About You” is from the Birthday Blossoms stamp set on page 8 of the big catalog. It is cut out with one of the Handpicked Framelits. “make a WISH” is from the Party Wishes stamp set and the banners are made using the little banner punch. The “make a WISH” greeting is colored with a black marker and stamped on a piece of the Designer Series Paper which has matching confetti on a white background instead of black. A black frame is made with the 1 1/2″ circle punch. A piece of black confetti Designer Series Paper measuring 3 3/4″ X 5″ is placed behind the cut out, just down from the candle flames so the flames in the back of the cutout show the Crushed Curry cardstock. The strips on the side are 3/8″ X 5 1/4″. I was conserving paper by making strips. You could just as well have an 8 1/4″ X 5 1/4″ piece of the designer paper adhered to the main card stock. Cut a piece of copy paper 3 3/4″ wide to slip under the Happy Birthday cutout so that you can sponge the base, the words and the candles. Use sticky notes to protect the sides so you don’t sponge more than you want colored.
The balloons are punched with our new large balloon punch. The sides are sponged and a sparkle is added with the white gel pen. A glue dot holds the twine on the back of the balloon and a bow is added on top.
Main Cardstock: Crushed Curry 8 1/2″ X 5 1/2″ Scored at 4 14″
Black Confetti Designer Series Paper: 5 3/8″ X 4 1/8″
Shimmery White Cardstock for outside: 4 1/2″ X 3 1/2″
Scrap of same at least 3 1/2″ long for the greeting
Shimmery White for inside: 8 1/4″ X 5 1/4″
This is a fun card to make!
Click HERE to see a video from Stampin’ Up!
Have a great day and click below to go to the online store.
SAL,
Karen
Happy Easter
Hello Stamping Friends,
I have so many cards to show you! Let’s start with Easter, though it is a bit late for you to CASE (copy and share everything!) If you need a few last minute cards, Donna Truitt, our Stampalosopher teammate, had a beautiful card for the Elizabeth Stamp A Stack.

The card uses the Work of Art Stamp Set, the Decorative Dots Embossing Folder and the Oval Framelit #5-(counting from smallest to largest). The greenery is from the Bird Builder Punch; the Petite Petal Punch with a pearl center makes the flowers. The wing from the Bird Builder Punch is used for the large leaf at the top. The banner is from the Hearts A Flutter Framelits set (retired) and the greeting is from the Circle of Spring stamp set. You could make a few of these in no time!
Soft Sky: 8 1/2″ X 5 1/2″ Scored at 4 1/4″
Whisper White Top Layer 4″ X 5 1/4″ and egg layer of 3 3/4″ X 5″
Scraps and Inks: Pear Pizzaz, So Saffron, Blushing Bride, Wisteria Wonder, and Soft Sky
I wanted to send Donna an Easter card and couldn’t send her the same one she taught us to make, so I did a bit of revising:

I purchased the Bloomin’ Heart Thinlits Dies intending to use it for a Valentine card but chose to make something else, so the set was paid for but totally neglected – until now! I followed Donna’s example with the Decorative Dots Embossing Folder but went down a size in the Ovals Framelits and used the #4 Oval so I could fill most of the egg with the cut-out. An extra pink flower was placed at the top where the heart shape left a bit of a blank. The Work of Art Stamp Set was used to create the color before cutting out the Bloomin’ Heart:

I was delighted with the Bloomin’ Love stamp set and Thinlits Dies. The stamp has a little guide for stamping so that you can cut out a perfect flower with the thinlit that also has a little guide:
 But you do need to mark how you stamped! Hmmm….. we could have made shamrocks with this set. I sure hope it carries over into the new catalog coming June 1. The greenery that you have never seen is Stampin’ Up! Check it out:
 It is a little piece of the Thinlit! I love how the little buds look and one leaf looks like a heart! So cool. The greeting is from Teeny Tiny Wishes stamped on the banner in the Bloomin Love stamp set. I fussy cut the banner but it does have a framelit in the Large Numbers Framelit Dies set on page 10 of the Occasions catalog.
And for the inside:
 I have used this sunburst from Kinda Eclectic so many times. Celebrating and Sunshine are both in the Crazy About You Stamp set and I used the retired Family Reunion set for the Son stamp. The corner stamp is another stamp in the Bloomin’ Love set with an additional thinlit flower cut out with the Big Shot. The flowers can be stamped solid or there is also a stamp with just the flower outline. A great set with lots of versatility!
I used Soft Sky for the base and our shimmery white card stock for the layers.
Inks: Wisteria Wonder, Daffodil Delight, Wild Wasabi, Pink Pirouette
Contact me if you have any questions.
Have a wonderful day and be sure and check out the sales this week, the pearls are on sale! I will be back with the other cards from the Stamp A Stack, the club cards, and the special Sale A Bration cards.
SAL,
Karen
Valentine Treat Box
Hello Stampers,
Just in time for Valentine’s day, Priscilla Ivler posted a cute treat box. It is triangular with a sliding tray that holds five Hershey kisses! I made them for my last two events and they were a hit. Here is a picture followed by a printable PDF file for your files, and for the recipe box here on the blog should you ever want to find it quickly! Click on this blue link:
Treat Box Triangle PDF Instruction Sheet

Here are the supplies used. Just click to go directly to the online store.


Built for Free Using:My Stampin Blog

Welcome to my blog!

Sal Window to Products


