Catalog Launch Open House Craft Sale
Hello Stamping Friends,
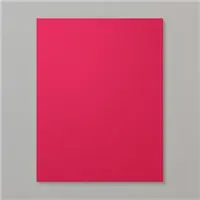
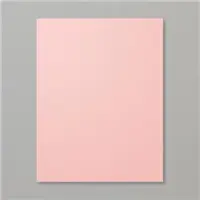
This coming Saturday, June 18, from 10am to 2pm I will have an open house to introduce the new catalog and the new In Colors. We will make a new In Color color sheet:
It is a great organization tool if you store your paper by color family as I do. An 18″ Elfa drawer stores two sets side by side:
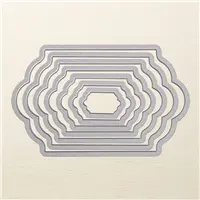
You can make a bookmark for your new catalog with the In Colors and the new Swirly Scribbles Thinlits Dies and there will be a quick make and take card using the new Floral Affection Embossing Folder. A fun day with no entrance fee!!
I am going to part with a few of my Stampin’ Up! stamp sets and Big Shot dies and will have them for sale at the open house. You are invited to set up a table of your own sales items if you would like.
Join the fun and pick up your catalog this Saturday! (Click to view it in PDF form)
SAL, (See A Lot, Save A Little)
Karen
The Wedding and SU Convention
Hello Stamping Friends,
Did you miss me? It was a flurry of a month in more ways than one! We spent 10 days of April at my daughter Stacia’s and Jonathan’s wedding in Puerto Rico, returned home for one evening and then I flew out to the Stampin’ Up! convention in Salt Lake City. A major snowstorm hit Colorado and I was stranded for an extra day in Salt Lake—rough, one more day to be with friends, eat pizza and soak in the hot tub.
So we left this scene in Puerto Rico:
And returned to this scene in Castle Rock:
A little more than a flurry I would say!
Convention was so much fun. Jean and Wendy attended with me and those two beloved friends knew I hadn’t had time to make swaps before I left for Puerto Rico so they got together and made a whole sack of swaps for me. Thank you both so much!
Look at this fabulous swap card they made:
 The inside says “and eat cookies”. Both greetings are from the Balloon Celebration stamp set.
Here we are at the photo booth:
 And here they are winning the prize patrol:
 I walked the stage to celebrate making Silver Elite status:
 And was part of the many stampers honored at the Grand Hotel with a five course formal dinner:
 followed by entertainment from the Dueling Pianos- a funny, witty and amazingly talented couple:
There were chandeliers and marble everywhere – even in the bathrooms!! As the bus left to go back to the convention center they handed each of us a really awesome bag. Thank you to everyone who has supported me and helped me to this level.
And look at the stash I brought home:
 Stampin’ Up! welcomed us with streamers that popped out and flew all over the auditorium so I saved a few.
Stamp sets and pens and markers and ribbon and buttons and bookmarks and a calendar notebook and two bags!
The Paper Pumpkin booth was a fun surprise with a business kit and a party kit to buy:
 And a sneak peak at future products:
There was even a Paper Pumpkin make and take – a sneak peak at the May kit! Hurry- sign up by tomorrow. If you buy a three month subscription (or maintain your subscription for three months) I will send you a snail adhesive, a pen, a bag and a case for your stamps. To sign up for a one month subscription you can go to http://www.paperpumpkin.com and choose me as your demonstrator or for a three month subscription go to my online store and enter item #137859. You will receive an email with a code and you will go to the paper pumpkin site and enter that code. Deadline is tomorrow, May 10th for the May kit with this cool card:
 You could make it a birthday card, too, but we didn’t see what the other stamps were so there is still a little surprise.
There were four other make and takes showing upcoming products:
A new all inclusive kit; this card has a fun fold as the heart goes up and the next layer down to reveal the inside:
 A cool new two pack of Embossing Folders and beautiful Designer Series Paper (DSP).
 A confetti punch and foam adhesive strips to make shaker cards:
 You will love the new catalog! Come to my catalog launch on June 18th, 10 – 2, and we will have fun as we ooh and ahh and play with the new products! Last but not least – a make and take with the new In Colors:
 These events are the icing on the cake after becoming a Stampin’ Up! demonstrator. Join my team as we make plans for the November On Stage Local in Kansas City. The more the merrier!
After returning home I received this stunning card from Jean thanking me for the roommate gifts! I have looked at it daily and it is like having a bouquet of flowers (that never die)! Love it! Thank you, Jean! This uses the Flower Patch Stamp set and the greeting is from Birthday Blooms:
 You can scroll through all this pretty fast so I am going to risk overload and show you a few wedding pictures.
My daughter, Stacia, was married to Jonathan Whitehead on April 8, 2016 at Tres Palmas in Rincon, Puerto Rico.
 The End (for this post)! A great beginning for the two of them.
SAL (Such A Love)
Karen
March Cards
Hello Stamping Friends,
March was a fun month with the Elizabeth Stamp A Stack, the bimonthly club, and Sale A Bration events! You have through tomorrow, March 31, to place an order of at least $50 and get a free stamp set. Subscribe to Paper Pumpkin for three months and you would qualify for the free Sale A Bration set. The April Paper Pumpkin will include two stamp sets to celebrate Paper Pumpkin’s third birthday and shipment of their one millionth kit! The kits just keep getting better and the three month subscription is on sale for $55. Go to my online store and use item #137859. Instructions will be sent to your email with a redemption code for the 3 months you have purchased.
The most popular Sale A Bration free set in my events was the “What I Love” stamp set. I did a Triple Time Stamping card to demonstrate this stamp set.
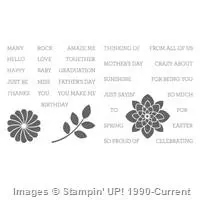
For the next card, I used the Party Wishes stamp set, the Confetti Embossing Folder and the Party Punch Pack casing the card in the Occasions catalog:
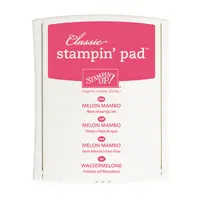
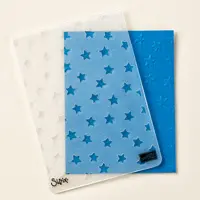
The embossing folder is sponged in the three colors, Melon Mambo, Pool Party, and Crushed Curry before running it through the Big Shot. Sponge the side with the indents if you want the confetti to be white like it is here. The confetti behind the cake is created by coloring only the confetti of the Make a Wish stamp with a marker. For the inside Happy Birthday, I used the Wet Wipe Technique, placing several drops of reinker on a wet wipe (placed on a silicone sheet to protect your work surface) and then use that for your ink pad! Voila! Lots of random color! The Melon Mambo balloon is stamped and punched, the cupcakes are colored with a marker, stamped and punched, and the candle on the cake is colored, stamped and punched. All three punches come in the Party Punch Pack. The cake is fussy cut and popped up after attaching thick twine with glue dots! One stamper used Perfect Plum instead of Melon Mambo for a more masculine card.
The following card uses another embossing folder technique-Stamping With An Embossing Folder. This is simply inking up your embossing folder and then using it to stamp on your card. I used the Honeycomb Embossing Folder and Sahara Sand Ink and purposely left some areas of the folder uninked for a subtle background:

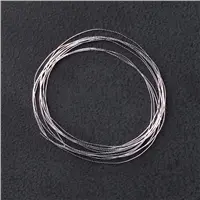
 The Whisper White paper is cut at 8″ X 5 1/4″ and scored at 4″. It is adhered to a piece of Blackberry Bliss cut at 4 1/4″ X 5 1/2″. This gives a nice alternative to our standard layering. The greetings are from the Rose Wonder stamp set and stampers could choose from a variety of greetings in that stamp set to create the perfect card. Kinda Eclectic was used for the sunbeams and greenery, and the butterflies are from the stamp set Papillon Potpourri. There are matching small and large punches to make quick and beautiful butterflies. The little flowers are from the Itty Bitty Punch set and gold metallic thread is looped behind the greeting. The silver metallic thread is used for antennae on the large butterfly.
My favorite card for this month is a birthday card using the Party Pop Up Thinlits Dies:

 The paper is from the “It’s My Party Designer Series Paper Stack”. Page 5 of the Occasions catalog. The Hip Hip Hooray is cut out using the Thinlit Die. The confetti pieces from cutting it out were used on the inside for a little extra bit of celebration!
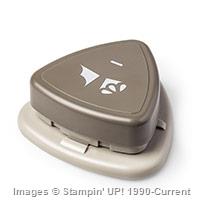
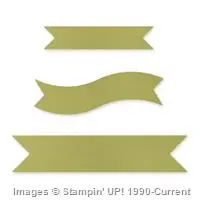
“A Day All About You” is from the Birthday Blossoms stamp set on page 8 of the big catalog. It is cut out with one of the Handpicked Framelits. “make a WISH” is from the Party Wishes stamp set and the banners are made using the little banner punch. The “make a WISH” greeting is colored with a black marker and stamped on a piece of the Designer Series Paper which has matching confetti on a white background instead of black. A black frame is made with the 1 1/2″ circle punch. A piece of black confetti Designer Series Paper measuring 3 3/4″ X 5″ is placed behind the cut out, just down from the candle flames so the flames in the back of the cutout show the Crushed Curry cardstock. The strips on the side are 3/8″ X 5 1/4″. I was conserving paper by making strips. You could just as well have an 8 1/4″ X 5 1/4″ piece of the designer paper adhered to the main card stock. Cut a piece of copy paper 3 3/4″ wide to slip under the Happy Birthday cutout so that you can sponge the base, the words and the candles. Use sticky notes to protect the sides so you don’t sponge more than you want colored.
The balloons are punched with our new large balloon punch. The sides are sponged and a sparkle is added with the white gel pen. A glue dot holds the twine on the back of the balloon and a bow is added on top.
Main Cardstock: Crushed Curry 8 1/2″ X 5 1/2″ Scored at 4 14″
Black Confetti Designer Series Paper: 5 3/8″ X 4 1/8″
Shimmery White Cardstock for outside: 4 1/2″ X 3 1/2″
Scrap of same at least 3 1/2″ long for the greeting
Shimmery White for inside: 8 1/4″ X 5 1/4″
This is a fun card to make!
Click HERE to see a video from Stampin’ Up!
Have a great day and click below to go to the online store.
SAL,
Karen
Happy Easter
Hello Stamping Friends,
I have so many cards to show you! Let’s start with Easter, though it is a bit late for you to CASE (copy and share everything!) If you need a few last minute cards, Donna Truitt, our Stampalosopher teammate, had a beautiful card for the Elizabeth Stamp A Stack.
The card uses the Work of Art Stamp Set, the Decorative Dots Embossing Folder and the Oval Framelit #5-(counting from smallest to largest). The greenery is from the Bird Builder Punch; the Petite Petal Punch with a pearl center makes the flowers. The wing from the Bird Builder Punch is used for the large leaf at the top. The banner is from the Hearts A Flutter Framelits set (retired) and the greeting is from the Circle of Spring stamp set. You could make a few of these in no time!
Soft Sky: 8 1/2″ X 5 1/2″ Scored at 4 1/4″
Whisper White Top Layer 4″ X 5 1/4″ and egg layer of 3 3/4″ X 5″
Scraps and Inks: Pear Pizzaz, So Saffron, Blushing Bride, Wisteria Wonder, and Soft Sky
I wanted to send Donna an Easter card and couldn’t send her the same one she taught us to make, so I did a bit of revising:
I purchased the Bloomin’ Heart Thinlits Dies intending to use it for a Valentine card but chose to make something else, so the set was paid for but totally neglected – until now! I followed Donna’s example with the Decorative Dots Embossing Folder but went down a size in the Ovals Framelits and used the #4 Oval so I could fill most of the egg with the cut-out. An extra pink flower was placed at the top where the heart shape left a bit of a blank. The Work of Art Stamp Set was used to create the color before cutting out the Bloomin’ Heart:
I was delighted with the Bloomin’ Love stamp set and Thinlits Dies. The stamp has a little guide for stamping so that you can cut out a perfect flower with the thinlit that also has a little guide:
 But you do need to mark how you stamped! Hmmm….. we could have made shamrocks with this set. I sure hope it carries over into the new catalog coming June 1. The greenery that you have never seen is Stampin’ Up! Check it out:
 It is a little piece of the Thinlit! I love how the little buds look and one leaf looks like a heart! So cool. The greeting is from Teeny Tiny Wishes stamped on the banner in the Bloomin Love stamp set. I fussy cut the banner but it does have a framelit in the Large Numbers Framelit Dies set on page 10 of the Occasions catalog.
And for the inside:
 I have used this sunburst from Kinda Eclectic so many times. Celebrating and Sunshine are both in the Crazy About You Stamp set and I used the retired Family Reunion set for the Son stamp. The corner stamp is another stamp in the Bloomin’ Love set with an additional thinlit flower cut out with the Big Shot. The flowers can be stamped solid or there is also a stamp with just the flower outline. A great set with lots of versatility!
I used Soft Sky for the base and our shimmery white card stock for the layers.
Inks: Wisteria Wonder, Daffodil Delight, Wild Wasabi, Pink Pirouette
Contact me if you have any questions.
Have a wonderful day and be sure and check out the sales this week, the pearls are on sale! I will be back with the other cards from the Stamp A Stack, the club cards, and the special Sale A Bration cards.
SAL,
Karen
Valentine Treat Box
Hello Stampers,
Just in time for Valentine’s day, Priscilla Ivler posted a cute treat box. It is triangular with a sliding tray that holds five Hershey kisses! I made them for my last two events and they were a hit. Here is a picture followed by a printable PDF file for your files, and for the recipe box here on the blog should you ever want to find it quickly! Click on this blue link:
Treat Box Triangle PDF Instruction Sheet
Here are the supplies used. Just click to go directly to the online store.
Built for Free Using:My Stampin Blog
Happy Valentine’s Day!
Hello Stamping Friends,
I have a Never-Ending Valentine for you today, (also called a Perpetually Folding Card). Love should be never-ending so it seems perfect! There will be a video from the Stampin’ Up! office at the end but here is the outside of our Never-Ending card:
Then the top folds up and the bottom folds down to reveal the first layer:
The little hearts are made with the blushing bride glimmer paper. The stamped images are all from the “Bloomin’ Love” Stamp set on page 17 of the Occasions catalog. The paper is on that same page – Love Blossoms Designer Series Paper Stack. Now lets open the Love You to reveal….
…a fun way to use the new Honeycomb embellishments on page 9 of the Occasions catalog. Now we flip the top and bottom again and have a new layer:
and all the stamps are in the same set! Here is the home office with a video:
Supplies Used (Click on any image to go directly to the online store):
Built for Free Using:My Stampin Blog
Built for Free Using: My Stampin Blog
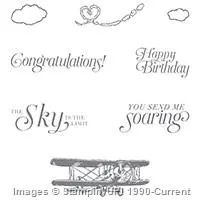
 Pay close attention to the last three items in the catalog. They are only available through February 15. Here is a card made using one of the Limited time stamp sets – the “Sky Is The Limit”:
Built for Free Using:My Stampin Blog
#12 of 12 Cards of Christmas
Hello Stamping Friends,
Christmas isn’t officially over until we actually go to bed right? So it is still Christmas at my house and I have one last card for you. This card with its removable angel ornament was made for Safyre in New York. She is the little girl the internet was buzzing about who lost her family and her home in a fire. She survived but is badly burned. Her wish was for Christmas cards to hang on her tree so I decided she needed an angel to hang on her tree. Do you remember the punch art angel we made with the Gift Bow Bigz Die? It uses the smaller of the two bows on the die.
I wondered what the angel would look like with our new Bow Builder Punch, so I made one!
Of course I needed to make a card for the delivery of the little winged ornament so voila:
And for the inside I tied in the red and gold using gold metallic ink. That ink is discontinued but gold embossing powder would be better!
Here are the instructions followed by the supplies used:
Punch Art Angel Card PDF Instruction Sheet
Built for Free Using:My Stampin Blog


