Home » Friendship (Page 4)
Category Archives: Friendship
Vibrant Vases Tri-fold card
Good morning, Stamping Friends,
It probably won’t be morning by the time you get this post in your mailbox but currently it is still morning in Karen’s World!
Don’t you mean Stampalosopher? Karen’s World was your accounting firm.
Yes, indeed, it is a Stampalosopher World! Today I have one of two cards to show you that I created for a stint as a guest presenter in Grand Junction. The first was inspired by Joy Meadows and the very lovely card she sent for my birthday. Thank you, Joy!
Do you see how the front right hand flap is exactly the same size as the left side white layer with the same size black border? So cool! The white flaps inside and out are 3″ X 3 1/2″ with a black border of 3 1/8″ X 3 5/8″. The paper is from the SAB (Sale A Bration) Botanical Butterfly DSP (Designer Series Paper). One side had butterflies and the other had black and white designs like the dots Joy used here. I hope you stocked up on this paper during SAB! Her base is 9 7/8″ X 5 1/2″ scored at 4 1/8″ and 8 3/8″ . This leaves a right hand flap of 1 1/2″. The butterfly is from the Butterfly Gala stamp set which is still current and has a punch to match. See page 46 of the Annual Catalog.
But Karen, you can’t use retired Designer Series Paper!
I know, Sal, so I chose to use the Vibrant Vases and the Pressed Petals DSP with an accent color of Blueberry Bushel, one of the 2018-2020 In Colors that I will definitely need to stock up on before it retires next June.
Don’t you love the Pressed Petals DSP with the Blueberry Bushel? There is even a sheet of the DSP with plain burlap that I used for the right side little panel to coordinate with the background of the pressed petals.
And the Pressed Petals is part of the current “Buy 3 packs of DSP and Get One Free”!
That’s right, Sal, thanks for the input!
I used the Flourishing Phrases stamp set for the sentiments on the flap and the left side of the card and left the inside blank for a birthday, congratulations or just thinking of you sentiment. I needed a little larger flap than what Joy used for the butterflies so the measurements won’t be the same. The goal was to have the outside vases a bit plain with the inside vase truly “vibrant” to match the sentiments. The Vibrant Vases stamp set is a two-step stamp set with outline stamps for the vases and then a stamp-to-color for each vase and it even has a punch to match! Check out page 61 of the Annual Catalog. The yellowed images show what images are punchable. (Is that a word?)
I stamped the outside vases with the border stamps in Soft Suede and then stamped again with the stamp-to-color stamps after stamping off to lighten the image. I used the “H” acrylic block and spaced out the three vases and stamped with the outline stamps on a 6 X 3 piece of Whisper White. I then placed the (clean) stamp-to-color stamps on top of the images and took another “H” acrylic block and pressed it down on the stamps to attach them to the blocks in the perfect position. The stamparatus would have worked better but it was in use for the other card.

You could order a second one. I could help, page 184, #146276.
Thanks Sal. That might be a good idea for the next time. To make the inside vase truly “vibrant”, I stamped it in Blueberry Bushel, colored in the diamonds with Cajun Craze and Daffodil Delight regular markers and then took my Versa Mark ink and inked the entire image. I applied “Clear Embossing Powder” and then heated it to make the vase look like glass.
Stamp the greenery and flowers directly on the Very Vanilla card stock pieces – the flap for the outside and the Pretty Label punched piece for the left hand side. Adhere the vases directly to the paper since they are punched out and look 3D without dimensionals. I adhered the two larger vases close enough together so that I could adhere the middle little vase slightly on top of the larger ones and all three would fit on the 2″ shelf that was cut from Early Espresso card stock to a final size of 2″ X 1/4″ with the “Be Mine” stitched framelits. Hint: Start with a larger piece of Early Espresso and cut the scallop edge with the framelit and then place it in the Stampin’ Trimmer to cut to the 1/4″ shelf size. I cut a piece longer than the desired 2″ so I could cut exactly 1/2 of a scallop at each edge of the shelf.
She told me she was a “recovering perfectionist”! Maybe she needs more therapy. SHHHH……
Did you say something, Sal?
The shelf is adhered with the top of the shelf 1 1/4″ from the bottom of the Very Vanilla layer and 3/8″ over from the left and right sides. Stamp the greeting in Blueberry Bushel under the shelf.
It can be tricky to stamp the greenery at the right spot for the vases so stamp your vases and punch them out then trim off the bottom white edge of the vases. Punches generally leave a little edge all the way around the image just like what we teach in fussing cutting. You want the vases to sit directly on the shelf so trim off that bottom edge.
Temporarily place your vases where you want them on the shelf and use a pencil to lightly outline the top of each vase. Now make three more light pencil marks where you want your stem to attach to the tulip. The tulip is 3/8″. Vary the heights of the three tulips. Use a sticky note to mask the shelf and where the vases will be and stamp the stem and greenery in Old Olive. Then stamp the tulips in Cajun Craze and stamp-to-color in Daffodil Delight. I had a shadow on one of my leaves so I just hand drew another leaf to utilize the shadow.
Sheri always called that “Design Opportunity”!
That she did! And that it is! We sometimes use tiny butterflies or hearts to cover our shadows and it adds beauty to the card. I just ordered erasers from Amazon that are supposed to remove ink without damaging the paper. I will let you know if they work.
A Stitched Labels Die is used for the little greeting that says “so he made you” and the fancy die in that same set is used for the DSP cutout on the left side. The Pretty Label punch is used for the vase and flowers on the left side. This is one of those times when you want to punch first and then stamp so you can align the flowers and vase on the punched piece. Use the same procedure of placing the vase temporarily on the piece, lightly draw the top of the vase, mask with a sticky note and stamp the flowers with Memento Black ink, then adhere the vase, color the flowers in Daffodil Delight and the greenery in Garden Green. Adhere rhinestones colored with Cajun Craze Stampin’ Blends. Sponge the edge of the Pretty Label punched piece and the little rectangle greeting with Blueberry Bushel and pop up both pieces with dimensionals.
Summary:
Stamp sets: Vibrant Vases, Flourishing Phrases
Inks: Blueberry Bushel, Soft Suede, Old Olive, Cajun Craze, Daffodil Delight, Tuxedo Memento Black
Markers: Blueberry Bushel, Garden Green, Daffodil Delight
Stampin’ Blends: Cajun Craze to color rhinestones
Framelits/Dies: Be Mine, Stitched Labels
Punches: Vases Builder, Pretty Label
Embellishments: Four rhinestones colored with Cajun Craze
Card Base: Thick Very Vanilla 9 7/8″ X 5 1/2″ Scored at 4 1/8″ and 8 5/16″ ; Fold in the little right side first and then fold in the left side over the middle.
First Layer on left side and middle: Blueberry Bushel (make 2) 3 7/8″ X 5 1/4″ , Cut out the middle of the inside one. I used a retired rectangular framelit that I use to save paper when I am layering. A stitched rectangle framelit would work as well.
Second Layer on left side and middle: Pressed Petals DSP (make 2) 3 5/8″ X 5″ ; Cut out the center of the inside DSP layer with the Stitched Shapes Die- the fancy one. Use the cut out for the left side behind the Pretty Label punched piece.
Third Layer on left side and the flap for the front: Blueberry Bushel (make 2) 3 1/8″ X 4″. The left side 3rd layer is adhered 1/2″ down from the edge of the DSP and 1/4″ over from the edge of the DSP.
Fourth Layer on left side and the front flap: Very Vanilla (make 2) 2 7/8″ X 3 3/4″
Little Right side first layer: Blueberry Bushel, 1 1/4″ X 5 1/4″.
Little Right side second layer: DSP in plain burlap 1″ X 5″
The Blueberry Bushel Front Flap is adhered 1/2″ down from the burlap DSP on the little right side to exactly match the left side. This is done last! I put two pieces of tear and tape at the far right of the flap and then matched up the flap to the card’s left side and pressed it in place.
Shelf: Early Espresso, 4″ X 4″ Cut to 2″ X 1/4″ with the Be Mine Scalloped framelit and the Stampin’ Trimmer
Vases: Very Vanilla, Use the leftover from cutting the base or a 6″ X 3″
Punched Label: Very Vanilla 2″ X 2 3/4″
Left side greeting and the left side vase: 1 1/2″ X 3 3/4″ , you need it large enough to be able to hold it as you punch the vase. Stamp the greeting on the same piece and cut with the Little Stitched Labels Framelit.
I remember you looking at that little Die and saying it was too little to use for anything.
I did say that! Amazing isn’t it?! I am glad I have that set. I used two of the Dies on this card. I love the one I call the “fancy” Stitched Label Die!
Okay Sal, I am through with this post and it is your turn to guide folks to the store where they can shop to their hearts content! Don’t forget to check the Clearance Rack, friends, before you place your order, there are many Christmas sets available at great prices. I have a post coming up from our first Christmas card Stamp-A-Stack called Clearance Rack meets Stamp-A-Stack. Stay tuned!
SAL, Stamp A Lot, Smile A Little, Share A Love
Karen
Shrinky Dink Card with Technique Sheet
Hello Stamping Friends,
Club members have a fun day making a technique sheet and a special card.
At January’s club I taught the Shrinky Dink technique using the humming bird in the ‘Humming Along’ set. The paper is our ‘Petal Promenade’ Designer Series Paper. It has sheets of paper with realistic little images to cut out like I have done here. The greeting is from ‘A Big Thank You’ .
The technique sheet is 6″ X 6″, perfect for putting in a photo album of that size for future reference.
I have some Valentines to post, since it is the day after the party and I won’t spoil the surprise, so I will sign off this post and begin another.
SAL, (Shrink Anything Large)
Karen
Awesomely Artistic Eclipse Card
Hello Stamping Friends,
I chose two of my favorite sets to make an Eclipse card – the stamp set “Awesomely Artistic”, and the color Island Indigo. In my usual monochromatic style I did cards for Mother’s Day, thank you cards and friend cards. Her are various fronts and insides of the cards -the inside could just as easily be the outside of a card.
The Glitter Enamel Dots, matched the Island Indigo perfectly and added sparkle. The dragonfly is colored with the Wink of Stella Glitter Brush, and the flower centers are a drop of glue from our Fine-Tip Glue Pen, with Dazzling Diamonds Stampin’ Glitter sprinkled on top. The For You greeting comes from the retiring stamp set “So Many Shells”.
Instead of Glitter Dots you could be a bit eclectic and use the stamp from the “Awesomely Artistic” set that has dots. The greeting, “From Across The Miles”, is a stamp in “Holly Berry Happiness”. I used a sticky note to cover up the Christmas Wishes words on the stamp, inked the stamp, removed the sticky note and stamped. Voila- a greeting to use any time of the year.
Or just stamp the flowers a little on the edge of your front layer:
The insides of the cards were fun to customize. My daughter is expecting her first child so this is her first Mother’s Day. A greeting in the “Special Celebrations” stamp set was perfect:
The Daisy Delight stamp set had the ideal message for the many thank you notes I needed after my father’s passing.
 For dear family and friends, the Occasions Catalog “Petal Palette”, has the perfect message:
 And of course Mother’s Day is coming up so I went back to the Special Celebrations stamp set for a special message:
Card Base: Whisper White 8 1/2″ X 5 1/2″ Scored at 4 1/4″
Island Indigo Layer: 5 1/4″ X 4″, Make two
Whisper White top layer: 5 X 3 3/4″, Make two
Stamping Order for the top is a bit critical so you don’t have the images running into each other:
- Stamp the greeting at the bottom
- Stamp the dragonfly
- Stamp the flowers
Color the dragonfly with Wink of Stella, then line up the Large Letters Framelits, #141712, spelling HUGS on your stamped top layer and run through the Big Shot. Adhere all your layers and then put Foam Adhesive Strips, #141825, on the back of the cut out letters and glue the letters back in their respective spaces. Helpful Hint: I adhered the letter framelits to a large sticky note and then placed the sticky noted letters on the top layer so I could use it over and over without realigning the framelits each time.
I checked Eclipse cards on Pinterest and found so many words that were used: HOPE, LOVE, YOU, WISH, BDAY, MOM, BABY, BOY, DAD, GIRL, GIVE, NOEL, (NAME), (DATE), JUST, FAITH, JOY, 4EVER, EPIC, BEST (friend). Graduation cards with dates are popular now using the retiring Large Number Framelit set, #140622. The Large Letters framelits will carryover to the new catalog but not the numbers set.
Have fun making your own Eclipse cards!
SAL, (Stamp A Lot, Smile A Little, Share A Love- and always be Salt And Light in your world)
Karen
Blossoming Basket Bundle
Hello Stamping Friends,
Are you thrilled with this year’s Occasion Catalog and the free Sale A Bration items? I sure am. And to bless us even more, Stampin’ Up! announced a few extra Sale A Bration items available February 16. As a demonstrator, I am able to preorder the items and I received them just in time for Deana’s annual Sale A Bration party. Here is the brochure of the new products:
My favorite new product is the free Blossoming Basket Bundle. The bundle includes the stamp set and the Basket Weave Dynamic Textured Impressions Embossing Folder. (Note: These new Dynamic embossing folders have a deeper image and are a thicker folder so you do not use the bottom cutting plate and you spritz the paper before putting it in the folder and running it through the Big Shot. This keeps the paper from tearing.)
There are no framelits with the set so I made cutting templates for the stampers by stamping the image on white cardstock and then placing the stamp back on the image without the block and drawing around the stamp with a pencil. I cut the image on the pencil lines to create the template. I did the same with the greeting. I liked all the little curves that the stamp had from the factory cut. I am sure Stampin’ Up! cuts various shapes to make identifying and mounting the stamps easier and the curves on this set sure made for a nice outline. With wooden sets you would just need to make your template from the stamp before mounting it to the wood. Store the templates with your stamp set and you are ready for the next card.
Base: Calypso Coral 8 1/2″ X 5 1/2″ Scored at 4 1/4″
Layer 1: Soft Suede 4″ X 5 1/4″ ; spritz with water, run through Big Shot with the Basket Weave Dynamic Textured Impressions Embossing Folder; sponge top with crumb cake here and there for a little extra depth
Layer 2: Doily – this one is the older Stampin’ Up! version which is 4″; the new ones, item #141701, are 3 1/2″ which would be better for showcasing the basket by not having as much doily showing. Warning: Do not put glue on the top part of the doily, use glue dots around the edge. The bottom of the doily which will be covered by the basket can be glued down.
Basket, tag and butterfly: Shimmery White 3 1/2″ X 3 1/2″ The basket, tag and butterfly stamps can all be placed together on a size E block to stamp the images at the same time.
Ink: If you are using the new Stampin’ Blends alcohol markers, use the Memento black ink; with the regular markers, which are water based, use the black Archival stampin’ ink.
I used Stampin’ Blends to color:
- Flowers, tag, butterfly – Calypso Coral, light and dark markers;
- Basket – Crumb Cake, light and dark;
- Leaves – Old Olive, light and dark:
- Flower centers – Dark Daffodil Delight;
- To enhance the colors – Color Lifter.
My favorite technique is to outline the outside with the dark marker and then use the light marker to blend the dark line and color the rest. The leaves are too small for that technique, so I colored one type of leaf in light green and one type of leaf in dark green and then used the color lifter to create lighter tones.
Click here for a Stampin’ Up! video on blending with the new alcohol markers.
Embellishments: 12″ of Linen Thread #104199, cut in half and made into a double bow; Metallic Enamel Shapes #141678
Our Clear Wink of Stella Glitter Brush was a hit with the stampers as they used it to add sparkle to the butterfly, hearts and middles of the flowers. It is item #141987 and shown on page 200 of the Annual Catalog.
The inside uses a greeting from the Special Celebrations stamp set in the Annual Catalog page 23. This set is great with greetings for birthdays, babies, weddings, and friendships.
The bottom basket weave piece starts at 5 1/4″ X 1″; it shrinks up a little when it is embossed so the Whisper White layer is cut at 5 1/8″ X 4″.
To better utilize our time at the party, I had kits made with card bases of Cherry Cobbler, Bermuda Bay and Pumpkin Pie along with the Calypso Coral cardstock shown here. That way, each stamper could play with a set of matching Stampin’ Blends and not be rushed to do their coloring. I wish I had taken a picture of all the beautiful cards they made in the different colors.
There is still time for you to book a Sale A Bration party. If you don’t live in the area, I can set you up with a hostess code and you can have a catalog party with your friends. If you live here in Castle Rock, why not host your own party and earn even greater hostess rewards. Along with each guest earning a free product with a $50 purchase, you can earn free product for your purchases and hostess dollars for the total of all the orders. During Sale A Bration you earn an extra $25 in hostess dollars with a qualifying party. Call or text me now! 303-815-0838.
Our current hostess code for orders under $150 is VJHRB73X. Orders over $150 – you earn dollars yourself!
SAL, (Stamp A Lot, Smile A Little, Share A Love)
Karen
May the cure be found….
(If you are viewing this in your email, you can click on the little SAL image at the left to go to the full blog.)
Stampin’ Up! joined the fight for the cure of breast cancer by contributing to research a portion of sales from each Pink Paper Pumpkin purchased this month! Thank you to all who subscribed and helped the fight!
Congratulations survivors! We pray for your continued good health. We hurt for those still in the trenches and cry for those we’ve lost. Stay strong!
The little 3X3 cards were inspired by a card made by our own team member Jennifer Michael.
The Paper Pumpkins come with a crazy too big USPS label but a bit of Un-du takes it right off so you have all of the pretty pink box to see. The card I attached to the front uses our Bitty Butterfly punch and a sizzlit given me by my dear sister and cancer survivor, Sharon, also, a new team member. Welcome, Sharon.
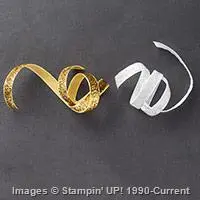
The ribbon is the White 3/8″ Glitter ribbon found on page 29 of the holiday catalog. The picture doesn’t do the sparkles justice. You just use a marker of your desired color to color the back and voila! colored glittery ribbon.
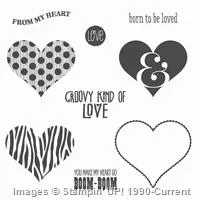
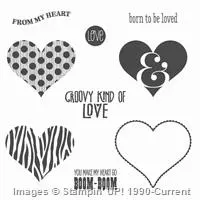
I used Pink Pirouette cardstock for the card base and our Shimmery White cardstock for the top. The “For You” uses our Bitty Banners Framelits though the stamp itself is retired. The Groovy Love stamp set has a stamp that says “From My Heart” that would be a perfect substitute!
Built for Free Using: My Stampin Blog
Built for Free Using:My Stampin Blog
Get Well Soup, Bohemian Birthday, Bohemian Thank You, Beautiful Birthday, Thank You, Card Box
(Click on the little SAL PAL icon to go to the blog, this is just a post.)
Hello Stamping Friends,
Where did summer go? Paul can’t wait for hunting season and I am already thinking about all those Christmas cards we will make together!
Let me show you what we did at the August card buffet:
Get Well Soup-printable pdf instructions
Card #1: Bohemian Get Well:
Isn’t the Bohemian Designer Series Paper (DSP for short) just beautiful. The first card uses the left over Very Vanilla paper from cutting the oval to make an additional layer. My stampers at the card buffet made that creative change.
How did you make that soup bowl? I am so glad you asked.
 You start by stamping the Very Vanilla layer with the whole image.
Then mask the little heart on the soup bowl with a sticky note and ink up the bowl part of your stamp.
Remove the sticky note! (That was the hardest thing to remember) and then stamp your bowl on the DSP.
 Make a little cut at the right side of the bowl to cut out the soup section.
 When you glue the bowl on top of your full image it will blend perfectly. Be sure and use Tombow liquid glue so you can get it perfectly aligned.
Then color the soup section. I used the fine tip end of my Crushed Curry marker and it gave a nice “soupy” look. For the inside I used a strip of DSP and a stamp from the Thoughts and Prayers stamp set:
Full directions and all the sizing are on the printable pdf file at the top of the first picture.
Envelope Card Box printable pdf instructions
As a thank you gift for attending, each stamper received this Envelope Card Box. Three of the cards at the card buffet used the Bohemian DSP and the card box used the same DSP so the stampers could have a lovely gift for themselves or have a gift to give with matching Get Well, Happy Birthday, and Thank You cards.
 I love the new Lots of Labels Framelits with its straight sides used for the buckle of the belly band, and there are seven sizes so truly LOTS of labels. The greeting is from Watercolor Wings.
Card #2: Bohemian Happy Birthday:
 This was the Happy Birthday with the Bohemian Designer Paper on Blackberry Bliss with the new Boho Chic Embossing Folder. I used a framelit from the Project Life Cards and Labels framelits to punch out the middle of the DSP where I stamped the Happy Birthday from the Birthday Blossoms stamp set.
The Bohemian DSP measures 3 5/8″ X 2 7/8″ and is on a Very Vanilla layer that measures 3 3/4″ X 3″. Not much else tricky on this card. It takes 23″ of twine to go around twice. The embossed layer is the same color as the main card stock and a full size of 5 1/2″ X 4 1/4″. The DSP cut out makes a perfect border for the inside of the card which uses another greeting from the Birthday Blossoms stamp set:
 This card comes straight from an example in the catalog. It is white embossing on the DSP with a base card stock of Rich Razzleberry and a Bermuda Bay Banner. The stamp set used is Another Thank You. For the inside, I stayed simple and used a greeting from the Crazy About You stamp set:
Card #4: Sprinkles of Life friend card
I couldn’t wait to play with the Sprinkles of Life stamp set inside the back cover of the catalog. It is this years Make A Difference stamp set. Stampin’ Up! donates $3 to the Ronald McDonald House Charities for each set they sell. But there’s more fun….. they have a punch that goes with the set! It is the Tree Builder Punch and punches out the clouds and tree leaves and the bird and the apple and the tree trunk! Here is my take on the set using Garden Green and Soft Suede:
 Kinda Eclectic is the stamp set with the sunshine and a Work of Art stamp makes quick work of adding green to the bottom. For the inside I broke my own rule and used a retired set from Sale A Bration called See Ya Later, it was just sooooo perfect for the card…..
 Nothing much you need help with on this card. The stamp sets do it all and the layers are the standard. What? You don’t have my Standard Layers worksheet? Let’s fix that:
Standard Layers-printable pdf file
Card #5: A Whole Lot of Lovely Thank You Card:
 This uses a hostess stamp set so now you really do want to have a party and earn this set – right?
There are only a couple tricky things to know on this card. The banner is the #4 banner framelit. Cut two of the same color and then cut 1/8″ off the top and the sides for a nice layered look. I used Versa Mark to add flowers to the top banner, glued it to the larger banner and then cut it in half, moved the halves 3/4″ apart, and glued the circle on top to lengthen the banner. You could also cut the paper exactly the width of the framelit, 1 7/8 “, and then run the banners only part way through the Big Shot to just cut the edges. We will do that with the next card but since this was behind a nice big circle I took the easy way. The stamped (colored with markers) Thank You is cut out with the Circle Framelit # 5 and the black border is punched with the 2 1/2 ” circle punch. This card was on Pinterest with Watermelon Wonder and Mint Macaron and looked great. This card uses Calypso Coral and last years In Color of Coastal Cabana. The inside used the same hostess stamp set:
Card #6: Birthday Blossoms:
 Hard as I tried to adjust the color this card looks blue but it is really a beautiful purple -Wisteria Wonder. It is also an example straight from the catalog with just a different card base and different ribbon and different twine. Okay, so it started out with an example from the catalog.
The tricky part is making the top layer longer than the largest framelit – easy peasy – if you remember to go through the Big Shot only part way to cut just the lovely curves and then back it out. You start with a Whisper White strip 2 13/16″ X 5 1/4″ to run just part way through the Big Shot using the largest of the new Lots of Labels framelits #7. The straight edges of this new set of framelits are perfect for adding ribbon. I put a strip of sticky tape on the back of each side of the label and used 4 1/2 ” White Organza ribbon which I trimmed after adhering. 12″ of Baker’s Twine gathered the ribbon nicely on the sides for a unique look. The stamps are all from the Birthday Blossoms stamp set, (we used two word stamps from that set on the Bohemian Happy Birthday) and the set is made for the pansy punch so no fussy cutting!
I won’t overwhelm you (or me) by listing every single item used in the six cards and the envelope box but please call or email me if there is something you can’t figure out. I would be glad to help, and if you don’t have a demonstrator I would love to earn your business!
As Always, SAL Stamp A Lot, Smile A Little, Share A Love
(and always be Salt And Light in your world!)
Karen


