Home » Valentines Day (Page 2)
Category Archives: Valentines Day
Silhouette Scenes & Heart Foil Tin Brownies
Hello Stamping Friends,
February hostess code: FPRJEPZJ
How was your Valentines Day?
Mine was phenomenal! My grandsons gave me chocolates and a card and flowers via their folks and Paul brought home chocolates and had my favorite flowers delivered – carnations! I was very spoiled and loved every minute!
I made Paul a card similar to the one on page 132 of the annual catalog.
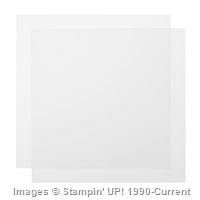
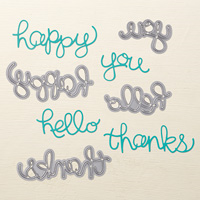
I changed it up a bit by using the rectangle stitched framelits and a Blueberry Bushel layer on a Balmy Blue card base. I attached a double sided adhesive sheet on the back of White Velvet Sheets (retired), cut out the ‘forever’ using the Sweet Silhouettes Dies and adhered it to a piece of Bluberry Bushel. I cut around the word to make a nice background. Lately, I have been seeing a lot of words embossed in white embossing powder on black paper and then cut out around the words. I liked that look so I imitated it here.
Measurements:
Base: Balmy Blue 5 1/2 X 8 1/2 scored at 4 1/4
Layer 1: Blueberry Bushel 4 1/8 X 5 3/8 (make 2-one for the inside)
Layer 2: See A Silhouette Designer Series Paper 4 X 5 1/4
Together Greeting: Balmy Blue 2 X 1 1/2 cut with Rectangle Stitched Framelit to 1 11/16 X 1 3/16
Silhouette : Whisper White 3 3/4 X 2 1/4 cut with Rectangle Stitched Framelit to 3 9/16 X 2 3/16
Forever: White Velvet DSP 3 1/2 X 1 1/2
Background of Forever: Blueberry Bushel 3 1/2 X 1 1/2
For the inside I printed a poem I wrote on Whisper White cardstock and cut it to 7 3/4 X 5 1/4 scored at 3 15/16 (one hair less than 4 inches) and glued just the right side to a Blueberry Bushel layer.
And for my family and special neighbors I made brownies in the Heart Foil Tins ( page 9 of the mini catalog).
One brownie mix made all 10! I washed the tins really well and sprayed them with PAM no stick spray then cooked them at 350 degrees for 20 minutes. (18 minutes would have been better)
The tins have high-dome lids so you can decorate them as you wish. I used the German Chocolate Coconut Pecan Icing.
For the lid I used several of those fun supplies from the suite on page 9 of the mini. I layered:
- A Heart Doily (stamped on the back-see below)
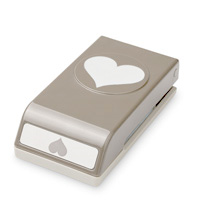
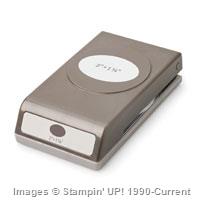
- A punched out scallop from the From My Heart Specialty Designer Series Paper using the Heart Punch Pack
- A punched straight edge heart from the same DSP using the Heart Punch Pack
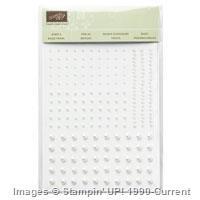
- A retired pink heart jewel
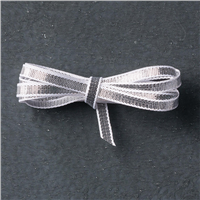
A little red bow at the front completed the project. I put two glue dots on the inside of the lid to hold it on better.
On the back of the doilies I stamped Happy Valentines Day from the retired ‘Valentine Love’ stamp set and used three glue dots to adhere the whole set of hearts to the lid. The lid is clear so the greeting shows through when they open up their goody.
If you don’t have food in the tin you can punch another heart for inside the lid. Also, the heart doilies fit perfectly in the bottom of the tin for further bling. The heart tins wash up to use again.
 What’s the point of posting valentines after the day has come and gone?
Ahh Sal, love is in the air everywhere and with anniversaries and birthdays we can change up the greetings and delight someone’s heart any time of year!
If you haven’t met your neighbors, try making a batch of brownies in heart tins with great big hello greetings and take them around as you introduce yourself.
SAL, Send A Love gift
Karen
Click on little Sal to be directed to my online store where you can order the products. If you don’t have a demonstrator I would love to earn your business.
More Valentine Fun
Hello Stamping Friends,
I hope your weekend was an extension of Valentine’s day like mine was! Our newest grandbaby is 4 1/2 months old and changing so fast that we decided a trip to Steamboat for her first Valentine’s day (month) was essential. Here’s mommy and daddy with little Emma. Daddy had just taken a group of guests for a hot air balloon ride. If you are ever in Steamboat Springs, Colorado, he would love to take you on a flight as well! Click here for Wild West Balloon Adventures. 
My prior Valentine post showed all the gorgeous cards my club members designed. Using the same trifold and designer series paper (DSP), I made one card in pinks and one in reds. Click here for my previous Valentine Post to see all the card dimensions and to take a look at the amazing ‘Be Mine Stitched Framelits’ set.
The heart in the middle of the doily with all the flowers is cut from the ‘All My Love’ DSP with a framelit. I colored the leaves with the Light Pool Party Stampin’ Blend and added a touch of light Rich Razzleberry Stampin’ Blend on the tiny flowers so the heart would match the DSP. ‘Dazzling Diamonds’ glitter was added to the center of the flowers for a little sparkle. I used the framelit with the multiple little hearts to cut hearts from the matching DSP to go around the edge of the doily. The middle heart is a ‘Heart Epoxy Droplet’ with a piece of the Flirty Flamingo cardstock, fussy cut to size,behind it.
For the red valentine I decided to use glimmer papers in red and blushing bride for the middle hearts to add sparkle and to use the skinny hearts in the framelits since the DSP has both heart shapes:
The hearts your see stamped below the ‘Happy Valentine’s Day’ greeting are stamped in Lovely Lipstick with only one stamp from the ‘Forever Lovely’ stamp set. It matches the ‘All My Love’ Designer Series Paper perfectly and the stamp is made to have all the different levels of color. Check out page 5 of the Occasions catalog to see the stamp set and DSP.
It is amazing what SU can do with stamps these days. I did use retired doilies but have you seen the ‘Dear Doily’ stamp Bundle in the Occasions catalog page 47? We can now make our own! 
For a little addition to this blog post I wanted to add pre-blog valentines to have a record of the past. If you go to the Recipe Box tab you can see valentines made over the past four years but we are missing inspiration from before that. March will mark my 10th year with Stampin’ Up! but I have only blogged since November of 2014.
Flashback Fun
I made this valentine for one of my first Stampin’ Up! convention contests. I learned that Stampin’ Up! does not like ‘Karen Cards’ as my DH, Paul, calls them. The winners were all very ‘Clean and Simple’ thirty minute cards not something like this multiple hours card that used several stamp sets, multiple techniques and even had the greeting stamped on red satin ribbon. My daughter and son-in-law met on a bike path so I made this with them in mind:
The next one is a trifold with a heart cutout in the middle of each side and a dangling trifold glimmer heart. One card just doesn’t say enough for a husband like Paul so this card is a three in one:
For club one year we made this card with its floating hearts in the middle:
To prove I can make clean and simple cards check out these two:
The first card is on Whisper White though it looks Very Vanilla like the second one. The top card pictures I took in the morning with more natural light so I need to remember to do that for future pictures.
It is time to move on from valentines to birthdays and Mother’s Day and Father’s Day. We have so many fun stamp sets and bundles it is hard to choose! If you have the same problem you might consider joining as a demonstrator and getting $175 of product for $99 during Sale A Bration. Just saying…….
Paper Pumpkin will be celebrating their sixth birthday in March! They are going to have a special box and the kit will include two stamp sets instead of one:
Click on the Paper Pumpkin image to sign up! Click on little SAL in the computer to go to the online store.
SAL, Sharing A Love
Karen
Happy Valentines Day
Hello Stamping Friends and Happy Valentines Day!!
(Hostess code for Terri’s kit party February 23 at 10:00am : MKATNKJV)
(Hostess code for Joy’s online party: FCGZVMVE)
I hope you have wonderful plans to celebrate all the loves of your life next week. How about celebrating our “LOVE” of stamping?
At club last month I gave the stampers a card base with a special trifold and then had lots of the new designer paper, the new stamp sets and dies offered in the Occasions catalog and the free foil paper from Sale A Bration available for them to use and design their own Valentine! The results were amazing!
I cut and stamped the Meant To Be stamps with the Be Mine Stitched Framelits Dies so we could see all the wonderful things we could make. The All My Love Designer Series Paper (DSP) even has one side with hearts that exactly match the framelits. Can you tell which ones are from the DSP and which ones are stamped? What a great bundle this is for many occasions. Check out page 6 of the Occasions catalog.
The card bases were a fun trifold layered with DSP from All My Love Designer Paper.
- Card Base: 11″ X 5 1/2″; Score at 1 1/4″ then 4″ then 6 3/4″
- DSP (X2) for front flaps: 1″ X 5 1/4″
- Coordinating DSP for next flap: 2 1/2″ X 5 1/4″
- Whisper White Message Panel: 2 1/2″ X 5 1/4″ (If Whisper White is your base, cut a coordinating DSP first with these measurements and then make a Whisper White Panel that is 2 1/4″ X 5″
- DSP Panel on the right side matching DSP of the front panels: 4″ X 5 1/4″
Now the fun begins! Check out these beautiful valentines my club ladies created:
Valentine 1 by Joy:
 The greeting is from Amazing Life on page 28 of the Occasions catalog item # 148750.
Valentine 2 by Jo:

 The Grapefruit Grove foil (free with a $50 order) is quite unique-especially when trying to photograph a project. See page 12 of the Sale A Bration brochure.
Valentine 3 by Terri:
Terri used the Lovely Lipstick foil. I missed the closed version of her card.
Valentine 4 by Lucille:
I love how she mounted the foil on a white background and used the little flourish and a heart in the middle!
Valentine #5 by —-:
How creative to pull in the color of the DSP with ribbon and to layer a DSP heart on a white heart!
Valentine #6 by Sharon:
The little Heart Epoxy Droplets pick up the color of the shiny foil beautifully. See page 5, item # 148583. The little flowers she used are the Frosted Flower Embellishments on page 11, item #148782.
Valentine #7 by LIsa:
Check out the embossed heart embellished with a flourish and the top little stamped heart holds the front flap down.
Valentine #8 by Christine:
I love how Christine placed the red outline of the heart so it perfectly matched her front white heart.
Valentine 9 by —–:
The white on the DSP is lovely and there is a plethora of hearts from the one framelit!
Valentine 10 by —-
Look at how she used the Crumb Cake to stamp the greeting and the heart so everything coordinates!
Help me with names dear stamping friends. Send me a comment with which numbered Valentine is yours and I will update the post. After all, it will be sort of a scrapbook for us.
Next post I will share the Shrinky Dink fun that we had for our club technique as well as the new Sale A Bration free products that will be available February 15 and the coordinating products we can purchase March 1 to go with many of the free stamp sets.
SAL,
Karen
Flashback Fun:
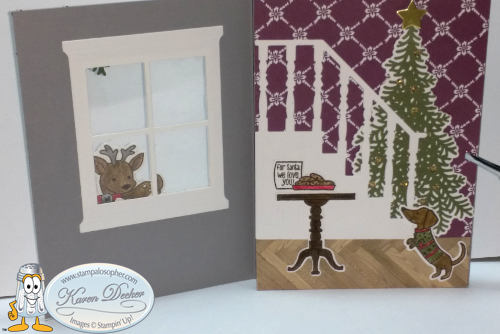
This is the Christmas card we made in 2017 with the same folds:
The DSP used here is retired but the stamp set and framelits are still available!! See page 102 of the Annual Catalog for the Ready For Christmas stamp set and the Christmas Staircase thinlits dies on page 216. There is a little Dachshund in this set so it was a must have for me! Check out the other trifold card we made with this set at the card buffet:
I think I started down a rabbit trail, one trifold leading to another and then to another! Thank you for stopping by!
I have a couple people interested in doing a monthly or bimonthly Christmas Card Stamp A Stack starting now so we have lots of cards made by November. Leave me a comment if you are interested.
Shop online and get a free Sale A Bration product for each $50 or $100 spent! Click on SAL and he will take you to the online site.
Valentine Treat Box
Hello Stampers,
Just in time for Valentine’s day, Priscilla Ivler posted a cute treat box. It is triangular with a sliding tray that holds five Hershey kisses! I made them for my last two events and they were a hit. Here is a picture followed by a printable PDF file for your files, and for the recipe box here on the blog should you ever want to find it quickly! Click on this blue link:
Treat Box Triangle PDF Instruction Sheet
Here are the supplies used. Just click to go directly to the online store.
Built for Free Using:My Stampin Blog
Happy Valentine’s Day!
Hello Stamping Friends,
I have a Never-Ending Valentine for you today, (also called a Perpetually Folding Card). Love should be never-ending so it seems perfect! There will be a video from the Stampin’ Up! office at the end but here is the outside of our Never-Ending card:
Then the top folds up and the bottom folds down to reveal the first layer:
The little hearts are made with the blushing bride glimmer paper. The stamped images are all from the “Bloomin’ Love” Stamp set on page 17 of the Occasions catalog. The paper is on that same page – Love Blossoms Designer Series Paper Stack. Now lets open the Love You to reveal….
…a fun way to use the new Honeycomb embellishments on page 9 of the Occasions catalog. Now we flip the top and bottom again and have a new layer:
and all the stamps are in the same set! Here is the home office with a video:
Supplies Used (Click on any image to go directly to the online store):
Built for Free Using:My Stampin Blog
Built for Free Using: My Stampin Blog
 Pay close attention to the last three items in the catalog. They are only available through February 15. Here is a card made using one of the Limited time stamp sets – the “Sky Is The Limit”:
Built for Free Using:My Stampin Blog
Valentine Shaker Card and 3D Thinlits
Hello Stamping Friends,
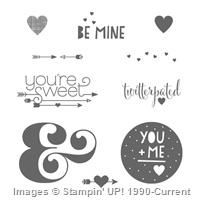
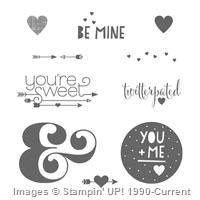
My Early Bird Stamp Club met Saturday and we had a great breakfast provided by our hostess, Sheri, and then made a Valentine Shaker Card and a 3D thinlit Card. I love the word “twitterpated” from Bambi and had to have that stamp set. Here is how I used it:


And here is a Recipe Sheet for you to print if you keep a notebook of ideas:
Valentine Shaker Card Recipe Sheet
Click on any of these products to go to the store:
Built for Free Using: My Stampin Blog
Our second card was a 3D Thinlit Birthday Card featuring the Crazy About You stamp set & Thinlit Bundle:


Recipe Sheet: 3D Thinlit Bday
Built for Free Using: My Stampin Blog
Card Buffet January 2015
The specials this week are very “special”! Did you know you can use your reinkers and Dazzling Diamonds Glimmer Paper to make many different colors of glimmer paper?!
Technique Alert: Colored Glimmer Paper: Drip drops of ink on your glimmer paper and use your Aqua Painter to spread the color evenly. So easy!
Card Buffet Report:
We had a great time with Valentines, A Sympathy card, A St Patrick’s Day card, A Birthday Card and A Thank You Card. Each stamper took home a Treat Box Holder with a bookmark designed by Peggy Tassler and featured on Too Cool Stamping with Angie Leach. Click on the link for directions. Here is my version with our new Stack With Love Designer Series Paper:

Do you see those little bitty hearts on the bookmark? They are from our new Heart Confetti Punch. Before this punch, our smallest heart was the owl punch heart which I used here with red glimmer paper inside the heart with the arrow. There are two different ways to make the window for the nuggets. Angie Leech used the Modern Label punch, lining up the punch with punched sticky notes. After trying that technique (second image) I used the Project Life Framelit so I only had to make one cut (first image).
Supply List
Built for Free Using: My Stampin Blog


Remember the Thank You card from a previous post? Jennifer did a double punch on the paper piercing and used a candy dot to match the stem of the flower. I love seeing the creativity of my stampers.
Have a great day and use hostess code JEJ32FKT to be entered in February’s online drawing. Congratulations to Shanon who won the set of Rhinestones in January’s drawing and December went to Robyn for post comments.
Stamp A Lot,
Karen


