Home » New Year’s

Category Archives: New Year’s

Ninja Turtle Birthday Cards & Gift Card Holder

Hello Stamping Friends,

Would you like to look at December’s Mystery card?

  What happened to January?

Ahh, January!  Snowstorms caused us to cancel club twice but finally we had club on the last day of January. Obviously no days left for a Zoom meeting with a mystery card.

January 4th was my daughter Amber’s birthday and the 9th was Emmitt’s 4th birthday so we celebrated with a Ninja Turtle party!  Paul had to be both grandpa and dad since dad was in Seattle.

.  

Of course, he had to have a Ninja turtle card:

.  

The little dog looks just like Ruger don’t you think?!  I used the ‘Back on Your Feet’ stamp set and the ‘Ready For Christmas’ stamp set and ‘Christmas Staircase’ dies.   I cut the curves with the ‘Polar Bear Dies’ and punched out a balloon.  The number ‘4’ was die cut with the ‘Playful Alphabet’ die.  I hand drew the Ninja mask!

Jaxson’s birthday was just two weeks earlier so he received a Ninja in red – I think that is Michaelangelo and the blue is Donatello.


.     


Then January 7th our fifth grandbaby decided to come early and was born to Stacia and Jonathan. Emma became a big sister!  Josephine Jasmine Whitehead entered the world weighing 5 lbs 13 oz.  She was named after Paul’s mom!  She was born one day before her daddy’s birthday on the 8th!  Very special in so many ways!

. .

And if that wasn’t enough we had sold the motorhome after Christmas and in January Paul found a new truck and camper to make our travels better!  It is an Arctic Fox 811. They sure make them better than the two cab over campers we owned in the past and it is a four season so we can take it to Steamboat to see the family!


Wow, that was quite the month! Now can we see the mystery card?

Mystery Card Challenge #18 printable pdf file- click on the blue


I needed several cards so I changed the front word die cuts to suit the situation:

    .   

I used a Crumb Cake base with a layer of Evening Evergreen, the gorgeous Ever Eden DSP-Designer Series Paper, another layer of Evening Evergreen with a Soft Succulent layer and then the Basic White for the art work.  The middle card has an extra layer of the Ever Eden cotton paper that is very like tissue and made a nice background with a bit of a different texture.  The gold is from our laser cut gold DSP and layered on top of stamped greenery and cut out greenery from the Sparkle of the Season bundle.   Happy New Year and Happy Day are from the Word Wishes dies.  Happy Birthday is the retired Birthday die.

The front is a flap that opens and has a pocket for a gift card.  The greeting is from the ‘Celebrating You’ set in the mini catalog.

Jo Brooks participated and made a birthday card with lots of cool balloons!!

.  

Joy Meadows also made a birthday card with a fun look of flowers and no need for a separate pocket!

Sharon Fincham made the card going vertically.

.  

Don’t you just love those little bugs!!   Thank you ladies for participating!

SAL,  Share A Love

Karen 


Oh So Ombre Starburst Card and Mystery Card #9

Hello Stamping Friends,

Current Hostess Code:  TMARBUUM  Use this code if your order is less than $150.

This month has flown by and February is almost upon us — whoo hoo time for valentines!!

You have valentine cards done?

Well, not for this post, Sal.  This post will highlight the swap cards and the Mystery Card #9.  For those who are new to the blog, each month we have two events- one Facebook Live event on the second Tuesday of each month and one Zoom event on the last Tuesday of each month.  Accordingly, the schedule for February is:

-February 9,  Facebook Live at 9:30 on http://facebook.com/stampalosopher/videos

-February 23, Zoom Mystery Card Event at 9:30 (Request an invite by submitting your email)

My event calendar shows the monthly Paper Pumpkin kit as a Facebook Live for the third Tuesday of the month but since the delivery times are so slow right now I haven’t received my kit in time to have the event.

.  Why don’t you do a YouTube live whenever you get the kit?

That is a possibility!  Especially with the January kit which has some beautiful valentine cards!  Stay tuned!

My swap card for this month is a Happy New Year! card and I used products from all three catalogs!

  1. From the Annual Catalog:  Stitched Stars Dies, Playful Alphabet Dies for the numbers, Word Wishes Dies
  2. From the Mini JJ Catalog:  Pearlescent Specialty Paper
  3. From the Sale A Bration brochure:  Oh So Ombre Paper

Recipe:

Base:  Either – Blackberry Bliss/Rococo Rose/Granny Apple Green/ Bermuda Bay, 8 1/2″X5 1/2″ scored at 4 1/4″

Starburst Base:  Whisper White, 5 1/4″X4″, Mark the center bottom at 2 5/8″ to show the starting point of your strips

Starburst Strips:  Oh So Ombre Designer Series Paper (DSP), 1 1/2″ X 6″,  make sure your strips are cut to go vertically light to dark or dark to light.  Cut each strip diagonally. Line the opposite corners in the track of the paper trimmer and cut. You will use 13 cut strips. Make a pile of 6 light to dark pieces and 6 dark to light pieces and use the 13th piece for the middle

Using liquid glue cover your Whisper White base. I used a sponge to spread Tombow so it didn’t have clumps of glue.

Place your 13th diagonal half with the point at the 2 5/8″ mark on your now ‘gluey’ piece of Whisper White. Work from that center piece alternating light and dark points.  Work quickly so you can slide each piece tightly to the previous one before the glue gets hard to work with.

When done, turn the base over and burnish the back to make sure all the glue spreads evenly and the pieces are tight to base.

Now cut all those starburst pieces to the size of the base using the back of the base as a guide.  Scissors work fine because you have the base to guide your cuts.

Note:  The Oh So Ombre paper is 6″X6″ so you have 4 strips on each sheet.  Each strip is cut diagonally making 8 strips per sheet of DSP so you need two sheets to make 13 strips.  Do not cut the last 1 1/2″ strip diagonally – cut it in half horizontally to give you a nice 3/4″ strip for the inside of your card.  You will have one starburst strip left over.

Star Top, Numbers and Scrolly at the bottom:  Pearlescent Specialty Paper, 4 1/2″ X 4″.  Use the double back adhesive paper just slightly less than that size and adhere it to the Specialty Paper, Die Cut your images, remove the five stars for the inside,  and then place the die cut images on a piece of scrap cardstock and run them back through the Cut and Emboss machine to flatten the little dots that show up in the cuts and to adhere the images tightly to the adhesive sheet.   Use a hat pin to remove the adhesive sheet backing from your die cut images by sticking it through the adhesive baking in the middle of a wide part.  The stars and the scrolly are from the Stitched Stars Dies, the numbers are from the Playful Alphabet Dies; both are in the Annual Catalog.  The Pearlescent paper is in the Mini JJ catalog.

Inside Happy New Year:   Oh So Ombre Designer Series Paper,  1 1/4″ X 6″, Apply double back adhesive sheet to the back and then cut using Word Wishes Dies, trim off the ‘s’ on ‘years’ since you are not using the ‘day’ die.  The stars are from the star cut out we made for the top.  The Oh So Ombre paper doesn’t show the little dots from the die like the pearlescent paper so I didn’t need to run it back through the machine to flatten but you do need to burnish the pieces well to adhere them to the cardstock.

.  What does ‘burnish’ mean?

Good question, Sal.  I do use that term often.  It is a technical way of saying ‘rub’.  Sometimes we use our fingers and sometimes we use the bone folder.  Most often the term is used when we score a piece of cardstock and want the fold on the score line to be nice and crisp and lay down flat.

Let’s look at this month’s Mystery Card, shall we?

Mystery Card Challenge #9.pdf

Base:  Granny Apple Green

I used the Sale-A-Bration Flower & Field Designer Series Paper which is free with a $50 purchase.

I punched and layered two large daisies in Whisper White, one small daisy in Pool Party and one in Whisper White.  Both the small and large punch are in the Annual Catalog.

The bee is from the Dandy Garden DSP in the Mini JJ Catalog, die cut with the Dandy Wishes Die.

The ribbon is the Ornate Garden Ribbon Combo Pack in the Annual Catalog (AC).

The jewel on the little heart is the “Flowers For Every Season Gem” in the AC.

The greeting is from the Many Messages bundle in the JJ catalog, page 35.  What an awesome set of greetings all cut out at once with the die!

Definitely to ‘die’ for!!!

Great pun, Sal!  Let’s look at the cards the others made.  We sure missed those who couldn’t be with us on the Zoom!

Beautiful cards!  Though the construction was basic, the mystery was in the different designer series paper that each chose!

We have fun, even virtually!  If you are needing supplies I would be honored to be your demonstrator and bring you ‘a pinch of creativity to spice up your crafting world’!

You can order online by clicking little Sal in the computer.

Use host code:  TMARBUUM   if your order is less than $150 or a club order.

I love to hear from you!

Happy New Year!

Hello Stamping Friends,

Today the Stitched Framelits are once again in stock!   ITEM # 145372

Item #145372, 12 framelits for $30!  What a great product!  Order the framelits, add $20 of other products and get a free product from Sale A Bration!  Just saying…..

The new year brings new catalogs.  We have a new Occasions catalog that runs through May 31, 2017 and a new Sale A Bration brochure with free products available to you with each $50 purchase;  February 21 a few surprise products will be added, so buy now and then check it out later for something else that you might love!  Click on either image below for the full catalog pdf.  These catalogs are also in the catalog section of the menu bar at the top of the blog.  Click on the little SAL icon at the top of this post to go to the full blog.  The Holiday carryover product list is also on the catalog tab in the blog if you want to purchase any of those items and then get your free Sale A Bration item.

Occasions Catalog
Jan 4, 2-17 – May 31, 2017
Sale A Bration
Jan 4 – March 31, 2017

Holiday Carryover Products

Three of my stamping club members have agreed to host online Sale A Bration clubs Jan., Feb., Mar.  Lucille is our hostess for January and the hostess code is R7QAJV2P.  I will post the codes for Feb and March as we get within 30 days since the codes are only good that long.

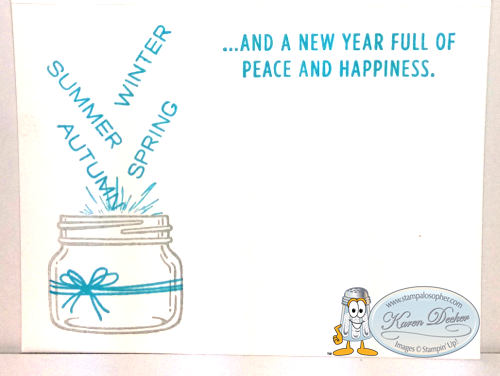
Now for my New Year’s / Thank You cards.  I couldn’t let the season slip silently southward (tee hee) without making sure everyone on my list received a greeting, but we were traveling in December and by 4:00 AM one morning I just had to give it up.  Upon our return, I worked on cards for the New Year and decided the design would work just as well for Thank You cards with just a little tweaking.

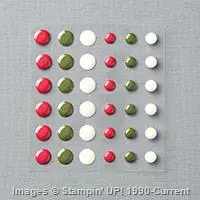
I started simple with standard layers, Whisper White and Tempting Turquoise, Dazzling Diamonds and a few rhinestones:

Enter Sheri, my beloved stamping friend, and she suggested we experiment with embossing a so we tried the layers of Whisper White and Night of Navy that were so stunning with the Christmas Joy card (see my last post for measurements) and why not mix several embossing powder colors to make a really cool firework display.  She looked a bit like a mad scientist as we got out several colors of embossing powder and began stirring them together.  I think we combined the new green glitter and red glitter powders with yellow, copper and iridescent ice:

We added lots of color with the stamps and embellishments and embossed the year in copper.  This was Paul’s favorite card!  It was a bit too colored for my monochromatic tastes so we embossed with just copper embossing powder, (Pretend you are seeing brilliant Whisper White not the phone’s pink interpretation)…

That wasn’t what I hoped for either so we tried a combination of embossing and stamping in Night of Navy.  Bingo…. loved it..

A little piece of copper metallic thread is tied around the Night of Navy Seam Binding ribbon and a glue dot placed underneath the left side to hold the bows out to the side. The inside:

(I tried a contrast button to make the image whiter which didn’t work very well.  Sigh…..)  Now a problem arose, I didn’t have enough Night of Navy cardstock to make the number of cards I needed so I went back to turquoise with a Basic Gray layer…..

I used gray bakers twine I had left over from a Paper Pumpkin but there was not enough so I took Whisper White Bakers Twine and cut a length for each card I planned on making and then soaked the twine in a mixture of Tempting Turquoise Ink Refill and water.  I hung the twine piece by piece on a hangar over the sink so any drips wouldn’t stain anything and let it dry overnight.  Bingo again!

For the inside I had two different designs, one for a thank you card and one for a New Years card:

The contrast button makes it look a little whiter but not how it looks in real life.  For the inside of the thank you:

And that my stamping friends is what happens as you design a card!  Which is your favorite?

Stamp sets used:  Jar of Love, Wonderful Year, Project Life Day to Day, Greenhouse Garden for the fireworks, Perfectly Preserved thank you, and Another Thank You stamp sets.

I am off to Amazon to find a light box.  Watch for the next post on using the new watercolor pencils!

SAL,  Shy Away Lengthy resolutions

Karen

Online Store


Happy New Year!

Happy New Year Stamping Friends,

May your year be blessed with health, prosperity and Stamping time!

The Holiday catalog is only good through January 4th so hurry if you have a few other products you wanted.

Use the hostess code KDREJS4A with your online order placed no later than the 4th and the orders will be combined so that I can order the Six Sayings hostess set that you will see on today’s cards.  It is a must have set.  I will draw from everyone ordering to select who gets the hostess set. One entry for each $25 order!   The inside of my New Year’s card uses the Six Sayings hostess set and Perfect Plum ink.  Once again (previously used at Thanksgiving)  I have combined two of the stamps from the stamp set to make the greeting I wanted.

Happy New Year

The snowflakes from ‘Flurry of Wishes’ were used for accents and stamped with Wisteria Wonder.

For the front of the card you will think I am very cheesy or very brilliant but we are not going to take a vote!

IMG_0450

Yes, it is a box card but it was soooo perfect for the greeting I wanted to use to reflect going from 2015 to 2016 and it had a snowy scene to tie in with the blessings falling like snowflakes!

Now for a Thank You card, once again using the Six Sayings hostess stamp set and positioning the designer series paper to the left instead of centered for a unique look.

Thankful

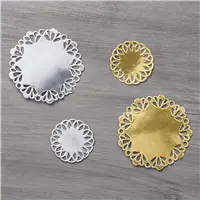
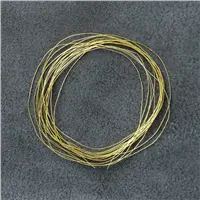
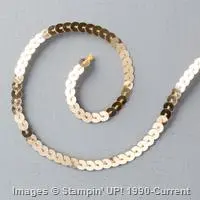
On the inside I wanted the word “Very”.  Our current ‘Reason For The Season’ set has the word ‘very’ but I didn’t have that set so I used the retired Very Merry Tags set.  I stamped it on Very Vanilla,  colored in the bottom half which had the word ‘merry’ with an Always Artichoke marker, punched it out with the 7/8 ” scalloped circle punch and then embellished the tag with gold metallic thread and a gold sequin and popped up the tag with dimensionals on top of the smaller of the gold foil doilies.  It is stunning in real life!!

Thankful Very

Here is the instruction sheet

Thankful-Very PDF Instruction Sheet

And the supplies used:

Supply List

Built for Free Using:My Stampin Blog

Oops, I forgot the scallop circle punch.  It is item # 129404 for $13.00.
Stampin’ up has added new items to the year end sale which also goes through January 4th.  The Rosette Bigz Die is back and on sale!  It was $42.95 in the past catalogs but you can get it now for $25.77.  (And you will have a chance at the hostess set- of course if you place a $150 order you can get any hostess set or other item you would like!)  Click on the image to go to the sale.
Screen Shot 2015-12-10 at 12.15.47 PM
And this week’s sale gives you other options:
Weekly Deals

Supply List

Built for Free Using: My Stampin Blog

It is almost time for the new Occasions catalog and I can’t wait to show you some of its goodies but be sure and get all your Christmas wish list filled before the Holiday catalog expires.  Here is the list of what is retiring.
Screen Shot 2015-11-17 at 12.53.16 PM

US_HolidayRetiringList_ENG

Have a wonderful evening and SAL, Sigh A Loud as you consider all those New Years Resolutions you are going to keep!

Blessings,

KarenOnline Store


Welcome to my blog!

Sal Window to Products

Subscribe to Blog via Email

Enter your email address to subscribe to this blog and receive notifications of new posts by email.

Join 158 other subscribers

Categories